

"Can I use this phone number with GoHighLevel, too?" That's when most Voice AI builders realise they're stuck.
They bought their phone number through Retell AI because it was quick.
No regulatory bundles. No configuration headaches. The number worked almost immediately.
But now:
→ The number lives in Retell's environment, not theirs.
→ They can't route calls to other platforms.
→ They can't access it via API.
→ Migrating means getting a new number entirely.
→ Every client conversation is tied to a number they don't control.
And when you're building for clients? This becomes a nightmare.
One Retell AI account. Every client's number is mixed together.
No isolation. No clean billing. No clean offboarding.
The solution is SIP trunking.
Think of SIP trunking as owning your phone line rather than renting one from someone else.
SIP (Session Initiation Protocol) is how voice calls travel over the Internet. A SIP trunk is the virtual phone line that YOU control.
When you own the trunk, you decide where calls go. Retell AI today. GoHighLevel tomorrow. Both simultaneously if needed.
Your n8n workflows can trigger actions based on call events. Your CRM stays in sync.
Why SIP Trunking matters for Voice AI:
- One number can connect to multiple platforms.
- Full control over call routing, recording, and compliance.
- Proper client isolation through subaccounts.
- You're building on infrastructure you own.
- Clients can be offboarded cleanly without touching other accounts.
SIP Trunking matters even more for non-US phone numbers.
If you need a phone number in the UK, EU, India, Australia, or most regulated markets, you can't just buy it instantly. You need a Regulatory Compliance Bundle.
That means submitting government-issued ID, proof of address, and business registration. Then waiting days (sometimes weeks) for approval.
It doesn't matter where you're based.
Building Voice AI agents for UK clients from the US? You still need an approved bundle for that UK number.
When you buy through Retell AI, they handle this for you. Convenient? Yes.
But that approved bundle sits in THEIR account, not yours.
Now imagine switching platforms or adding GoHighLevel to your stack. You're starting the entire compliance process from scratch.
New number. New bundle. New approval wait. Clients are asking why your number changed.
Own your Twilio account. Own your regulatory bundle. Own your SIP trunk.
The compliance work you do once stays with you forever, regardless of which Voice AI platform you connect to tomorrow.
The real advantage?
You stop being dependent on any single platform's roadmap. If Retell changes its pricing or features tomorrow, your phone infrastructure will remain intact.
You swap the endpoint, not the entire system.
The approval process can take a few days to a couple of weeks. But once approved, the actual configuration takes about an hour, provided you know all the necessary steps beforehand.
I've written a complete walkthrough covering every configuration screen, naming conventions, and the exact settings to enable.
Follow the steps below to use Twilio with Retell AI via SIP Trunking for Voice AI Agents:
#1 Arrange government-issued IDs for verification.
Telecom is a regulated industry, so using Twilio, Retell AI, or any programmable telecom platform often requires completing country-specific compliance steps before you can fully use the service.In many regions (especially the UK, EU, India, and other regulated markets) you must:
- Verify your identity with a government-issued photo ID (passport, driver’s license, voter ID, etc.)
- Provide proof of address and/or business registration (utility bill, tax notice, company certificate, etc.)
- Create and validate a Regulatory Bundle in Twilio to purchase and activate local phone numbers.
- Verify your identity to make outbound calls in Retell AI.
Upgrading from a trial to a paid Twilio account may also require photo ID verification.
Before you start building Voice AI Agents or buying numbers:
- Gather your government-issued ID.
- Have proof of address and/or business registration ready.
- Prepare clear digital scans/photos for upload during onboarding.
Note: Regulatory requirements vary by country, but preparing these documents early will speed up onboarding and help you get to production faster.
#2 Sign up for the Twilio account.
Follow the steps below:#2.1 Navigate to https://www.twilio.com/en-us .
#2.2 Click on the 'Start for Free' button.
#2.3 Sign up with your email address and password or via Google login.
#2.4 You will now be asked to verify your phone number by sending a code via SMS or Voice Call.
#2.5 You may be asked about your use case, company details, or development experience. This helps Twilio personalise your setup.
#2.6 Accept Twilio’s terms and privacy policy and finish creating your account.
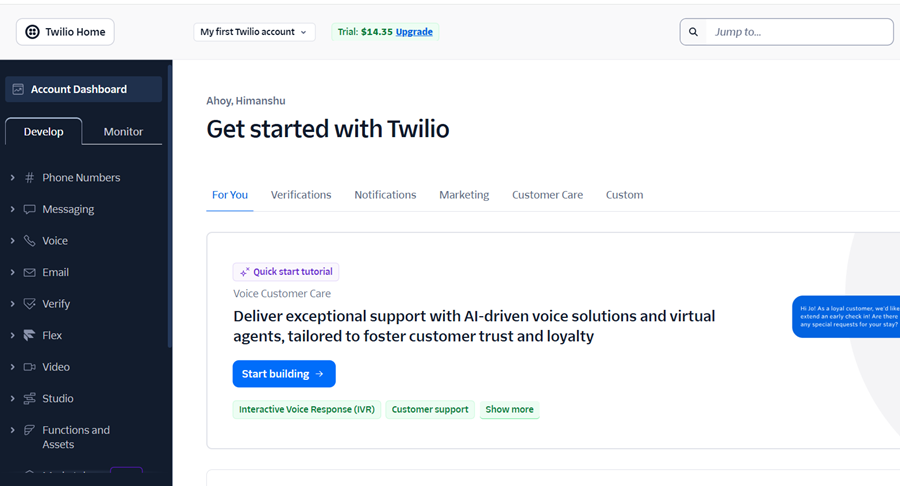
#2.7 Once registered and verified, you will be directed to the Twilio Console dashboard which looks like the one below:
#3 Upgrade your Twilio account.
The following are the key benefits of upgrading your Twilio account:#1 A trial account requires verification of non-Twilio phone numbers before you can call or message them. It means on a Twilio trial (free) account, you can only send messages or make calls to phone numbers that you have manually added and verified as "Verified Caller IDs" within your Twilio Console. This restriction is removed when you upgrade.
#2 You are limited to a single Twilio phone number on trial. With a paid account, you can purchase as many numbers (local, toll-free, mobile, worldwide) as needed.
#3 A paid account is designed for production workloads. It allows for higher API limits and faster support for scaling business needs.
#4 Only paid accounts can create subaccounts (needed for client isolation, clear billing, or multi-project management).
Follow the steps below to upgrade your free Trello account to a paid one:
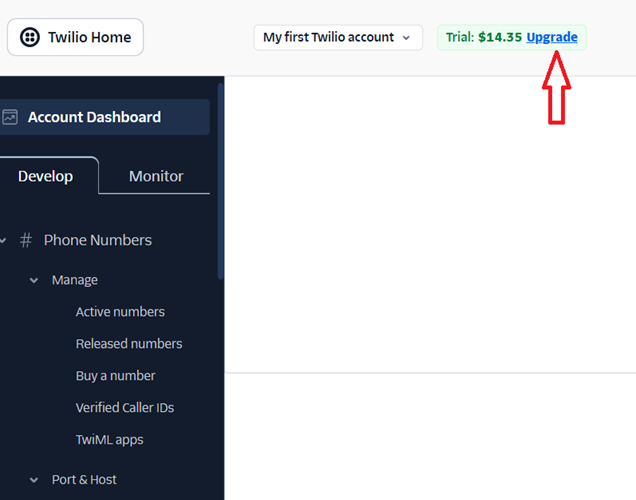
#3.1 Navigate to https://console.twilio.com/
#3.2 Click on the ‘Upgrade’ link in your Twilio account:
#3.3 Follow the on-screen instructions. You would need to take a photo of a government-issued ID (like a driver's license, Passport, Voter ID, etc) to verify your identity.
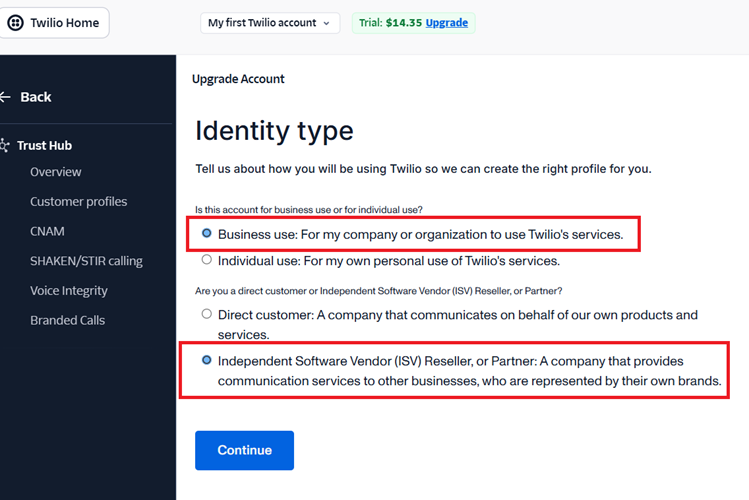
#3.4 Set Identity type to ‘Business use’ and 'Independent Software Vendor (ISV) Reseller, or Partner’:
#3.5 In the next step, provide your business information.
#3.6 Enter your billing information.
#3.7 You will be asked to fund your account. This is usually a minimum first payment (for example, $20).
Note(1): Funding is mandatory. You cannot upgrade without adding a payment method and making an initial deposit.
Note(2): The balance goes into your Twilio account as credits, which you use to pay for calls, texts, numbers, etc. Your balance is used “pay-as-you-go” for Twilio services.
#3.8 Once payment is approved and any required verification is completed, you are upgraded to a full, paid account.
#3.9 Visit the Twilio Payments page to view your payment history or download a printable receipt.
#4 Rename your Twilio account.
Renaming your main Twilio account from the default (e.g., “My first Twilio account”) to something meaningful and unique is a best practice because:
#1 You can instantly recognize your main Twilio account in dashboards, billing statements, and API management UIs especially if you are planning to add subaccounts.
#2 If you manage multiple Twilio accounts (for clients or internal purposes), having clear names helps prevent costly mistakes, like sending live messages from the wrong account or configuring phone numbers in the wrong environment.
#3 The account name often appears in logs, API responses, webhooks, and project documentation. A meaningful name minimizes ambiguity for developers and operations.
Follow the steps below to rename your Twilio account:
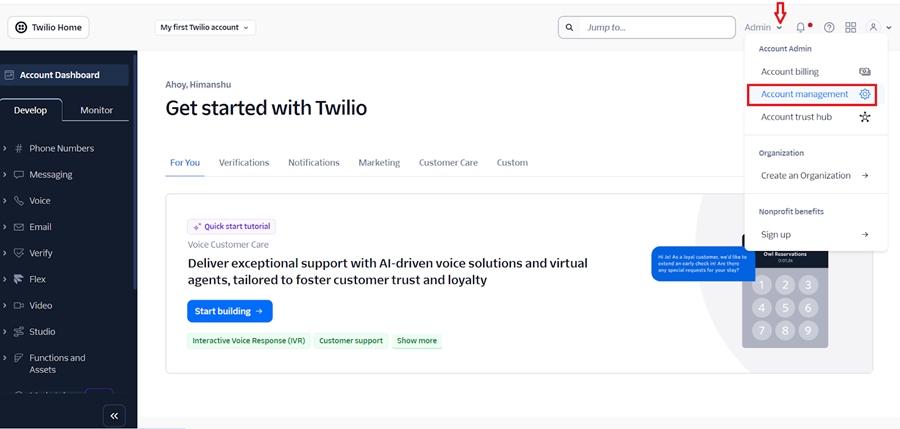
#4.1 Once you have upgraded your Twilio account, navigate to Admin > Account Management:
#4.2 Enter your verification code and then click on the ‘Verify’ button:

You should now see a screen like the one below:
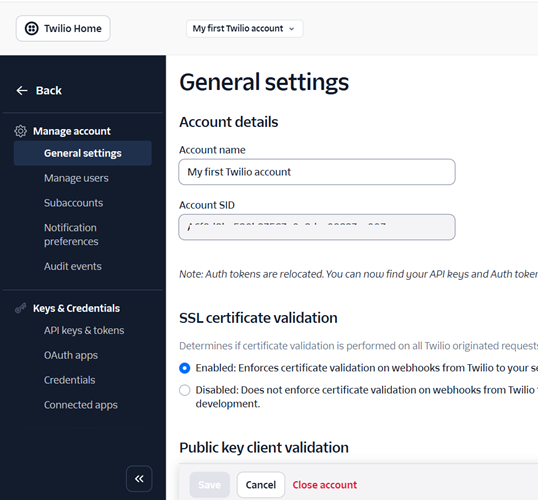
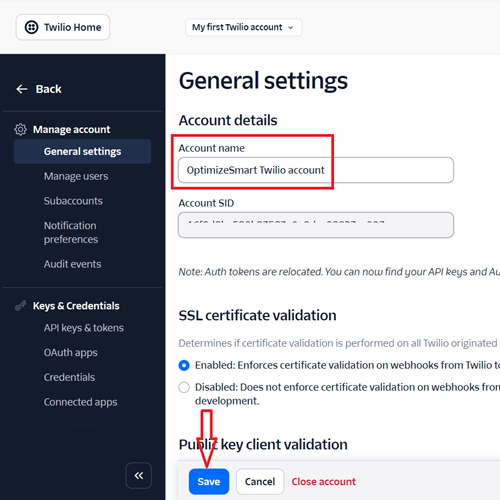
#4.3 Change your account name from ‘My first Twilio account’ to ‘Main Twilio account’ or whatever you prefer and then save your changes:
#5 Understand the importance of programmable phone numbers.
Programmable phone numbers are virtual phone numbers that you can fully control with software, usually through an API.
Unlike a regular phone number that’s tied to a SIM card, handset, or fixed line, a programmable number lives in the cloud and can be configured in real time to send/receive calls and messages, trigger code, and integrate with applications.
With programmable phone numbers, you can:
- Route calls using APIs or custom call-handling logic.
- Trigger webhooks for real-time AI interactions.
- Use SIP trunking to connect with external systems.
Standard phone numbers from traditional carriers (Vodafone, Verizon, Airtel, etc.) are tied directly to their network and devices. They don’t allow you to insert a webhook, SIP endpoint, or third-party platform between the carrier and your phone, which means they can’t provide these advanced capabilities.
AI voice platforms like ‘Retell AI’ cannot connect just any ‘regular’ phone number (like a personal mobile or landline) directly to its AI agents.