

Understand client side tagging before Server Side Tagging.
To really understand server-side Tagging, you first need to understand client-side Tagging.
The Tagging setup that runs in a client-side environment is called client-side Tagging.
The client-side environment represents a web browser which fires Tagging codes or ad pixels to communicate directly with third-party vendors’ servers, most commonly through a tag management solution (like GTM).
That’s why client-side Tagging is also known as browser-based Tagging.
Examples of third-party vendors’ servers: Google Analytics servers, Google Ads servers, Facebook Ads servers etc
Client-side Tagging is the most common setup for data collection.
In the case of client-side Tagging, you fire third-party JavaScript code (also known as pixels) on your website.
When this JavaScript code is executed, it sets up third-party cookies on your users' web browsers.
These third-party cookies send your website users' data directly to third-party vendors’ servers (like Google, Facebook, Linkedin etc.).
So when you set up client-side Tagging for Google Analytics, you run Google Analytics on users’ web browsers.
When you set up client-side Tagging for Google ads, you fire Google Ads tags on users’ web browsers.
Similarly, when you set up client-side Tagging for Facebook ads, you fire Facebook pixels on users’ web browsers.

Limitations of client-side Tagging.
In the case of client-side Tagging, the third-party cookies send your website users' data directly to third-party vendors’ servers (like Google, Facebook, Linkedin etc.).
However, web browsers (like 'Safari') and ad blockers ultimately control the behaviour and fate of these third-party cookies.
For example, they set rules for how cookies can be set, like setting a maximum expiration date of 7 days.
Ad blockers can also control the behaviour of third-party cookies.
They can stop third-party JavaScript code from being executed on a user’s web browser.
And when the JavaScript code is not executed, no third-party cookies are set, and no data is sent to the third-party vendors.
So,
When you use client-side Tagging, it is unreliable as it is at the mercy of your website users and web browsers.
Introduction to server-side Tagging.
The Tagging setup that runs in a server-side environment is called server-side Tagging.
Server-side is commonly referred to as SS.
The server-side environment.
The server-side environment represents a Tagging server which fires Tagging codes or ad pixels to communicate directly with third-party vendors’ servers, most commonly through a tag management solution (like GTM).
That’s why server-side Tagging is also known as server-to-server Tagging.
Examples of server-side environments:
Google Cloud Platform, Amazon Web Service etc.
Note: The servers-side environment is also called a server environment or server endpoint.
How does Server Side Tagging work?
In the case of server-side Tagging, you DO NOT fire third-party JavaScript code (also known as pixels) on your website. You do not set up third-party cookies on your users' web browsers.
You fire Tagging and marketing pixels from your servers instead of on the users’ web browsers.
So when you set up server-side Tagging for Google Analytics, you no longer run Google Analytics on users’ web browsers.
Instead, you run Google Analytics from your web server.
Similarly,
when you set up server-side Tagging for Google ads, you no longer fire Google Ads tags on users’ web browsers.
Instead, you fire Google Ads tags from your web server.
However, there is one exception here.
When you set up server-side Tagging for Facebook ads, you also continue to fire Facebook pixels on users’ web browsers.
This is because Facebook recommends using both client-side and server-side Tagging to get optimum results.
When you switch from the client side to server-side Tagging, you move your Tagging pixels and marketing pixels to the server side.
Examples of Tagging pixels:
Universal Analytics tag, Google Analytics 4 tag, Adobe Analytics tag etc.
Examples of marketing pixels:
Facebook ads pixel, Google Ads pixel, Twitter ads pixel etc.
Why should you switch to Server Side Tagging?
You probably know that the ‘Brave’ web browser blocks both Google Analytics and GTM by default.
An increasing number of users are now using ad blockers that can also block Google Analytics.
Apple Intelligent Tagging Prevention (ITP)
Apple Intelligent Tagging Prevention (ITP) is a privacy feature of Apple's Safari web browser.
This feature is designed to improve the privacy of Safari users by blocking third-party cookies/Tagging that identifies and tracks users across different websites.
To make matters worse, Google also announced a plan to end the support of third-party cookies in the near future.
Web browsers continue to restrict access to more and more users' data.
Progressively stringent privacy regulations and ever-increasing Tagging restrictions from web browsers and ad blockers have made client-side Tagging unreliable.
And it is only going to get worse.
These Tagging restrictions create significant data gaps in conversion paths, making it very difficult to understand customers' purchase journeys and to advertise profitably.
So it is fair to conclude that
Browser-based Tagging and cookies (especially third-party cookies) won’t last long and Server-side Tagging is the future.
API-based conversion Tagging.
One of the biggest advantages of using server-side Tagging is that you can implement API-based conversion Tagging, which can track conversions much more accurately than traditional browser-based conversion Tagging.
Examples of API-based conversion Tagging:
Google Ads Conversion API, Facebook Ads Conversion API etc.
API-based conversion Tagging is less impacted by browser-based Tagging restrictions and ad blockers than traditional browser-based conversion Tagging.
So when you use API-based conversion Tagging, you can feed your ad pixels with more conversion data.
This, in turn, can help improve the performance of your marketing campaigns.
Facebook recommends using the Conversion API (CAPI) along with your Facebook pixel.
"The Conversions API helps improve performance by sending data you already share with your pixel through an API connection, which is less impacted by ad blockers and browser connectivity issues. You can see how people interact with your business in ways the pixel alone can't measure, like when purchases are initiated online but completed in a physical store." - Facebook
You can mitigate some of the -ve effects of Apple IOS 14.5+ updates on Facebook ads by using CAPI.
However, you can not use CAPI without server-side Tagging.
Facebook prioritises the Conversion API over the Facebook Pixel.
Facebook prioritises the Conversion API over the Facebook Pixel.
This means server-based events are prioritised to feed your Facebook ad pixel, and browser-based events are used only when no corresponding server-based events are available.
If you want to run profitable advertising for the foreseeable future, you have to switch to server-side Tagging. There is no other alternative.
Moving from third-party to first-party data collection.
To understand the concept of first-party and third-party data collection, you would first need to understand the concept of first-party and third-party cookies.
What are first-party cookies?
First-party cookies are cookies issued by the website you are visiting, and only that website can read them.
What is first-party data?
The data collected by first-party cookies is called the 'first-party data'.
If your website collects users' data without using cookies (maybe via measurement protocol or server-side Tagging), then that data is also called the 'first-party data'.
What are third-party cookies?
Third-Party Cookies are the cookies issued by the website(s) other than the website being visited.
For example, cookies issued by Facebook or Google Ads on your users’ web browsers are third-party cookies.
What is third-party data?
The data collected by the third-party cookies is called the 'third party data'.
The data collected by the third-party vendors is also called the 'third party data'.
One of the biggest advantages of using server-side Tagging is that you can collect third-party data in the first-party context.
You can use third-party cookies in the first-party context when using server-side Tagging.
You can deploy all of your Tagging setups in the 1st-party context.
For example,
Instead of sending your users' data directly to the Facebook Ads server via Facebook pixel on your website, you can send the same data to your Tagging server.
Your Tagging server would process the data and then send the data to the Facebook ad server.
Thus, you can circumvent Tagging restrictions on third-party cookies/Tagging, like:
- Extending the cookie expiration period from 7 days to 30 days.
- Sending users' data to third parties vendors without using third-party cookies.
Key advantages of Server Side Tagging.
The following are the key advantages of server-side Tagging:
#1 You can implement API-based conversion Tagging, which can track conversions much more accurately than traditional browser-based conversion Tagging.
#2 You can collect third-party data in the first-party context.
#3 Unlike client-side Tagging, web browsers or ad blockers cannot block server-side Tagging.
#4 Through server-side Tagging, you can fill the data gaps on your conversion paths created by client-side Tagging.
#5 When you use server-side Tagging, you have more control over the data that you send to third-party vendors (like Google and Facebook).
#6 Because you don't fire marketing and analytics tags from users' web browsers, server-side Tagging can help improve your website speed.
Client-Side vs Server-Side GTM Container.
Client-side tagging means running a GTM container in a client-side environment.
The GTM container that runs in a client-side environment is called the ‘client-side GTM container’ (also known as GTM web container).
You set up server-side Tagging via server-side tagging.
The GTM container that runs in a server-side environment is called the ‘server-side GTM container’ (also known as GTM SS container or SS container).
There are multiple ways to send data from your website to your GTM SS container:
- Using your existing GTM web container
- Gtag.js JavaScript framework (if you cannot use GTM container).
- Using measurement protocol.
Introduction to GTM Container.
GTM container is a piece of JavaScript code which is designed to hold one or more marketing and analytics tags and their corresponding triggers and variables. That’s why it is known as a container.
Examples of marketing tags:
Google Ads Conversion Tagging code, Facebook Pixel code, LinkedIn pixel, etc.
Examples of analytics tags:
GA4 Tracking code, Adobe Analytics Tracking code etc.
Three primary functions of the GTM container:
#1 Hold tags and their corresponding triggers and variables at one central location.
#2 Deploy various marketing and analytics tags on a website and/or mobile app.
#3 Route (i.e. send) data from one data source to another.
In addition to holding tags, triggers, and variables, the GTM container is used to deploy marketing and analytics tags on a website and/or mobile app.
Instead of hardcoding several tags on a website, one tag (called the GTM container) is hard-coded on every web page, which is used to deploy and manage other tags on the website.
This makes tag management efficient. This is the advantage of using GTM.
Note: The container tag can not track any users’ interactions (pageviews, events, transactions etc.) and website usage data on its own.
In other words, the container tag is not an analytics tag. But it can be used to deploy the analytics tag.
The GTM container is often used to route (i.e. send) from one data source to another.
For example,
If you want to send analytics data from your website to Google Analytics Server, you can do that via GTM container.
Similarly,
If you want to send marketing data from your website to Facebook ads Server, you can do that via the GTM container.
In GTM, we create integration with each data source via ETL (extract, transform, load).
ETL functions and Server Side Tagging.
ETL is a process used to send data from one data source to another.
A data source can be:
- Website
- Data warehouse (like ‘BigQuery’)
- CRM
- Shopping cart
- Smartphone
- Tablet PC
- Digital appliances (washing machine, coffee machine, slot machine)
- Point of purchase system or
- Any device/system which can be connected to the internet.
When you use a tag management solution like ‘GTM’ to route data from one data source to another (like from your website to Google Analytics Server), you knowingly or unknowingly carry out ETL.
Your GTM container acts as a hub between the originating data source and the destination data source:

The data source from which you extract the data is called the originating data source.
The data source you send data to is called the destination data source.
For example,
If you send analytics data from your website to Google Analytics Server via GTM, then your website is the originating data source, and the Google Analytics server is the destination data source.
Note: You can also send data:
- From one originating data source to several destination data sources, or
- From several originating data sources to one destination data source, or
- From several originating data sources to several destination data sources.
ETL is made up of the following three functions:
- The extract function is used to extract data from the originating data source.
- The transform function is used to transform the data into the format your destination data source can understand.
- The load function is used to send the transformed data to the destination data source.
Example of ETL functions.
Let’s suppose you have a Tagging requirement to send ecommerce data from your website to Google Analytics via GTM.
To accomplish this task, you typically first extract the ecommerce data from the data layers (that are hardcoded on your website) via GTM.
Then you transform the ecommerce data into a format which Google Analytics can understand. This is done via GTM tag templates.
Finally, you send the transformed ecommerce data to the Google Analytics server.
The process of extracting the ecommerce data from the data layers represents the extract function.
The process of transforming the ecommerce data into the format which Google Analytics can understand represents the transform function.
And finally,
The process of sending the transformed ecommerce data to the Google Analytics server represents the load function.
When you use a GTM container to send data from one data source to another, you knowingly or unknowingly carry out one or more ETL functions.
In server-side Tagging, ETL functions are executed in the server environment.
You track and send users' data from one or more originating data sources to your GTM SS container.
The originating data source can be:
- Website
- Data warehouse (like ‘BigQuery’)
- CRM
- Ad platform (like ‘Facebook Ad Manager’)
- Shopping cart
- Smartphone
- Tablet PC
- Digital appliances (washing machine, coffee machine, slot machine)
- Point of purchase system or
- Any device/system which can be connected to the internet.
You can send data from originating data source(s) to your GTM SS container via:
- GTM web container.
- Gtag.js JavaScript framework (if you cannot use GTM web container).
- Measurement protocol.
The SS container then processes and transforms the users' data in a format that third-party vendors (like Google and Facebook) can understand.
Once the data is transformed, it is sent to the destination data source(s).
The destination data source can be:
- Website
- Data warehouse (like ‘BigQuery’)
- CRM
- Ad platform (like ‘Facebook Ad Manager’)
- Shopping cart
- Smartphone
- Tablet PC
- Digital appliances (washing machine, coffee machine, slot machine)
- Point of purchase system or
- Any device/system which can be connected to the internet.
So,
In the case of SS Tagging, we send data from originating data source(s) to the destination data source(s).
Use your servers or rent servers for Server Side Tagging?
You can either use your own virtual servers or rent servers from a third party to install server-side Tagging setups.
It is dedicated web hostingand shared web hosting.
I recommend that you set up and use your own servers for server-side Tagging.
Pros of using your own servers for Server Side Tagging.
#1 The advantage of using your own servers is that you exclusively own your data and no one else.
#2 You can easily process data according to your privacy policy.
#3 You can carry out endless customization to server-side Tagging setups as you own both the data and the servers.
#4 If you run a high-traffic website (more than 100k visits a month), using your own servers would cost you much less than renting server space from a third party.
#5 Since you have full access to your servers, you have full control over all outgoing HTTP traffic from your server endpoint and logging. This level of control can greatly benefit you in optimizing your SS Tagging cost.
Cons of using your own servers for Server Side Tagging.
#1 To set up server-side Tagging, Google recommends that you run at least 3 instances of App Engine on your Google Cloud Platform. So you would need to set up and maintain these three virtual servers.
#2 Setting up and maintaining server-side Tagging can become very technical, very fast. You would need either an in-house dedicated resource (like a developer) or an external service provider for ongoing maintenance.
The cost of Server Side Tagging when using your own servers.
To set up server-side Tagging, Google recommends that you run at least 3 instances of App Engine on your Google Cloud Platform.
You would need to set up three virtual servers.
The cost per server instance is around US $40 per month.
3 server instances will cost you around $120 per month or $1440 per year.
This is the money you pay to Google.
And here is the bummer.
This is just the computation cost and the bare minimum you can expect to spend each month.
The actual cost depends on network egress (all outgoing HTTP traffic from your server endpoint) and logging.
And this assumes your website traffic does not increase over time.
Because the more traffic your websites get, the more third-party tags you send data to, the more you will pay.
When using server-side Tagging, you must be careful not to collect unnecessary data.
Should I install and manage my own servers or outsource the server setup?
When you outsource your server-side Tagging setup to someone who has done it before (like us), they can optimize your set-up for the “cost” by reducing computation, network egress and logging as much as possible.
So you pay as little as possible to Google each month.
When you try to do it yourself, even when you succeed, you will pay unnecessarily more to Google each month for the foreseeable future.
Whatever money you think you are saving in the short term by doing DIY, you will be giving away 3-4X more to Google.
In the end, you won’t save any money but will spend much more.
Pros of renting server space from a third party.
Instead of setting up and maintaining your own virtual servers, you can also rent the server space from a third party for server-side Tagging.
The following are the pros of renting server space from a third party:
#1 You can start immediately as the third party will create and maintain servers and integrations on your behalf, so you don’t need to worry about any technicality involved in setups.
#2 If you run a low-traffic website (less than 30k visits a month), renting server space could be cheaper than running your own virtual servers.
Cons of renting server space from a third party.
The following are the cons of renting server space from a third party:
#1 Expect to pay hundreds or thousands of dollars a month.
If you run a high-traffic website (more than 100k visits a month), renting server space could easily become much more expensive than running your own servers.
Expect to pay your solution provider hundreds or thousands of dollars a month.
#2 Since you rent server space, you do not exclusively own your data.
#3 You can not easily process data according to your privacy policy.
In fact, you have very little control over data processing as you do not own the servers. This could become a big bottleneck in GDPR compliance.
#4 Expect customisation restrictions.
You can not carry out endless customization to server-side Tagging setups as you don't own the data or the servers.
The level of customization you are allowed to carry out depends upon the team's technical expertise used by the third party.
#5 You have little control if anything goes wrong.
If anything goes wrong with the server-side Tagging setup (which often does), there is nothing much you can do.
This is because you do not have server access. You will need to submit a support ticket and then wait for the issue to be fixed.
In the meantime, you would have no choice but to continue to collect flawed or incomplete data.
It is not really an ideal setup for big mature businesses which process thousands of transactions a day.
If you run an e-commerce website and you are really serious about your business, run your own servers. Your future self will thank you for that.
Companies that let you rent their server space.
The following companies let you rent their server space:
- https://www.customerlabs.com/customer-data-platform/
- https://stape.io/
- https://anytrack.io/
- https://redtrack.io/
- https://www.getelevar.com/
Cost of Server Side Tagging when renting server space from a third party.
The cost of server-side Tagging when renting server space depends upon the following factors:
#1 Number of server-based events tracked each month
The cost of your server-side Tagging depends greatly on the number of server-based events (also known as requests) tracked each month for your website and/or other originating data sources.
An event is a user interaction. It could be a pageview, button click, download, link click etc.
The more traffic your website receives, the more server-based events you will track and the higher the cost.
#2 Number of originating data sources your Tagging setup requires.
The data source from which you extract the data is called the originating data source.
The more originating data sources you would use, the more you will pay.
#3 Number of destination data sources your Tagging setup requires (API integrations).
The data source you send data to is called the destination data source.
The more destination data sources you use, the more you will pay.
#4 Number of cloud servers you rent.
The more servers you rent, the more you will pay each month.
#5 Number of services you want to use.
These services could be:
- Tag error monitoring.
- Conversion monitoring.
- Real-time reporting.
- Data retention.
- Rule-based automation.
- Alerts.
- Level of support etc.
The more services you use, the more you will pay each month.
Is renting server space for Server Side tagging really worth it?
There are three types of costs associated with GTM server-side (SS) tagging setup:
- One-time setup fees (often starting from US $980).
- Ongoing monthly fees that you pay to hosting providers like Stape and Google for using their servers. (often starting from US $20/month).
- Maintenance fees. (the hourly rates of the service provider you use).
The ongoing monthly fee you pay to hosting providers for using their servers depend upon the number of events being processed in the last month.
So, when you send more events to the tagging server, you pay more, and when you send fewer, you pay less.
In other words, as website traffic increases, so will the cost of using SS tagging.
You can either use your own virtual servers or rent servers from a third party to install server-side tagging setups.
It is like deciding between dedicated and shared web hosting.
I recommend setting up and using your own virtual servers on Google Cloud Platform for server-side tagging.
But there are many businesses that rent servers from third parties to install server-side Tagging setups simply because it is cheap.
If you are using third-party server-side tagging for GA4, Google Ads, Meta etc where you pay a small monthly subscription fees (usually below $100/month), you have probably noticed how “affordable” it seems compared to running your own servers on Google Cloud Platform.

But, like most things that seem too good to be true, there is a catch.
Actually, there are 11 catches.
- Limited Data Ownership and Control.
- Privacy and Security Risks.
- GDPR and CCPA Compliance Issues.
- Dependency on Vendor Server Infrastructure.
- Limited Customization.
- Data Delays (Latency).
- Vendor Lock-In.
- Limited Transparency and Control When It Comes to Data Processing.
- Risk of Service Discontinuation.
- Hidden Costs Over Time.
- Troubleshooting could become a nightmare.
#1 Limited Data Ownership and Control.
You lose direct and full control of your data when you use a third-party service provider.
They process and sometimes modify your data before it reaches GA4. You have no idea how the data is processed/modified.
Risk: You no longer have 100% visibility or control of your data collection.
#2 Privacy and Security Risks.
This is a big one, esp. if you are EU-based.
Your users’ data flows through third-party servers before reaching GA4. Your user data could be exposed if that provider has a security breach.
Risk: GDPR and CCPA hold you responsible for leaks, not the vendor.
#3 GDPR and CCPA Compliance Issues.
GDPR and CCPA require you to know where user data is going, how it is processed, and who has access to it.
But with third-party tools, you introduce a middleman into your data flow, making it much harder to track and prove compliance.
Risk: Without proper compliance, you risk GDPR and CCPA penalties.
#4 Dependency on Vendor Server Infrastructure.
If the vendor’s system goes down for whatever reason, your Tagging goes down too. And the worst part is you can’t do anything about it except hope and wait that it get fixed.
Risk: Imagine losing Tagging data during Black Friday or a big campaign.
#5 Limited Customisation.
This is one of the biggest limitations.
Third-party setups are “plug-and-play,” but they offer little to no flexibility. You can submit a support request and hope they might execute it.
You might find yourself working around the tool’s limitations rather than having the tool work for you.
Risk: Unique Tagging setups may not be possible.
#6 Data Delays (Latency).
When you use a third party, you have little to no control over their server infrastructure.
So, you can not manage and optimise data delays with the same level of control when using your own servers.
Risk: Real-time Tagging is delayed, which affects data collection and decision-making.
#7 Vendor Lock-In.
Once you are fully integrated with a third-party system, switching is hard. Tagging setups, APIs, and platform dependencies create exit barriers.
Impact: Migration means a complete implementation, and you may lose valuable Tagging history.
#8 Limited Transparency and Control When It Comes to Data Processing.
With a third-party vendor, you can’t see how data is processed, whether it’s transformed, or if failures occur.
Impact: You don’t know if your data is being modified or misclassified before it hits your GA4 property.
#9 Risk of Service Discontinuation.
This is a big one. If the third-party provider shuts down, considerably increases its pricing, or discontinues service, you are f*cked.
Impact: You face a forced migration to another provider, and your data collection could be severely disrupted.
#10 Hidden Costs Over Time.
Third-party services often start cheap but charge per usage (e.g., API calls or event counts). Costs can rise considerably as traffic grows.
Impact: What starts as a “cheap” option can become 10x more expensive as your data volume increases. You could end up paying a lot more than using your own servers.
#11 Troubleshooting could become a nightmare.
When something breaks, is it GA4? The third-party tool? Your CMS? Who knows?
Impact: Troubleshooting could become a nightmare because multiple systems are in play.
Remember, today’s “cheap” option might become an expensive trap tomorrow due to a lack of control over data processing, vendor lock-in, and privacy compliance. Your call.
Securing budget for the server-side (SS) Tagging setup.
After hearing my argument, your company will magically have the ‘budget’ for the server-side (SS) Tagging setup.
When your website does not use SS Tagging, your paid ad campaigns tend to underperform because of inadequate conversion data.
Your ad pixel needs a lot of conversion data to find the audience that is most likely to convert.
According to sources like Statista, around 25-40% of internet users use ad blockers globally.
In the U.S., around 26-37% penetration is often cited on desktops, per eMarketer and AudienceProject data.
Ad-blockers don’t just block ads; they often block trackers (like GA4), too.
Studies show that ad blockers can reduce reported conversions by 20-30%.
You can skip the SS Tagging setup now and might save $X upfront.
But that same amount could be wasted over time on poorly optimized ad campaigns due to underreported conversions caused by ad-blockers.
In the end, you are not saving any money. It is simply being redirected to underperforming ad campaigns.
You just can’t see it, which is why it doesn’t feel like a waste. But the monetary loss is real.
So whether you have a budget is immaterial; you will either spend on the server-side tagging setup or on ads that don’t deliver, with losses compounding multiple times due to inaccurate data.
Delaying this only magnifies the opportunity cost.
Your money will be spent regardless, either proactively or wastefully.
For companies running paid ads, SS Tagging is not something nice to have but a mandatory requirement.
Full migration or partial migration for Server Side Tagging?
Full migration means moving all of your browser-based Tagging events to a server-side environment.
Pros of full migration.
#1 You get the most accurate Tagging setup possible when you move all of your Taggings to the server side.
Cons of full migration.
#1 Your server-side Tagging cost will be highest once you fully migrate all your tags to the server environment, as you will be Tagging the most server-based events.
#2 You may need a full-time dedicated resource to manage and monitor your server Tagging. This will increase your overall Tagging cost.
#3 Not all third-party vendors support server-side Tagging. Your website Tagging could be severely restricted once you fully migrate all tags to the server environment.
#4 For most third-party vendors, we do not know what browser data they rely on for retargeting or Tagging your website users.
So if you move all your browser-based Taggings to the server side, you would need to jump through many technical hoops to achieveYour website Tagging could be severely restricted once you fully migrate all your desired functionality.
Partial migration means moving only certain browser-based Tagging events to a server-side environment.
Pros of partial migration.
#1 Partial migration will keep your server-side Tagging cost under control as you will track relatively fewer server-based events.
#2 You get the best of both worlds (client-side Tagging and server-side Tagging) when you deploy partial migration. Not all third-party vendors support server-side Tagging. In that case, you can use browser-based Tagging. So your website Tagging will not be restricted.
#3 Most companies deploy partial migration. They mainly use server-side Tagging to implement API-based conversion Tagging and browser-based Tagging for the rest of the website Tagging.
Cons of partial migration.
#1 Duplicated conversion data.
When you are deploying partial migration, it is critical that you do not track the same conversion event twice. Once via browser and once via server.
Some data platforms, like Facebook, provide very clear instructions on using browser-based Tagging in parallel with server-side Tagging to avoid duplicating conversion events.
Others, like Google Analytics, do not provide such instructions.
Server-Side Tagging and GDPR.
As far as I know, no legal case can be made against using server-side Tagging. It is not illegal or against GDPR.
However,
Using server-side Tagging does not give you the liberty of following the GDPR guidelines any less strictly.
You must still comply with GDPR and collect data in accordance with your privacy policy.
The server-side Tagging helps get back the GDPR compliant data that ad blockers and web browsers are blocking.
It is not against GDPR to retrieve GDPR-compliant data from ad blockers and web browsers.
GDPR compliant data does not include personally identifiable information (like name, email address, phone number etc.).
GDPR compliant data should not be used to identify your users or their activities on a personal level. It should be anonymous and aggregated.
FAQ: Do I still need to display a cookie consent pop-up if I use server-side Tagging?
When you use server-side Tagging, you don’t need to set up any third-party cookies on users’ hard disks.
You also don’t need to store information on a user’s device or gain access to information on a user’s device.
For setting up first-party cookies, there is already a good case for ‘legitimate business interest’ in using cookies.
Because of these reasons, you most likely won’t need to show a cookie consent pop-up.
But you should still consult your data controller/processor to be completely sure, as your situation might be different, esp. if you are based in the EU.
You may still need to display some consent popup if you are Tagging something for which you need explicit prior consent according to GDPR and/or your privacy policy.
So while the ‘cookie’ consent popup is out, the consent popup is still likely to remain unless you decide not to disclose it.
Note: Most cookie consent pop-up solutions do not automatically integrate with server-side GTM containers.
How can you determine whether a website uses GTM Server Side (SS) tagging?
You can use the Google Developer Console and AI tools like Claude to determine whether a website uses GTM SS tagging.
For more details, check out this article: How to detect GTM Server Side Tagging.
Overview of GA4 Server Side Tagging Setup via GTM.
Following is the 10000-foot view of the steps involved in setting up the server-side Tagging for Google Analytics 4 via GTM:
- Install Google Tag Manager on your website.
- Install GA4 on your website via Google Tag Manager.
- Create a Google Cloud Platform account with billing enabled.
- Create a server-side GTM container.
- Set up your tagging server.
- Setup custom domain in Google Cloud.
- Configure your server container to use the custom domain.
- Connect GA4 configuration tag to server container.
- Upgrade from testing to production server.
- Optimize Cost.
Phase-1: Install Google Tag Manager on your website.
We would use Google Tag Manager (GTM) for setting up server-side Tagging.
For the server-side Tagging to work, we would use both the web container and the server container.
If GTM is already installed on your website, skip this phase and move to Phase-2.
Phase-2: Install GA4 on your website via GTM.
The GA4 configuration tag that you currently use for your GA4 Tagging sends data to the Google endpoint (https://www.google-analytics.com/g/collect), aka the Google server.
Later on, we would edit this tag so that it sends data to your server endpoint, aka your tagging server.
That’s why we need a GA4 configuration tag for our server-side Tagging setup.
If you already have GA4 installed on your website, skip this phase and move to Phase-3.
Phase-3: Create a Google Cloud Platform account with billing enabled.
If you already have a Google Cloud Platform account with billing enabled, skip this phase and move to phase-4.
Phase-4: Create a Server Side GTM container.
Follow the steps below to create a new server-side GTM container:
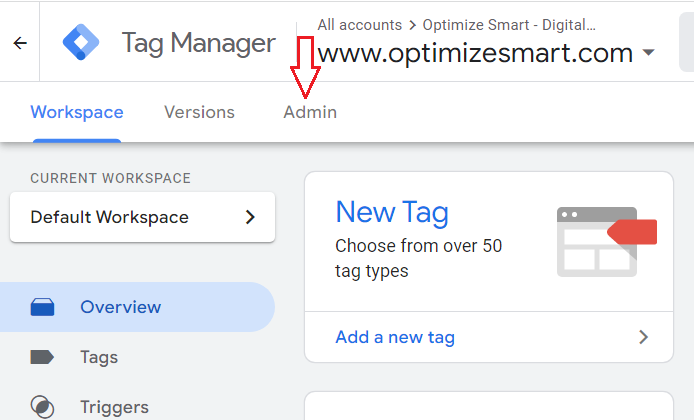
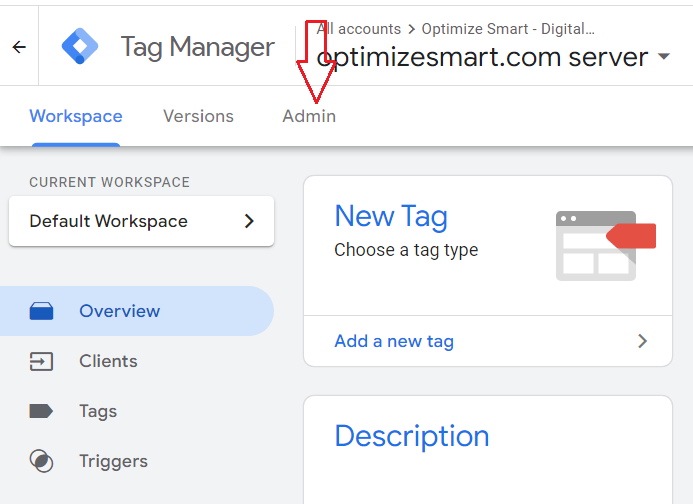
Step-1: Navigate to your Google Tag Manager account and click on the ‘Admin’ button:
Step-2: Click on the ‘+’ button to create a new GTM container:

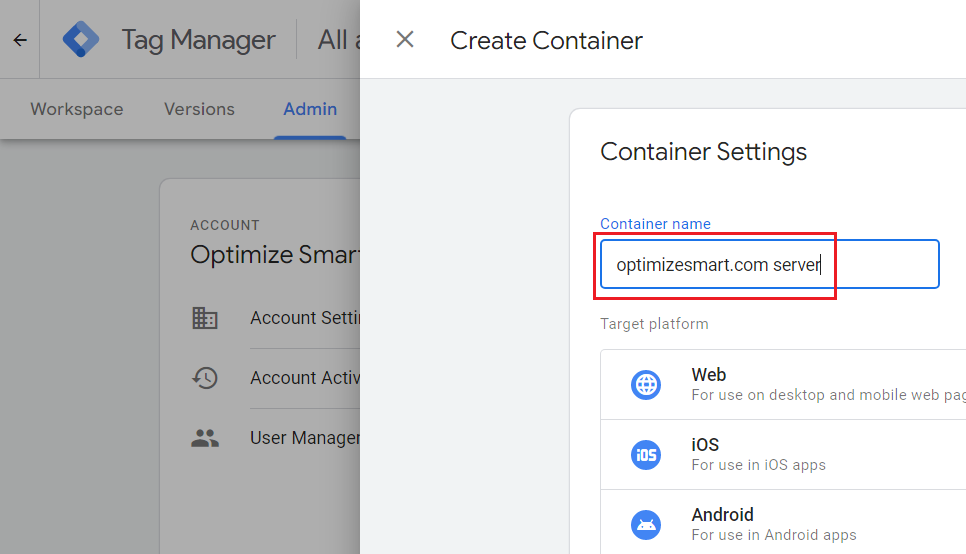
Step-3: Give your container a descriptive name:
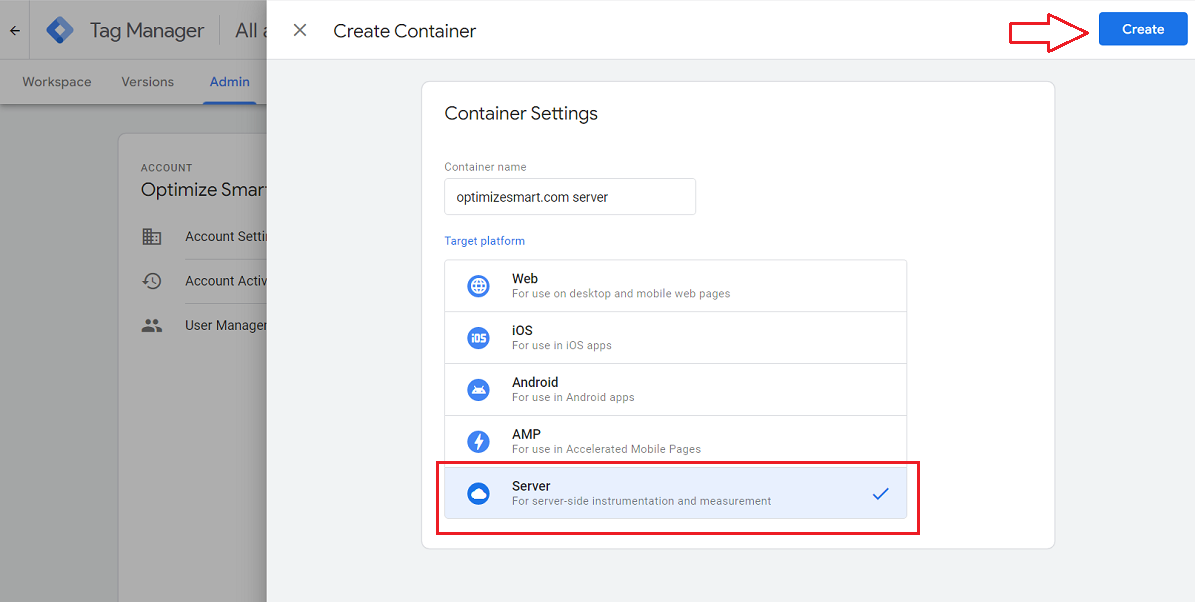
Step-4: Click on ‘Server’ under ‘Target Platform’ and then click on the ‘Create’ button:
You should now see the following pop-up:

Step-5: Click on the ‘Close’ button:
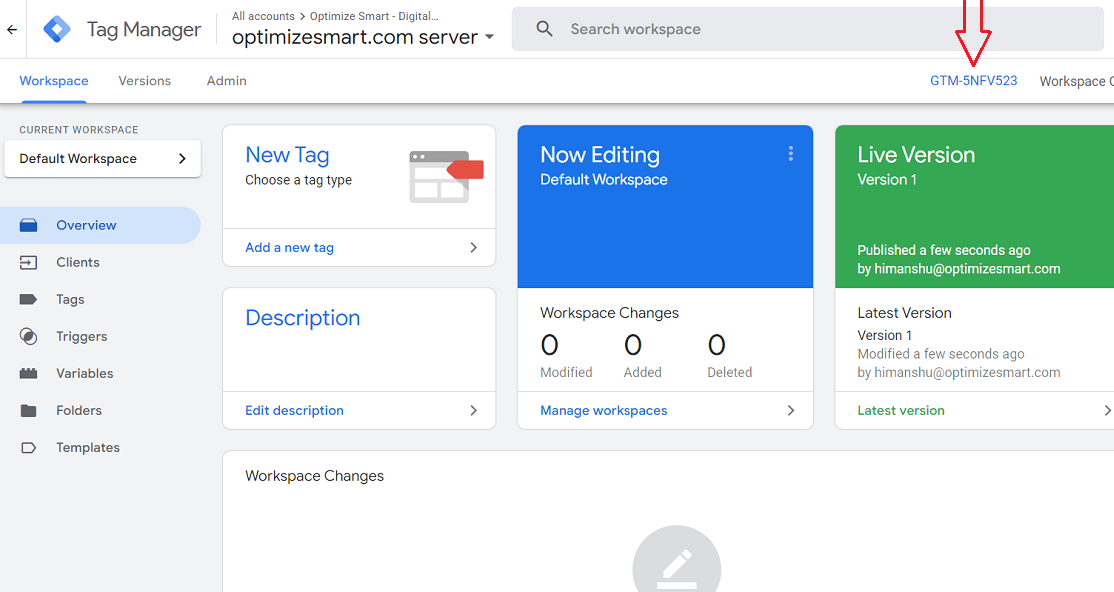
You should now see a screen like the one below:

Congratulations!
Your server-side GTM container is now created.
Phase-5: Set up your tagging server.
Follow the steps below to set up your tagging server:
Step-1: Click on the container ID of your GTM Server Side Container:

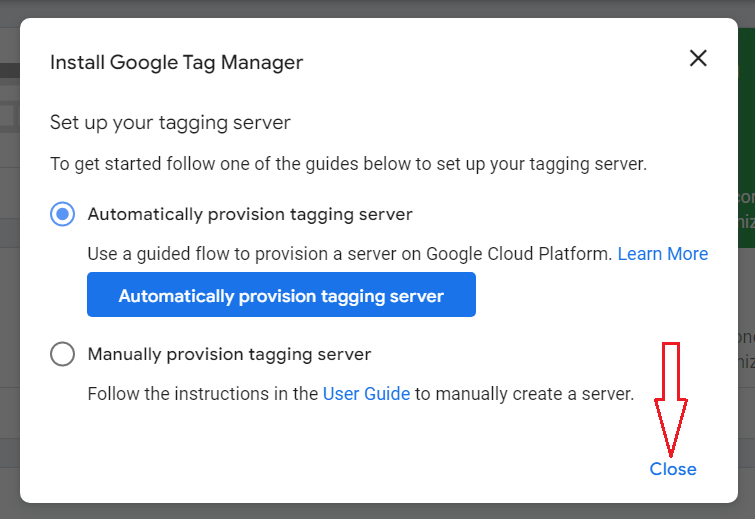
You should now see a pop-up like the one below:
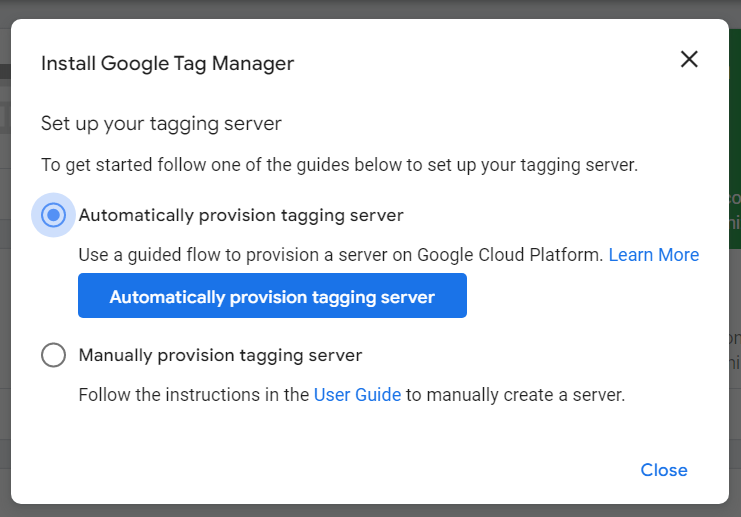
Step-2: Click on the button ‘Automatically provision tagging server’:

Step-3: Select your Google Cloud Platform billing account from the drop-down menu:
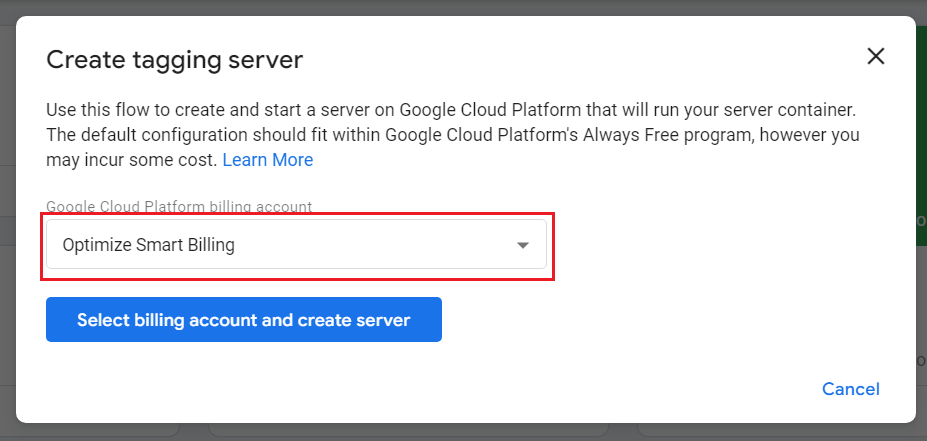
This is the same billing account that you created earlier in Phase 1.
Step-4: Click on the button ‘Select billing account and create server’:
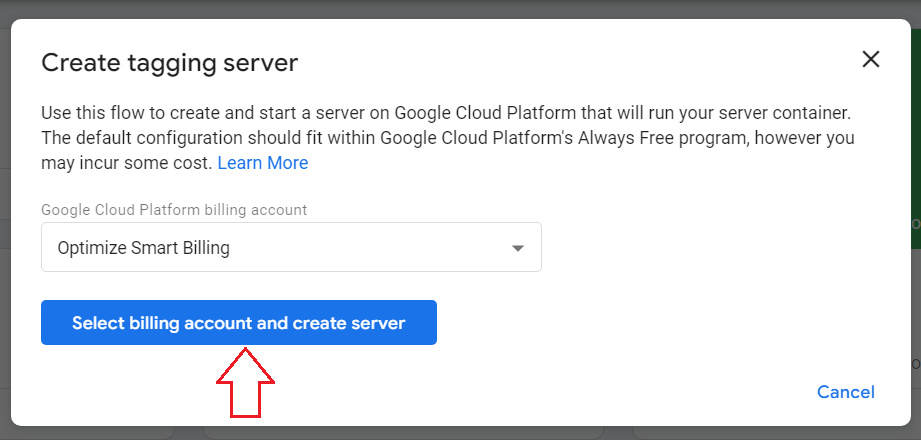
You will now see the following message:
Note: Do not close this message window.
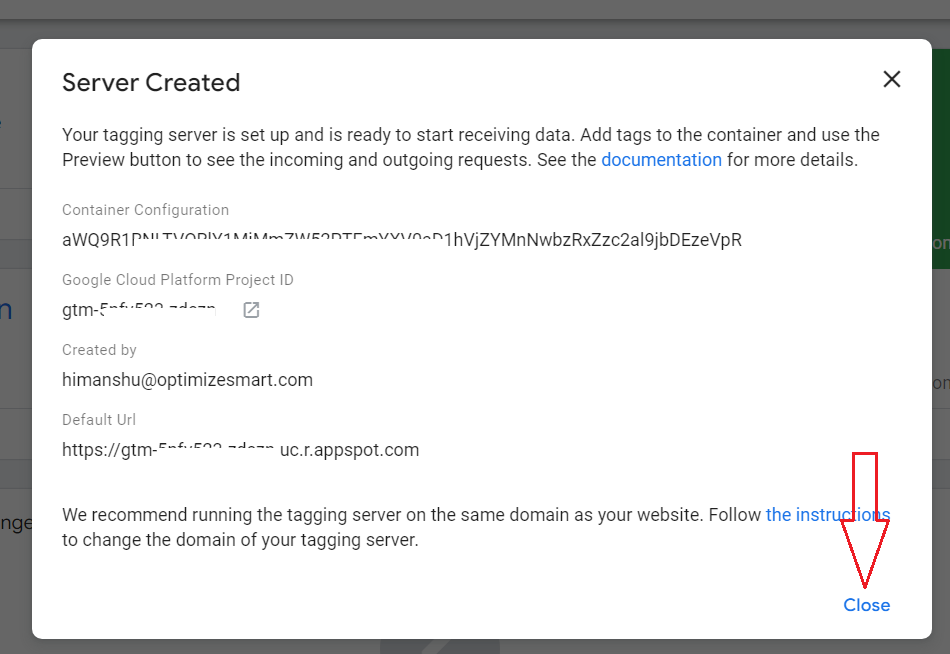
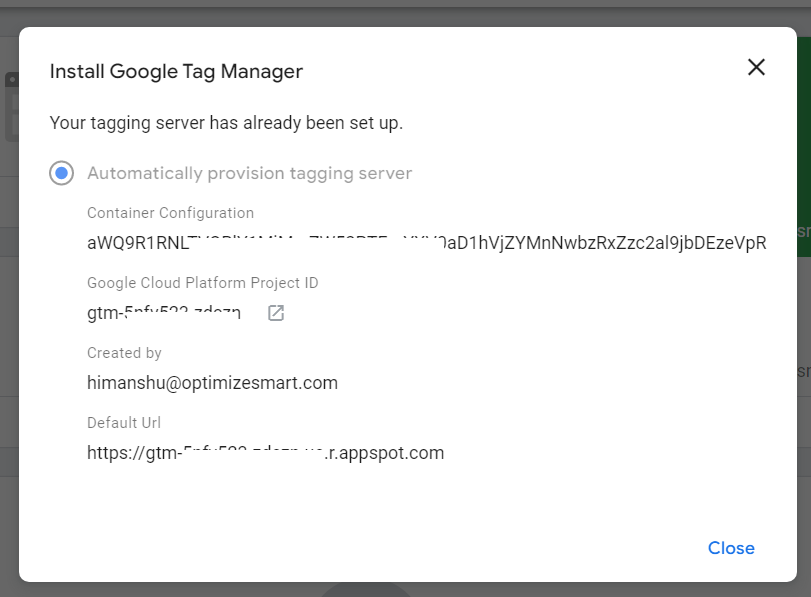
Once your tagging server is successfully created, you should see the following similar message box:
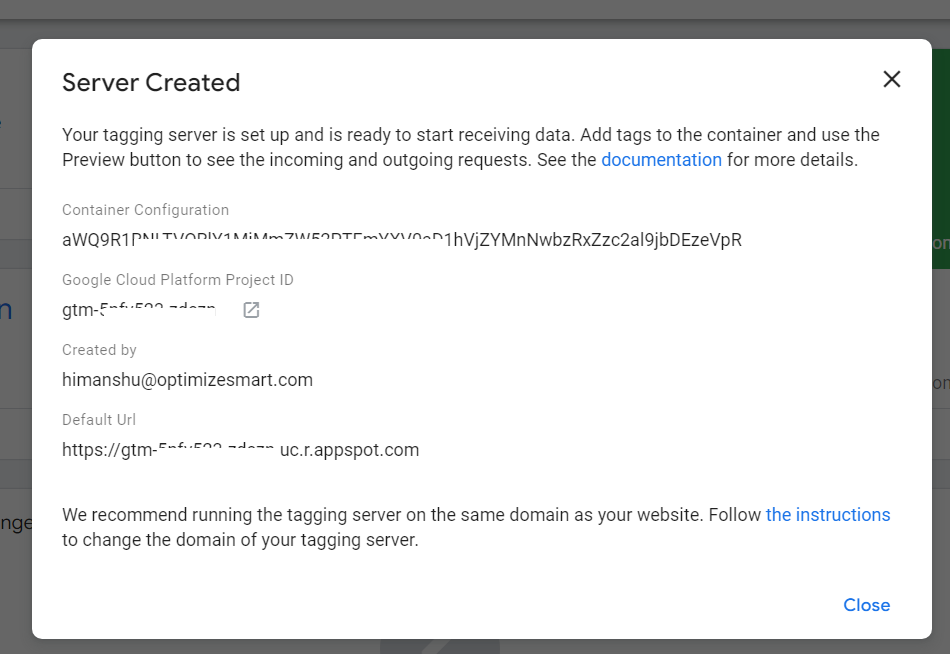
Step-6: Click on the ‘Close’ button:
Phase-6: Setup custom domain in Google Cloud.
Follow the steps below:
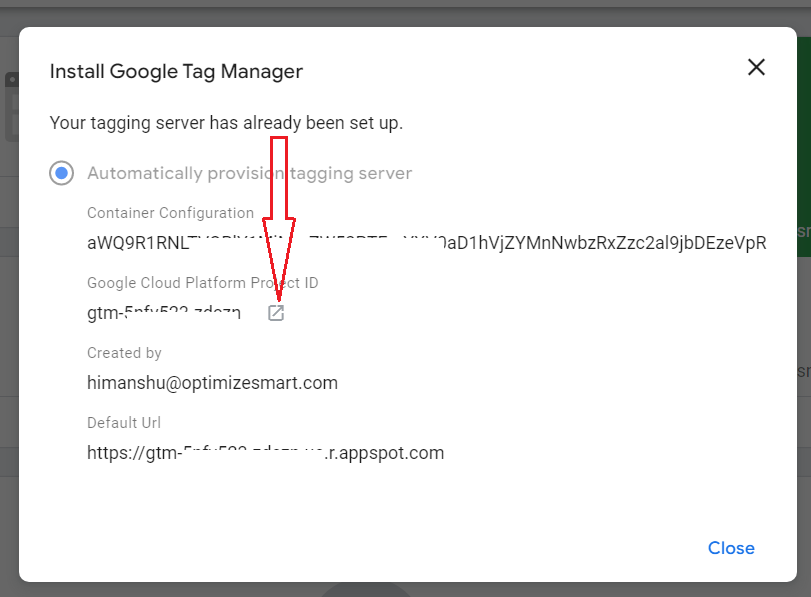
Step-1: Click on the container ID of your GTM Server Side Container:
You should now see a pop-up like the one below:
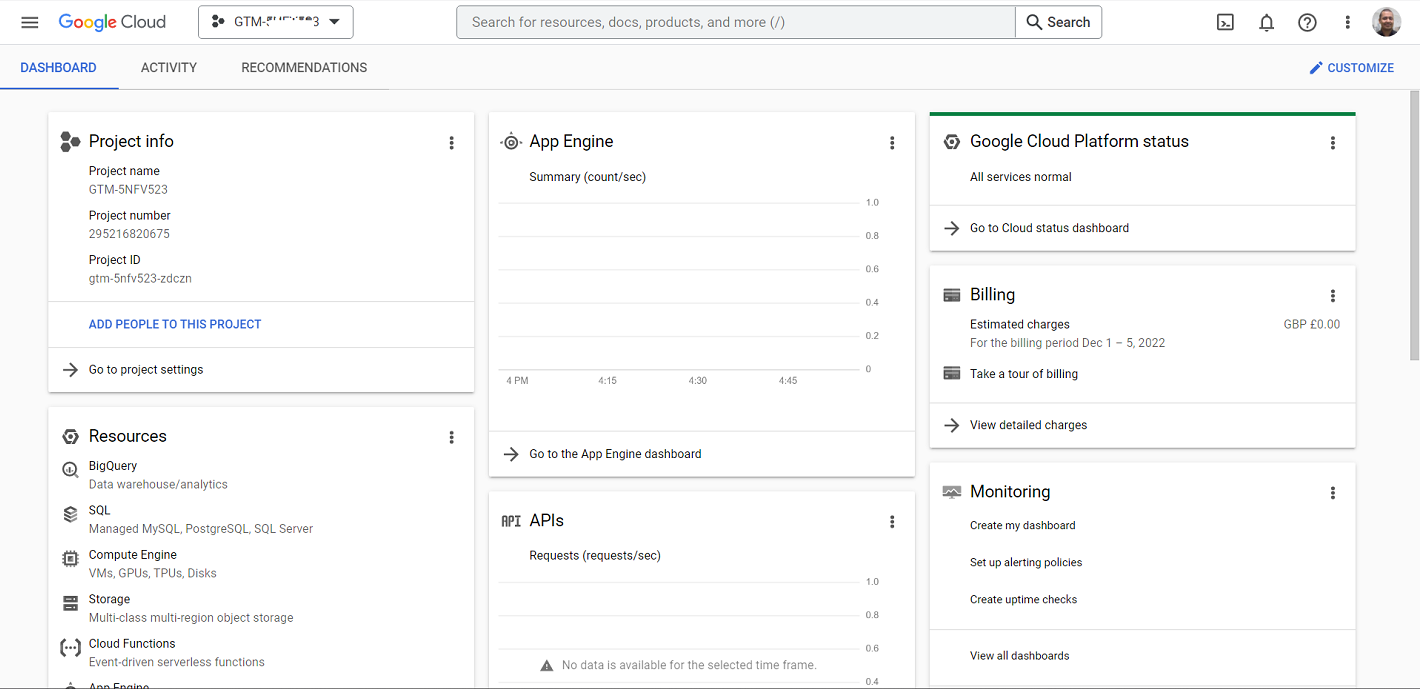
Step-2: Open your Google Cloud Platform project by clicking on the open button:

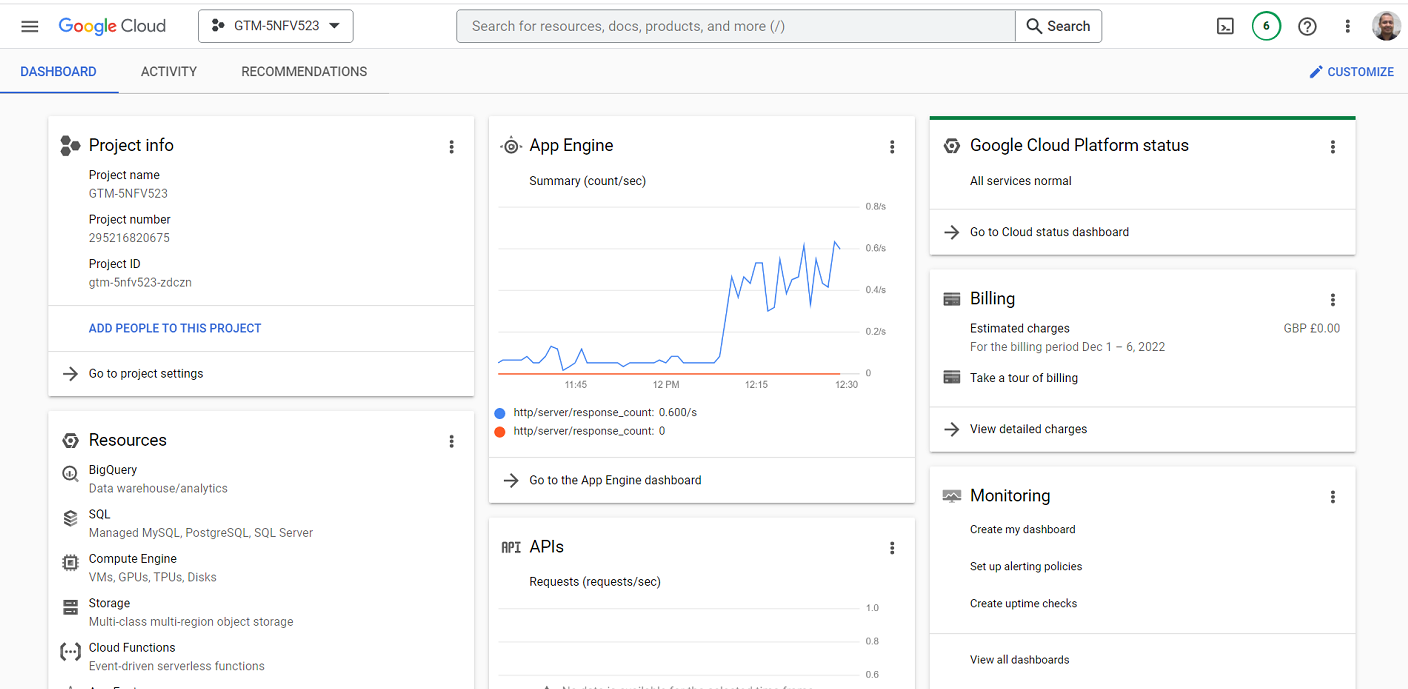
You should now see a screen like the one below:
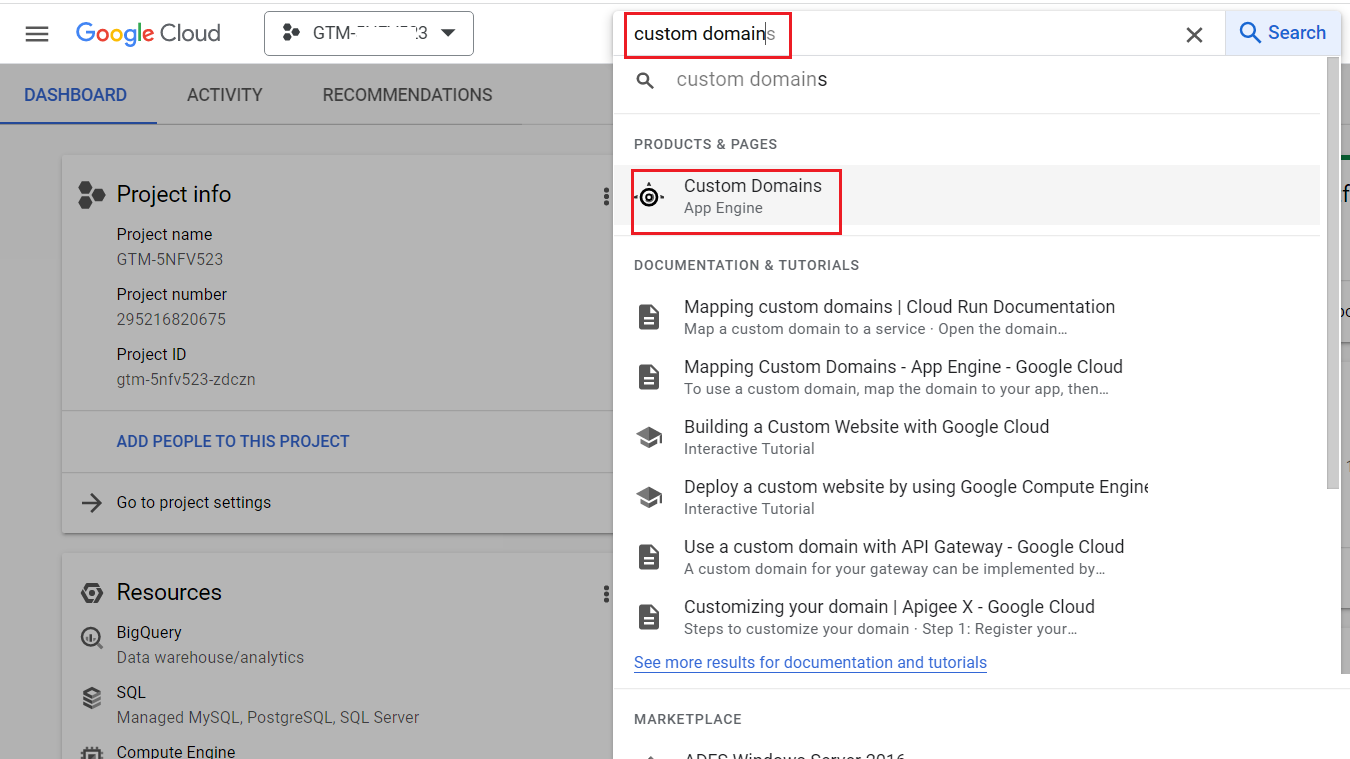
Step-3: Type ‘custom domain’ in the search box and then click on the first search result:
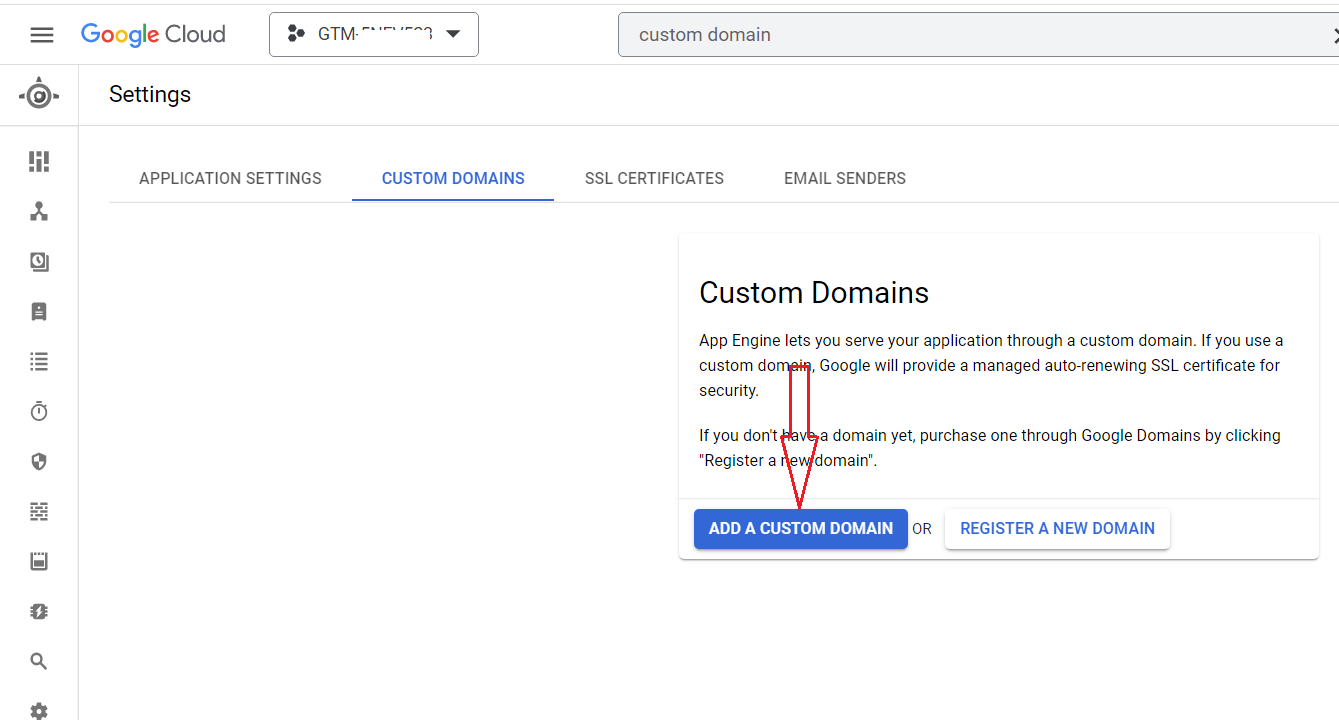
Step-4: Click on the button ‘Add a custom domain’:
Step-5: Click on the drop-down menu below the text ‘Select the domain you want to use’:
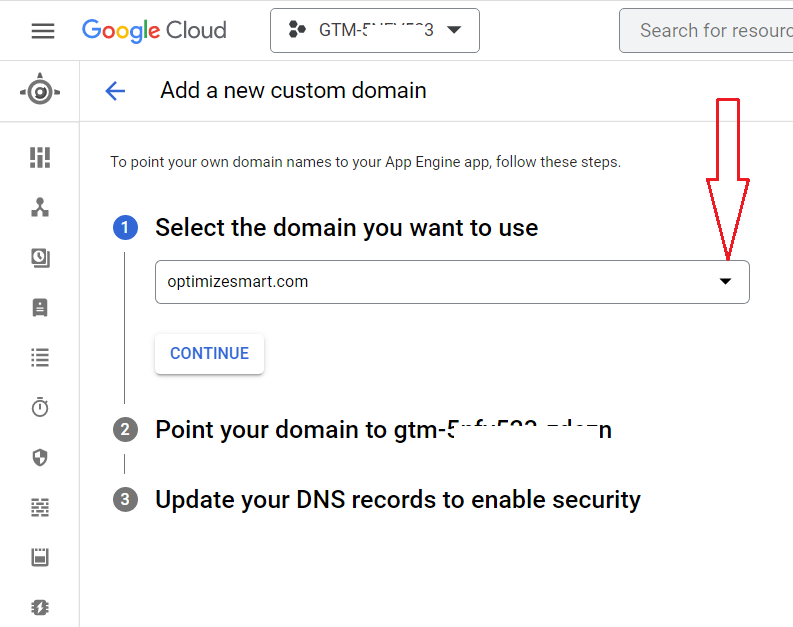
Step-6: Click on the option ‘Verify a new domain’ from the drop-down menu:
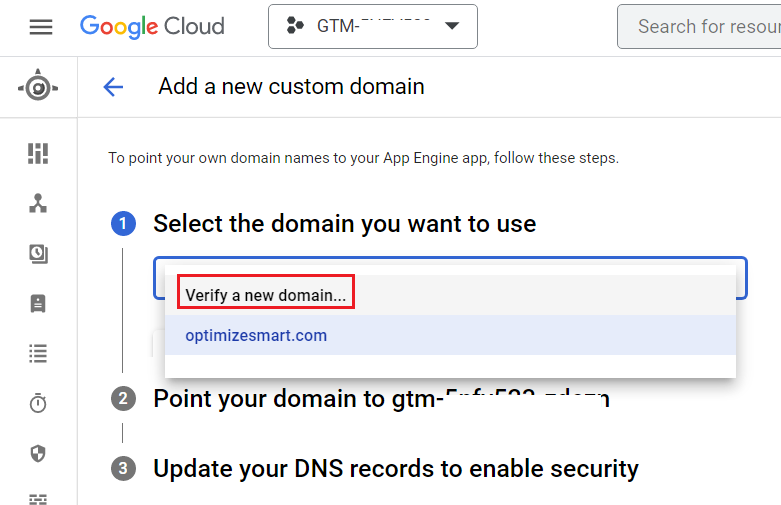
You should now see a screen like the one below:
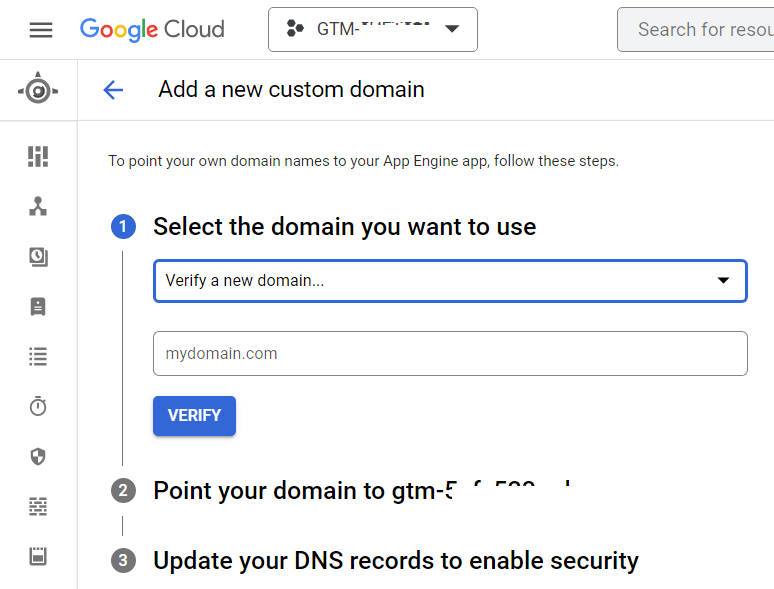
Step-7: Type 'sgtm' followed by your primary domain name.
Since my primary domain name is optimizesmart.com, I will type sgtm.optimizesmart.com and then click on the ‘Verify’ button:
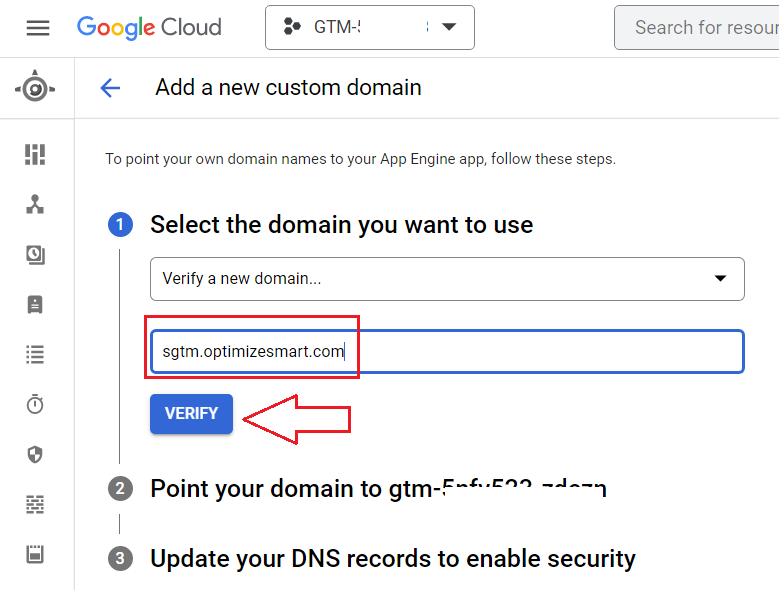
You will now be automatically redirected to your Google search console account in another browser tab:
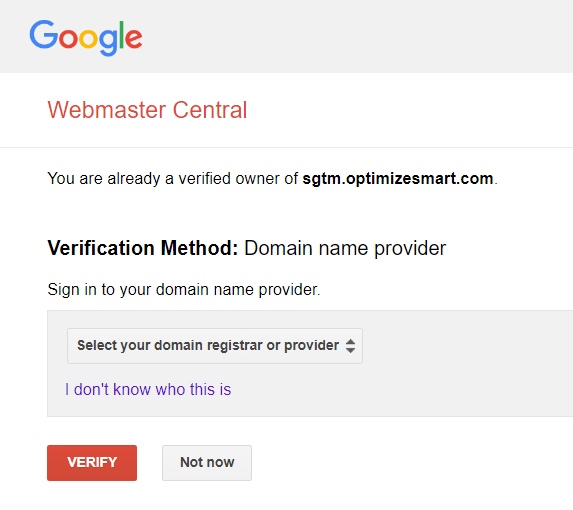
Step-8: Select your domain registrar from the drop-down menu.
I would select ‘other’ as my domain registrar is ‘Cloudflare’, and it is not listed in the available domain registrar list:
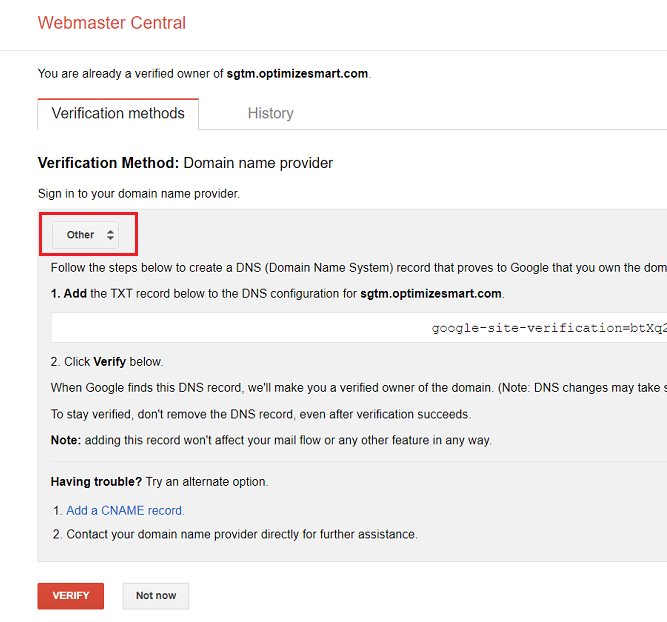
Step-9: Add the TXT record you see to the DNS configuration for sgtm.<your-domain-name>.com and then click on the ‘VERIFY’ button:
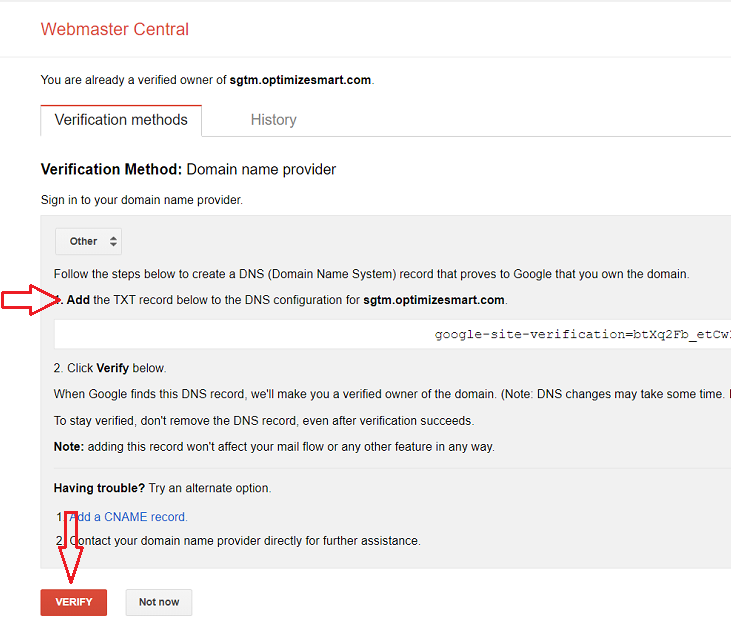
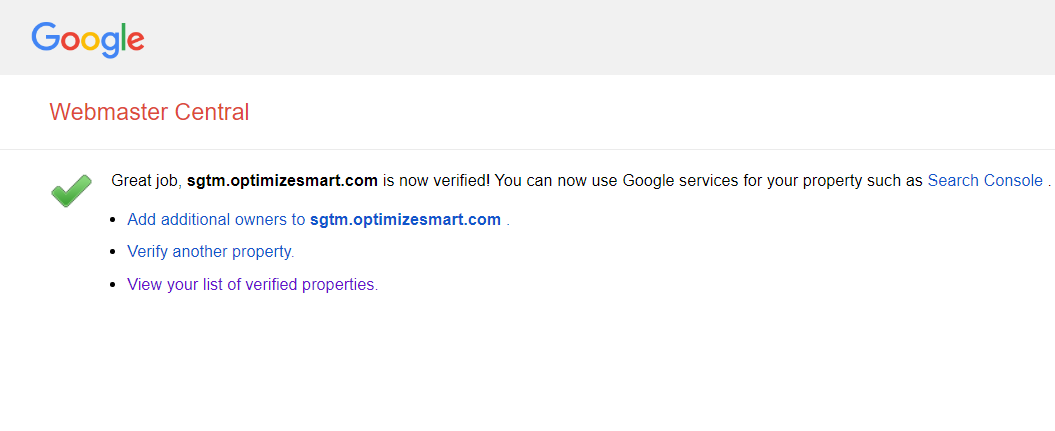
You should now see a confirmation message like the one below:
Note: If your domain verification fails then you should take the help of a web developer as correctly adding DNS records can be quite technical.
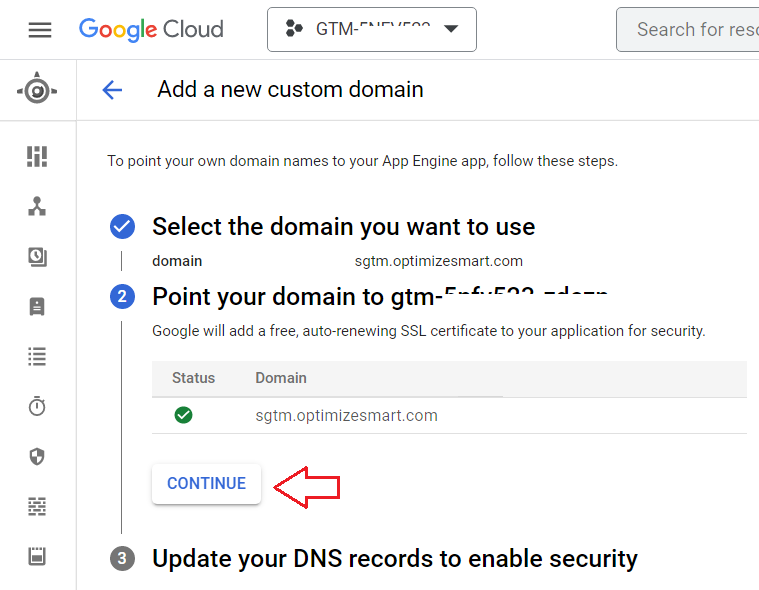
Step-10: Navigate back to your Google Cloud account and then click on the ‘REFRESH DOMAINS’ button:
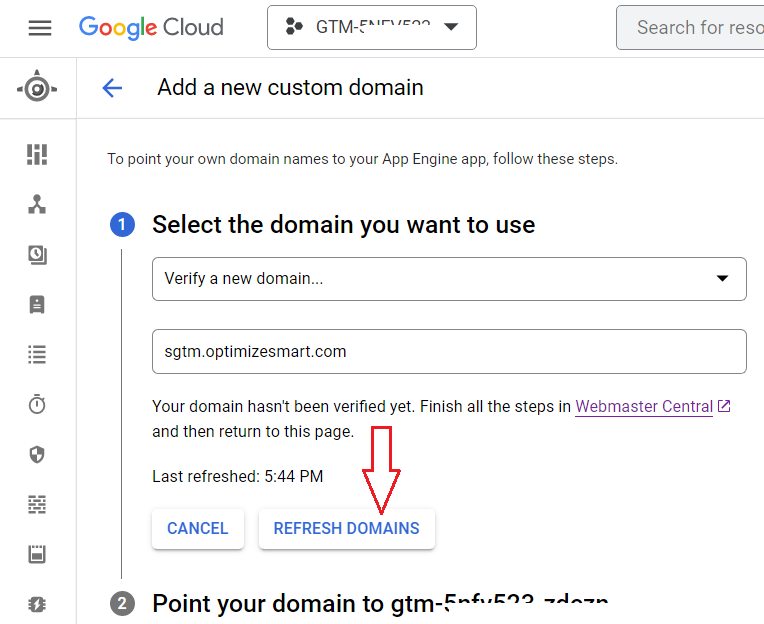
You should now see a screen like the one below:
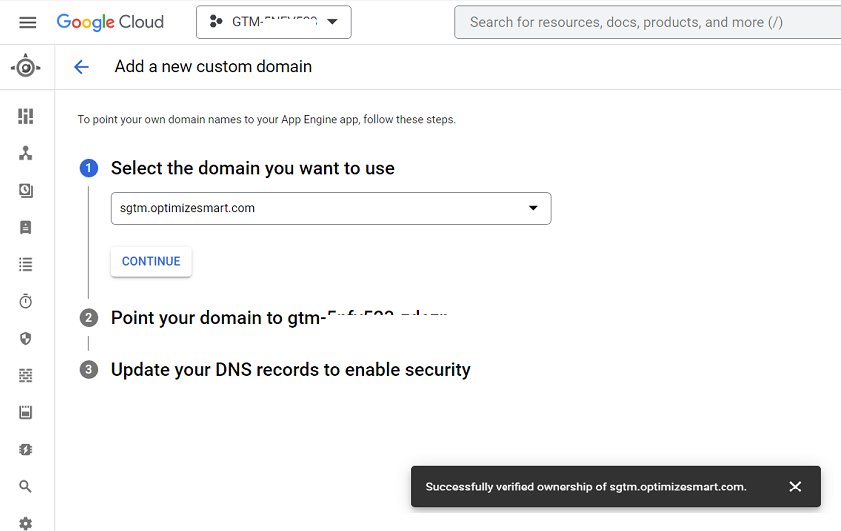
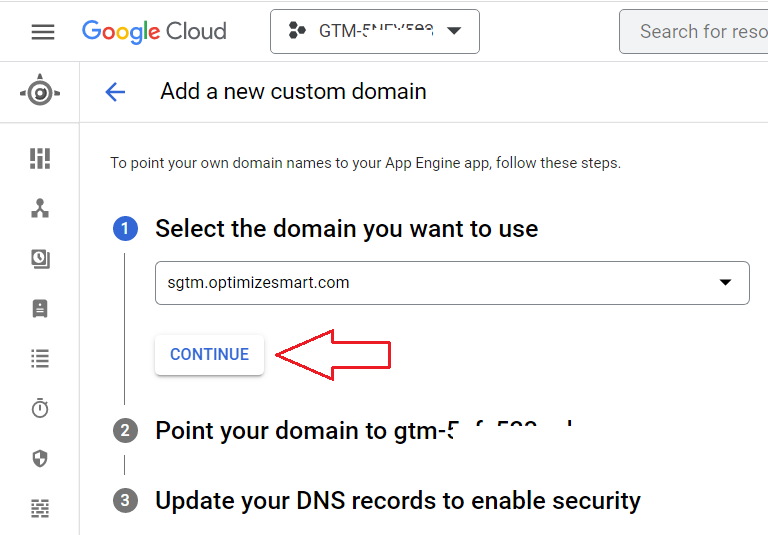
Step-11: Click on the ‘CONTINUE’ button:
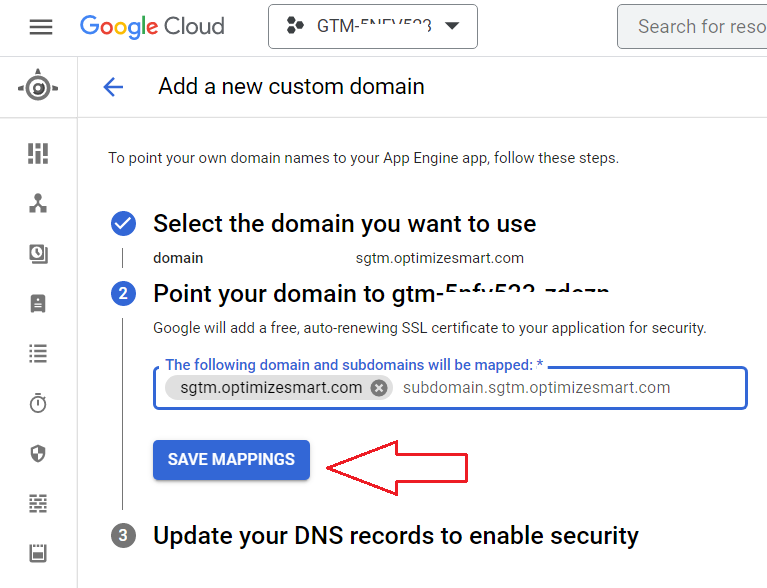
Step-12: Click on the cross button next to ‘www.sgtm.<your-domain-name>.com'

Step-13: Click on the ‘SAVE MAPPINGS’ button:
Step-14: Click on the ‘CONTINUE’ button:
Step-15: Add the DNS records you see with your domain registrar for sgtm.<your domain name>.com and then click on the ‘DONE’ button:
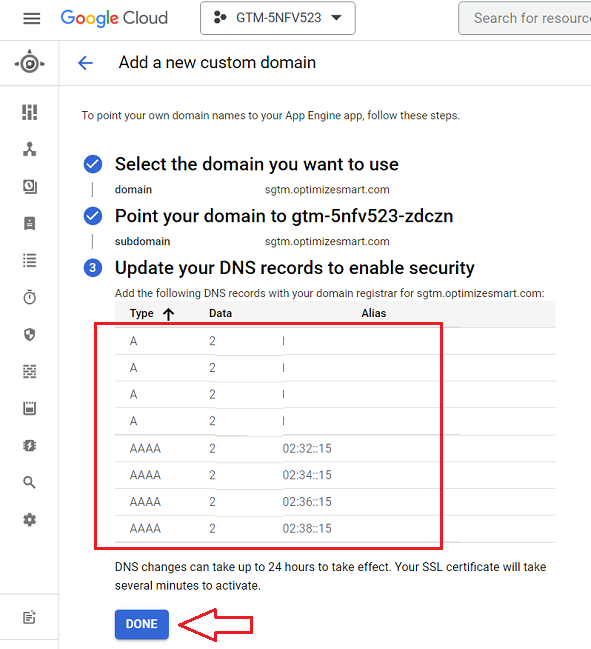
You should now see a screen like the one below after around 15-20 minutes:
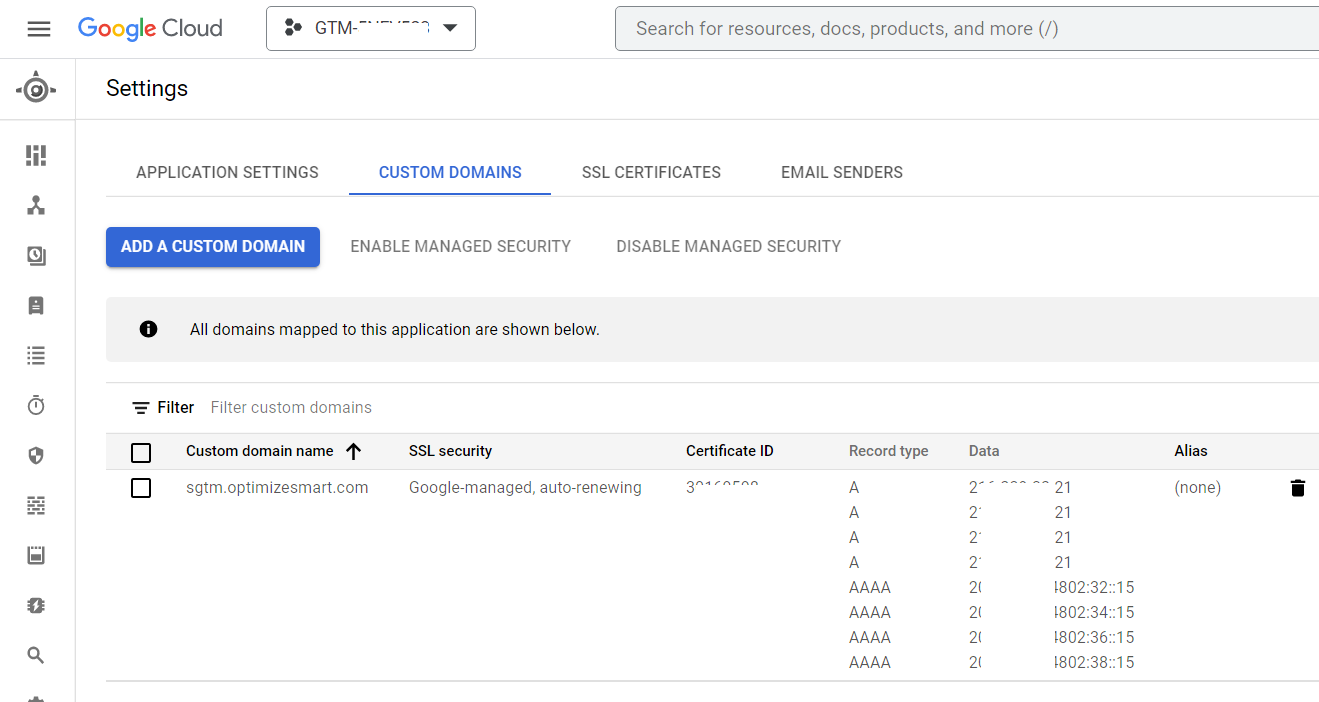
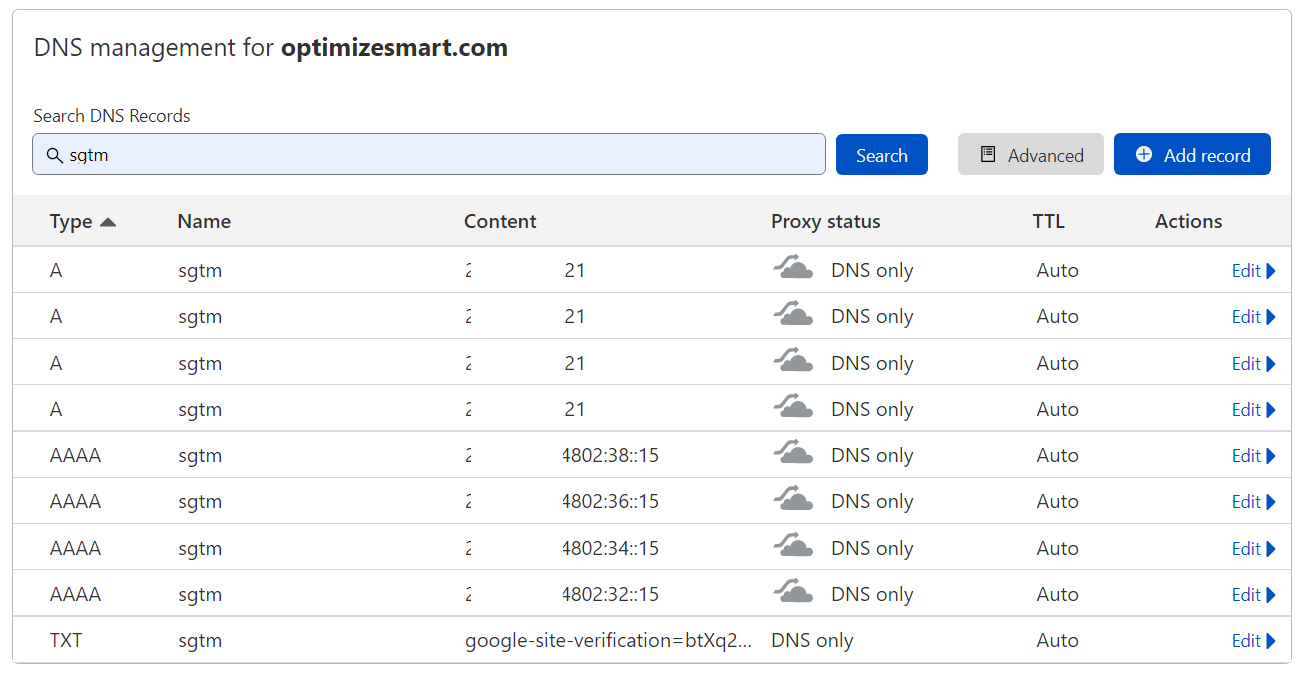
Here is how I set up the various DNS records for my website in cloudflare:
The URL of my server endpoint is now https://sgtm.optimizesmart.com/
The URL of your server endpoint will be https://sgtm.<your domain name>.com/
Step-16: Append the word ‘healthy’ to the URL of your server end point.
Since the URL of my server endpoint is https://sgtm.optimizesmart.com/, the modified URL will be https://sgtm.optimizesmart.com/healthy
Step-17: Visit the modified URL of your server end point in your web browser.
If you see the message ‘ok’, it means your server end point is responding to your request correctly and is serving the GTM server from your custom domain name.
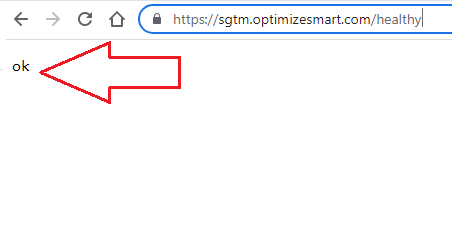
If you do not see the message ‘ok’ then wait for the full 24 hrs and then try again, as the DNS changes can take up to 24 hrs to take effect.
After 24 hrs of waiting, if you still don’t see the message ‘ok’, it means your DNS records were not set up correctly. Contact your web developer.
Phase-7: Configure your server container to use the custom domain.
Follow the steps below:
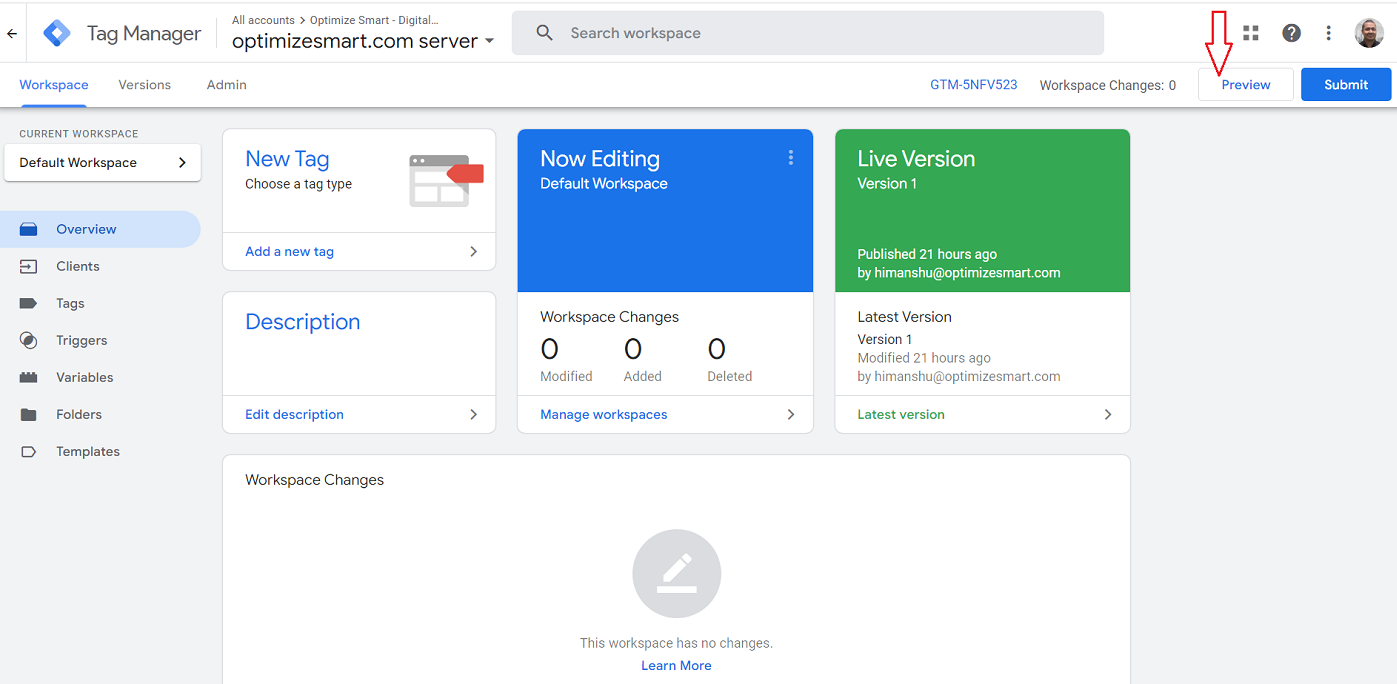
Step-1: Navigate to your GTM server container and then click on the ‘Preview’ button:

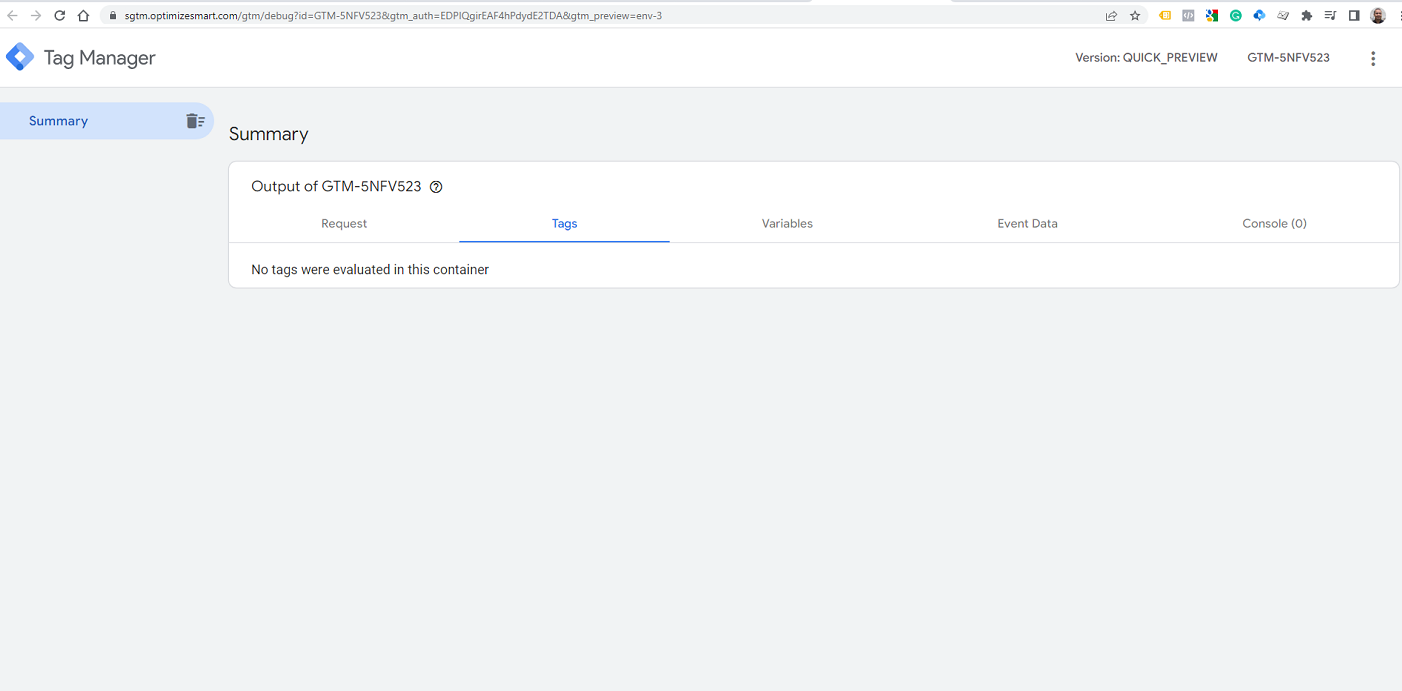
You should now be automatically redirected to the tag manager debug window:
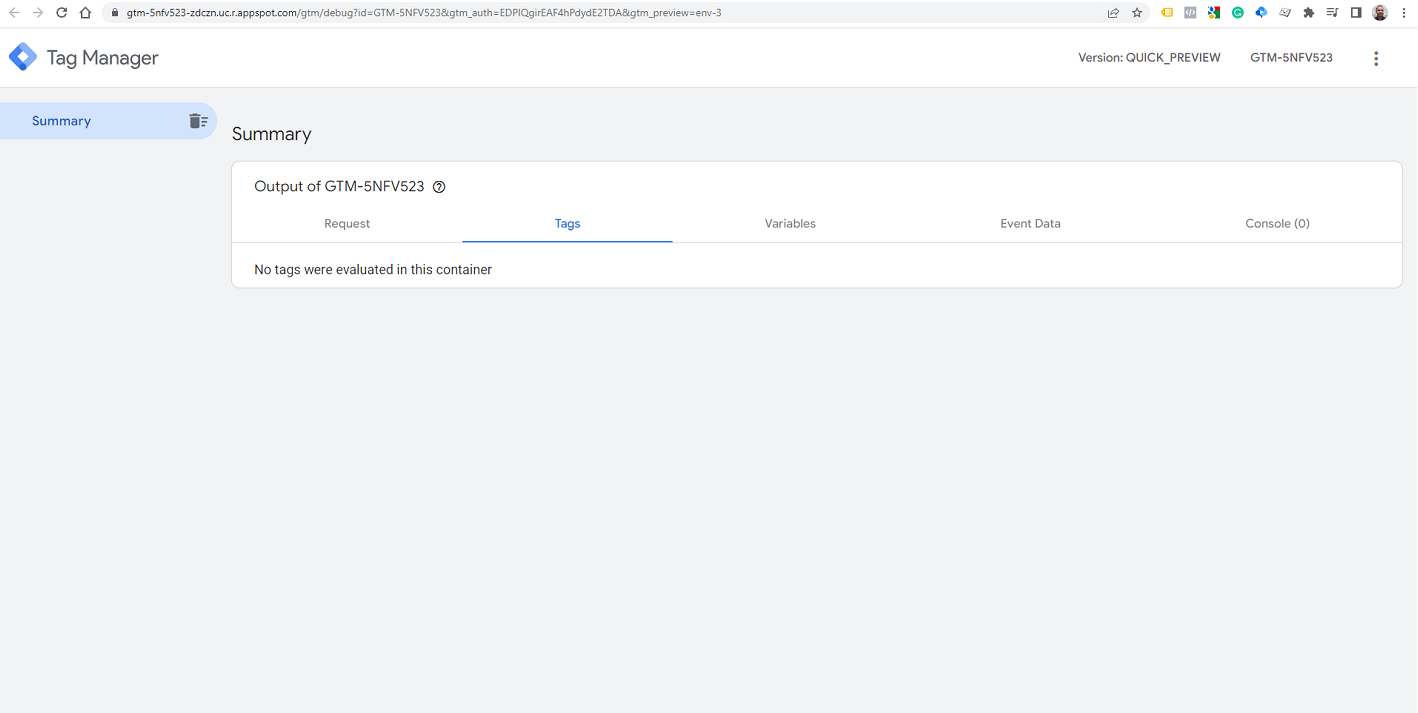
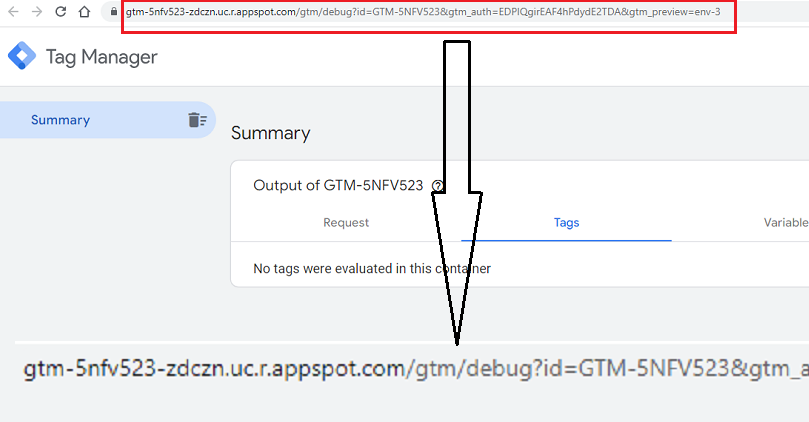
Step-2: Look closely at the URL in the browser address bar. It will contain the ‘appspot.com’ domain name:
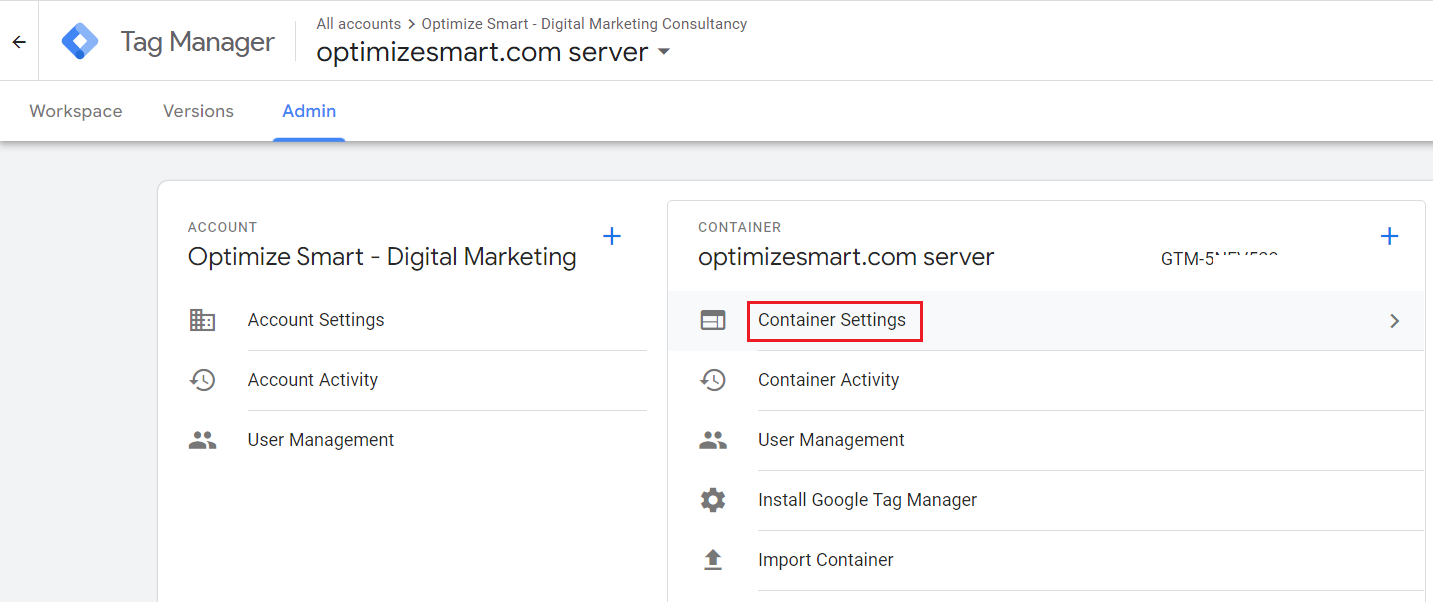
Step-3: Navigate to your GTM server container and then click on the ‘Admin’ link:
Step-4: Click on the link ‘Container Settings’ under ‘CONTAINER’:
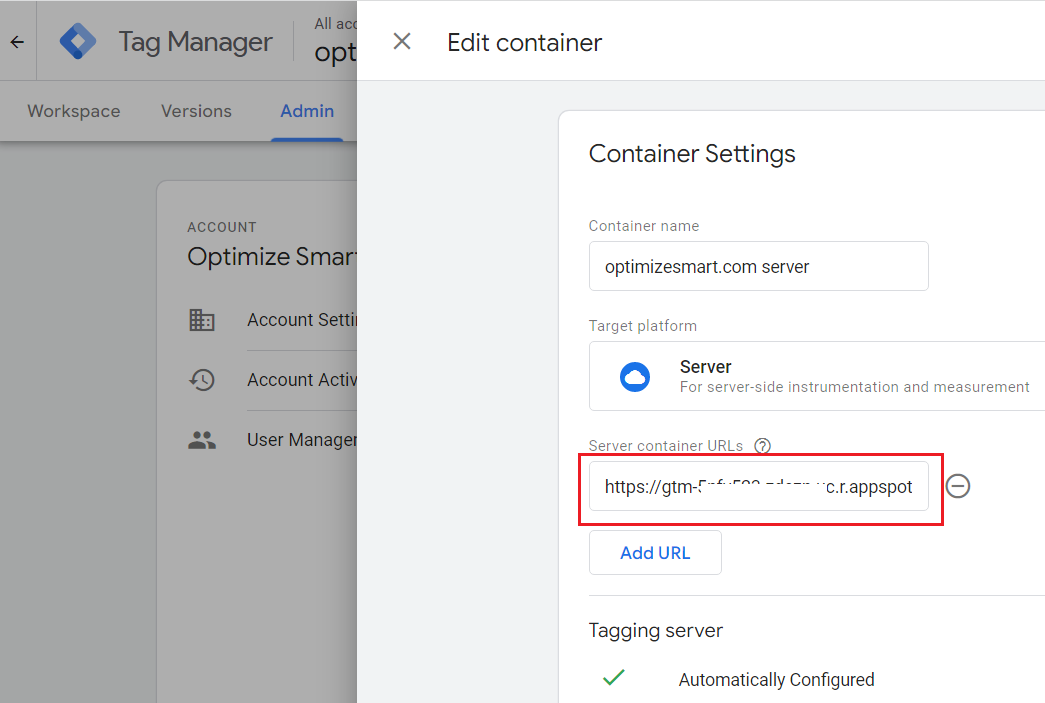
You should now see the default server container URL, which you saw earlier in the debug window:
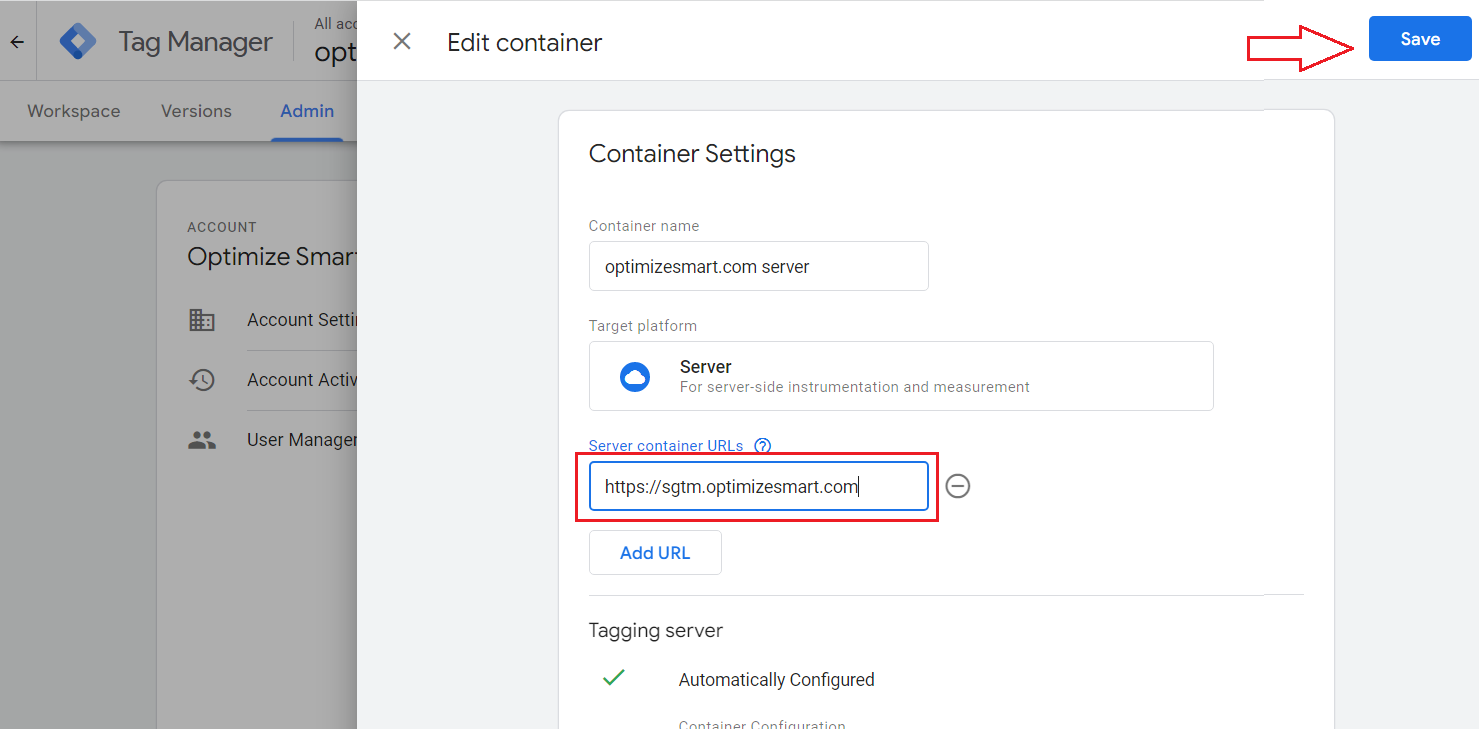
Step-5: Replace the server container URL with the URL of your server end point (in my case https://sgtm.optimizesmart.com) and then click on the ‘Save’ button:
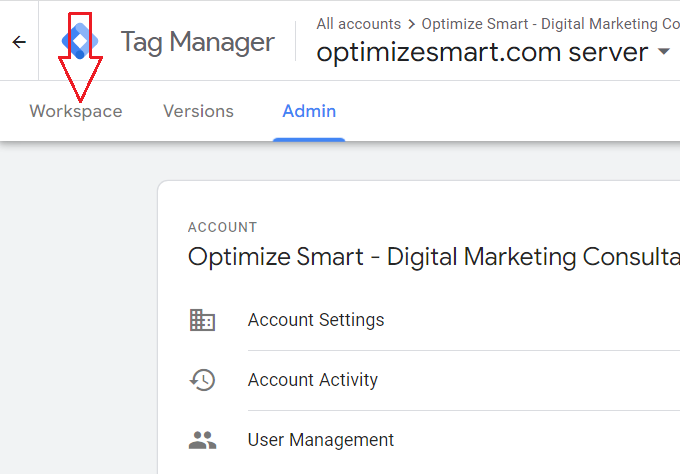
Step-6: Click on the ‘Workspace’ tab:
Step-7: Click on the ‘Preview’ button again to refresh the debug window:
You should now be automatically redirected to the tag manager debug window:
Step-8: Look closely at the URL in the browser address bar. It should now start with your custom domain name:
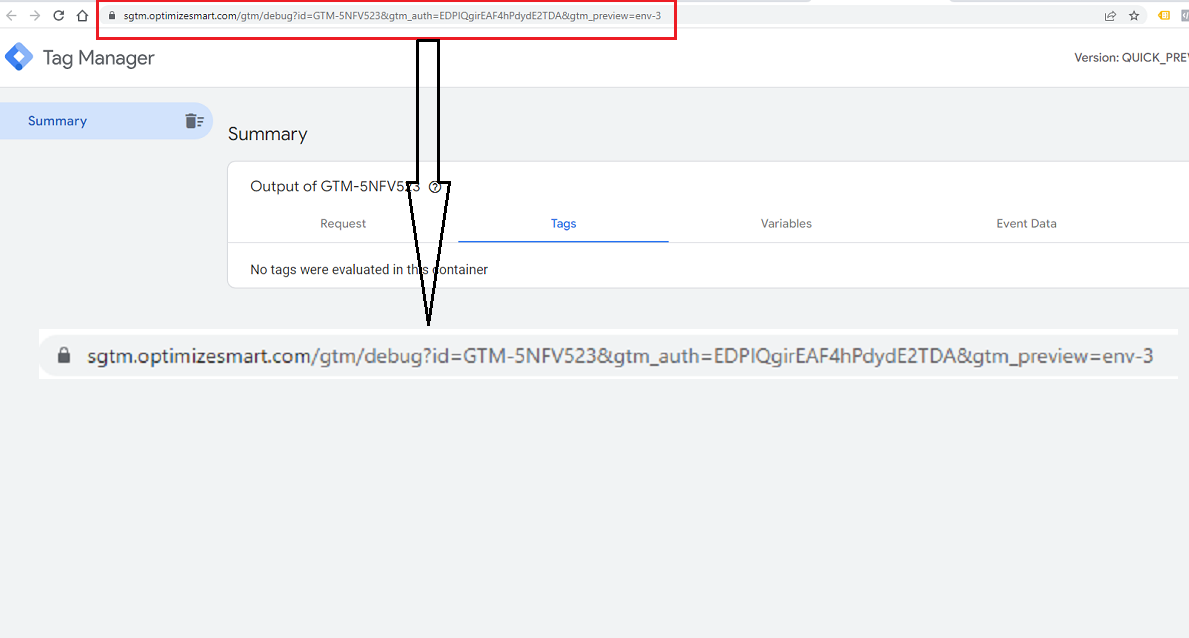
Note: If instead of the GTM debug window you see an error message, wait for the full 24 hrs and then try again, as the DNS changes (which you made earlier while setting up the custom domain) can take up to 24 hrs to take effect.
Phase-8: Connect the GA4 configuration tag to the server container.
The GA4 configuration tag that you currently use for your GA4 Tagging sends data to the Google endpoint (https://www.google-analytics.com/g/collect), aka the Google server.
We will now update this tag to send data to your server endpoint, aka your tagging server.
Follow the steps below:
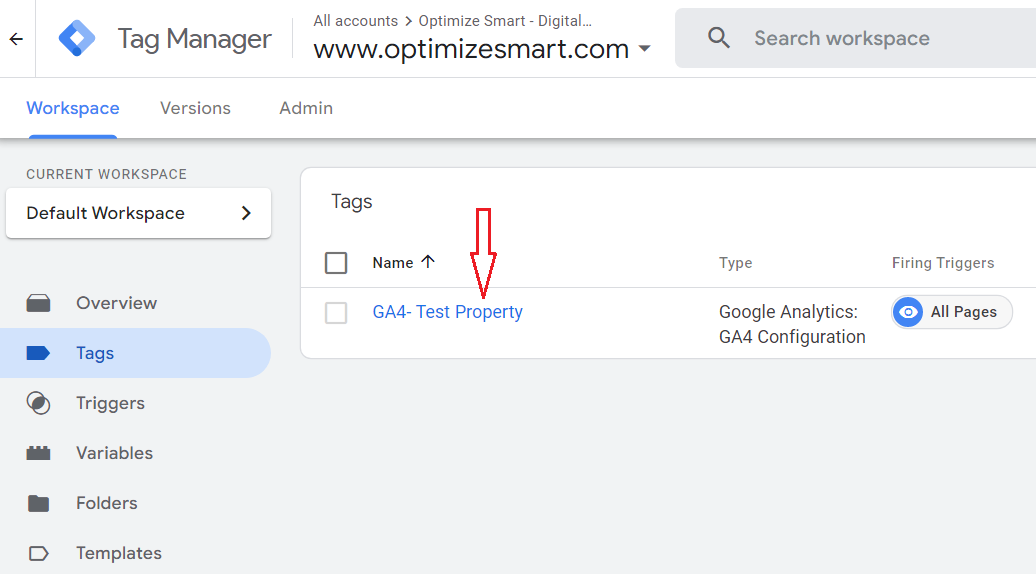
Step-1: Navigate to your GTM web container.
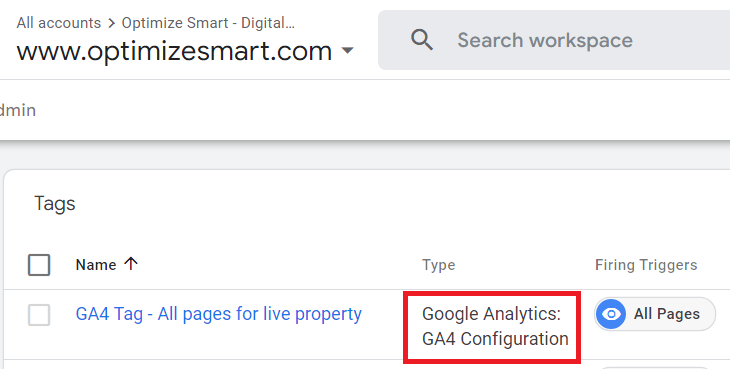
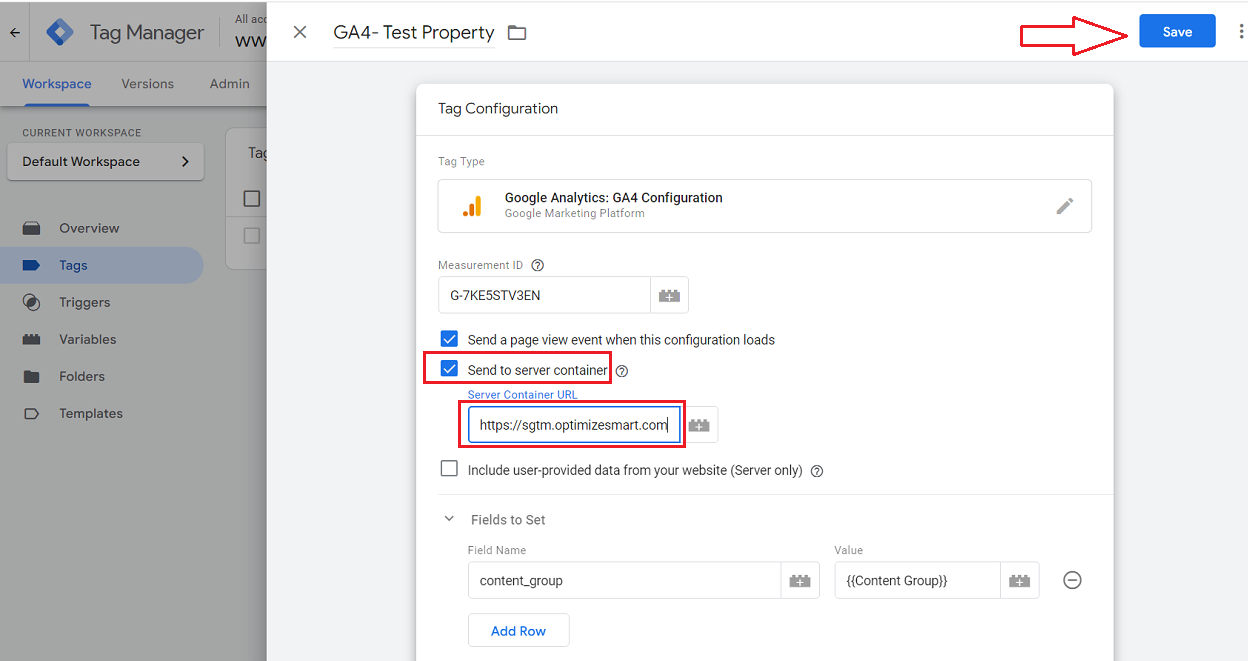
Step-2: Edit the GA4 configuration tag:
Step-3: Click on the checkbox ‘Send to Server Container’, enter the URL of your server end point and then click on the ‘Save’ button to save your tag:
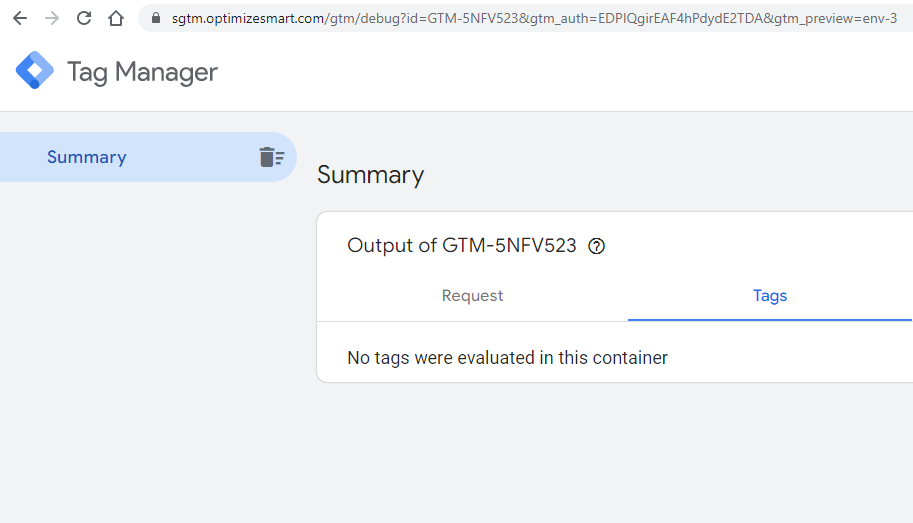
Step-4: Navigate to your GTM server container and then click on the ‘Preview’ button:

You should now be redirected to the tag manager debug window:
Step-5: Navigate to your GTM web container and then click on the ‘Preview’ button:
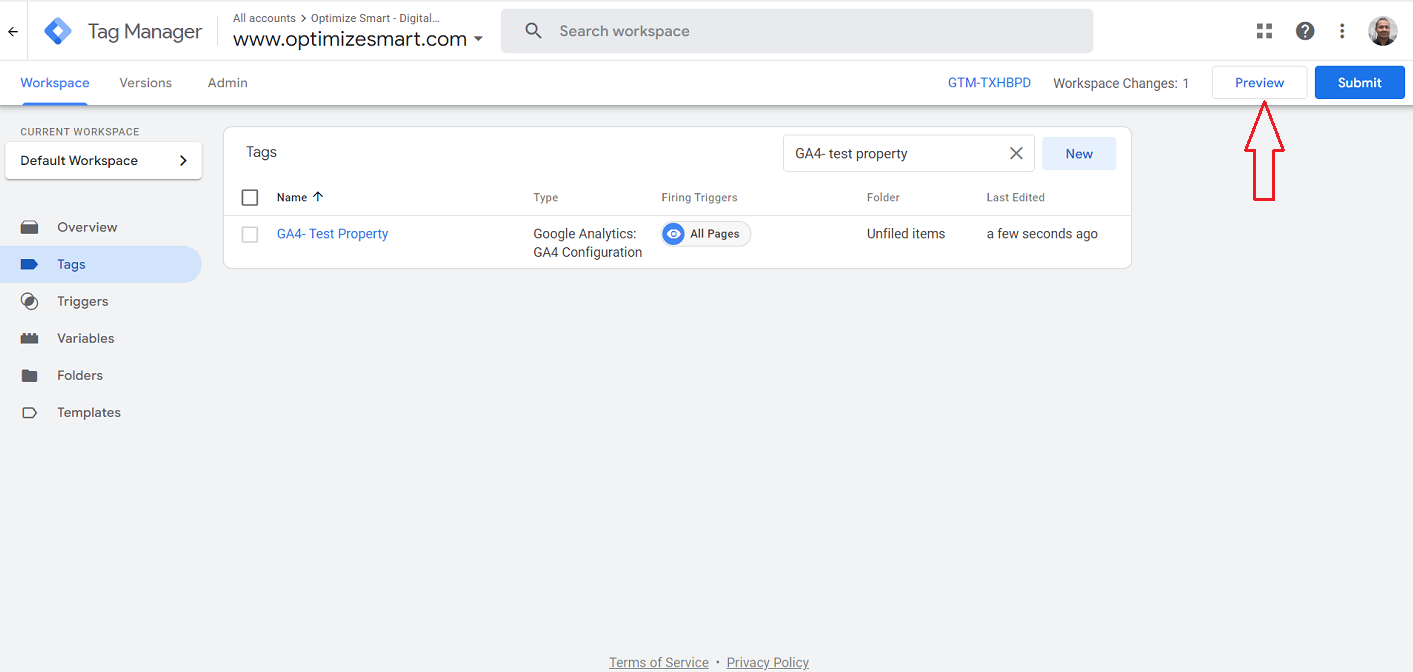
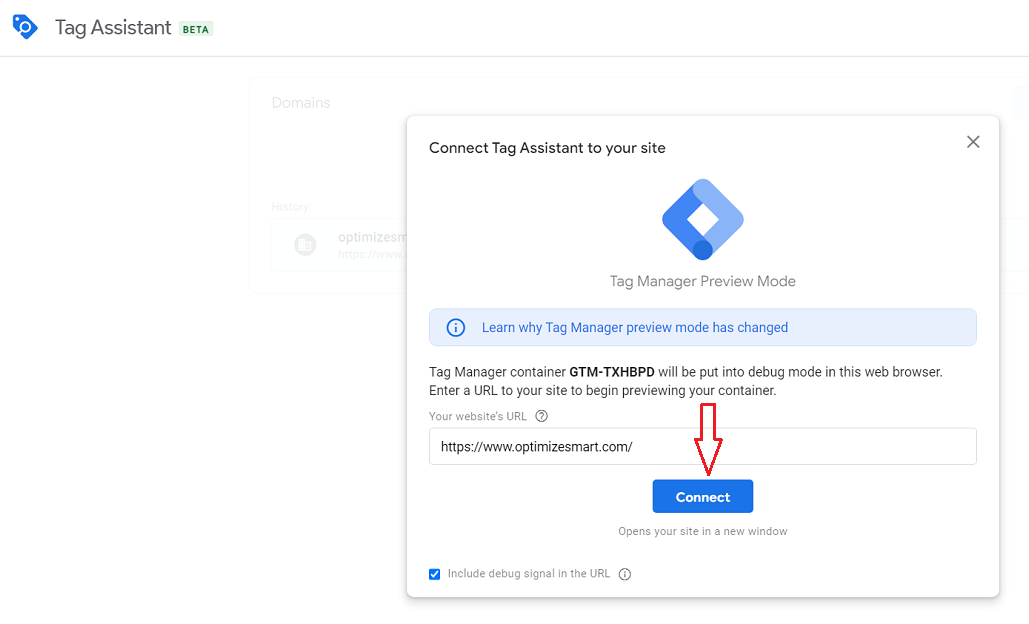
You should now be redirected to the tag assistant window:
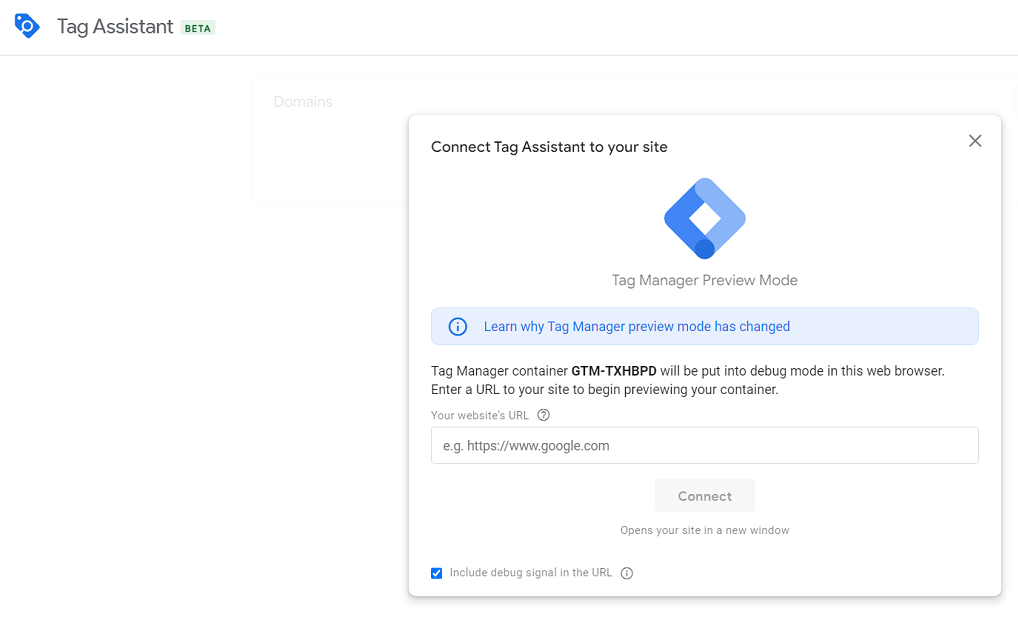
Step-6: Enter your website URL and then click on the ‘Connect’ button:
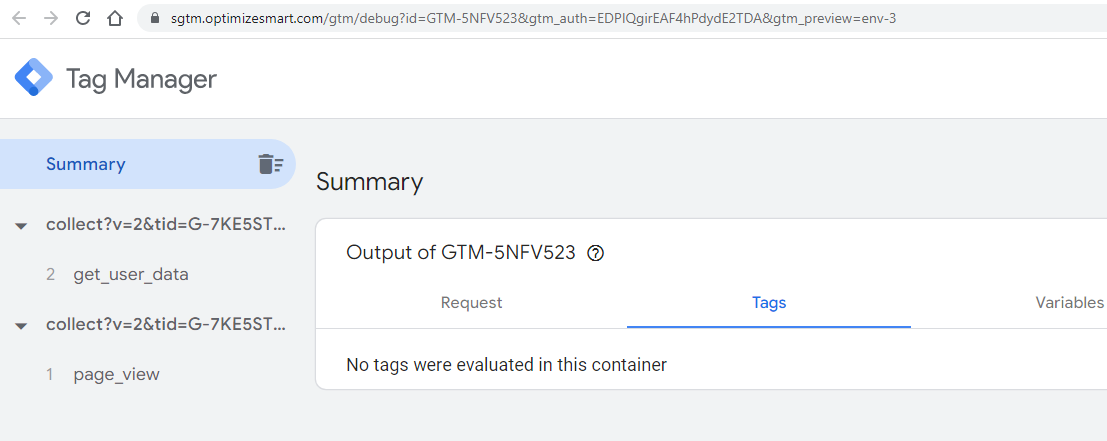
Step-7: Navigate back to the tag assistant window of your server container. You should now be able to see some hits recorded:
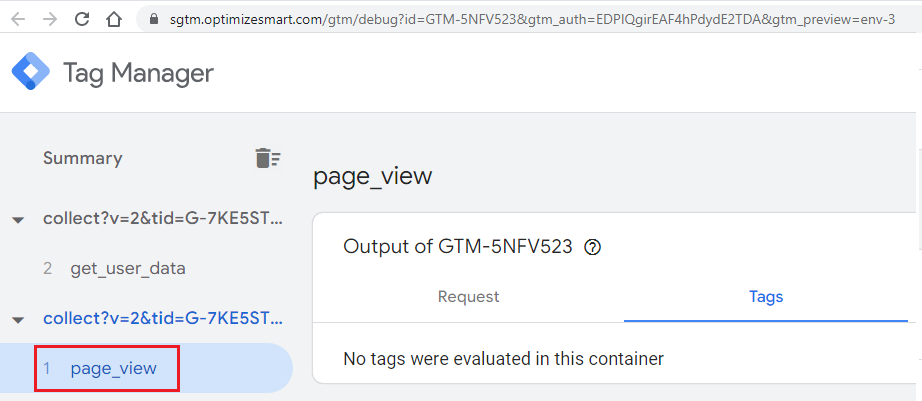
Step-8: Click on ‘page_view’ event:
Step-9: Click on the ‘Request’ tab:
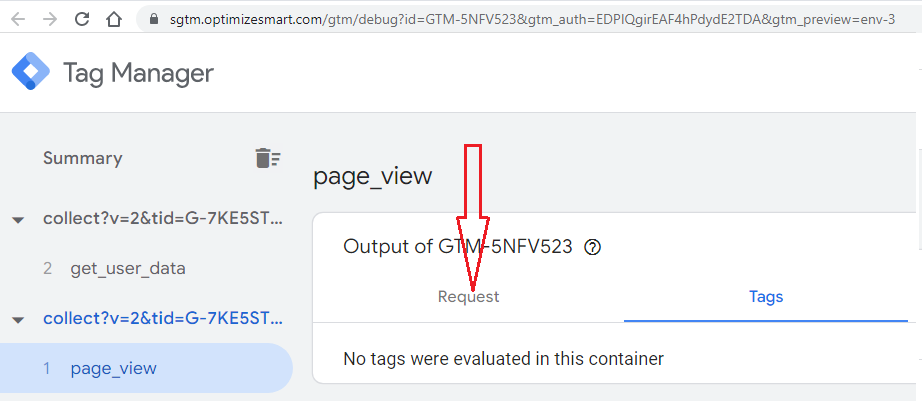
You should now see a screen like the one below:
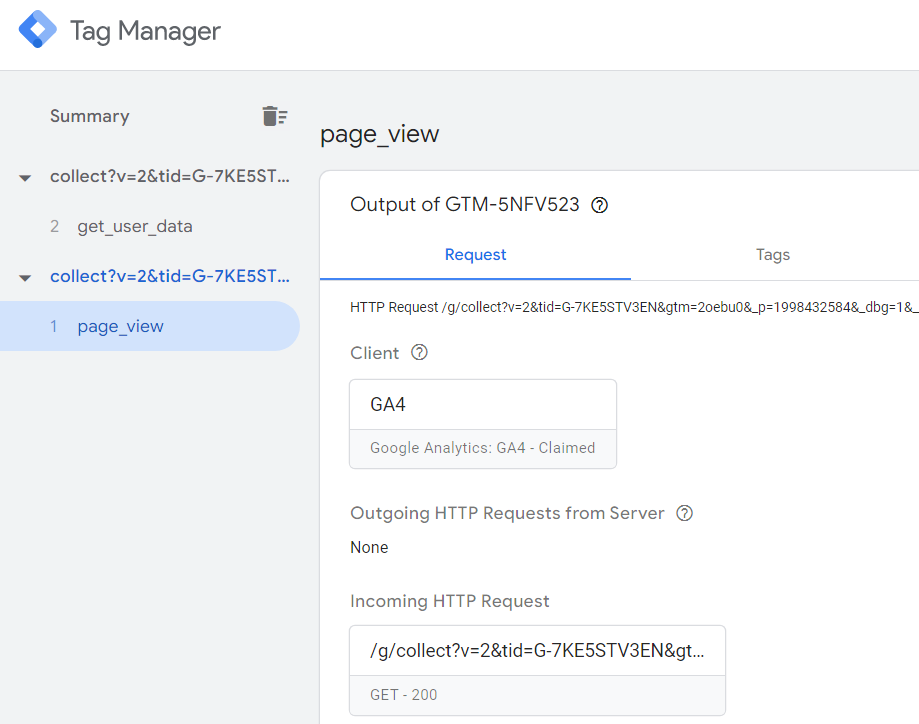
The GA4 HTTP request that we sent (from our web container) to our server-side endpoint is claimed by the GA4 client:
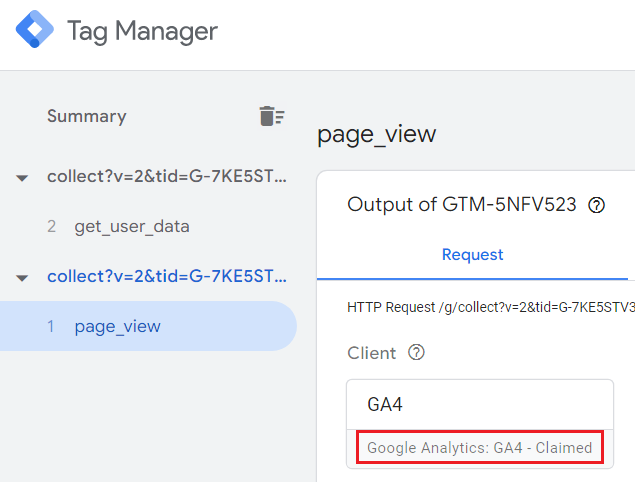
It is very important that the GA4 client claims the GA4 request. Otherwise, something is wrong with your Tagging setup.
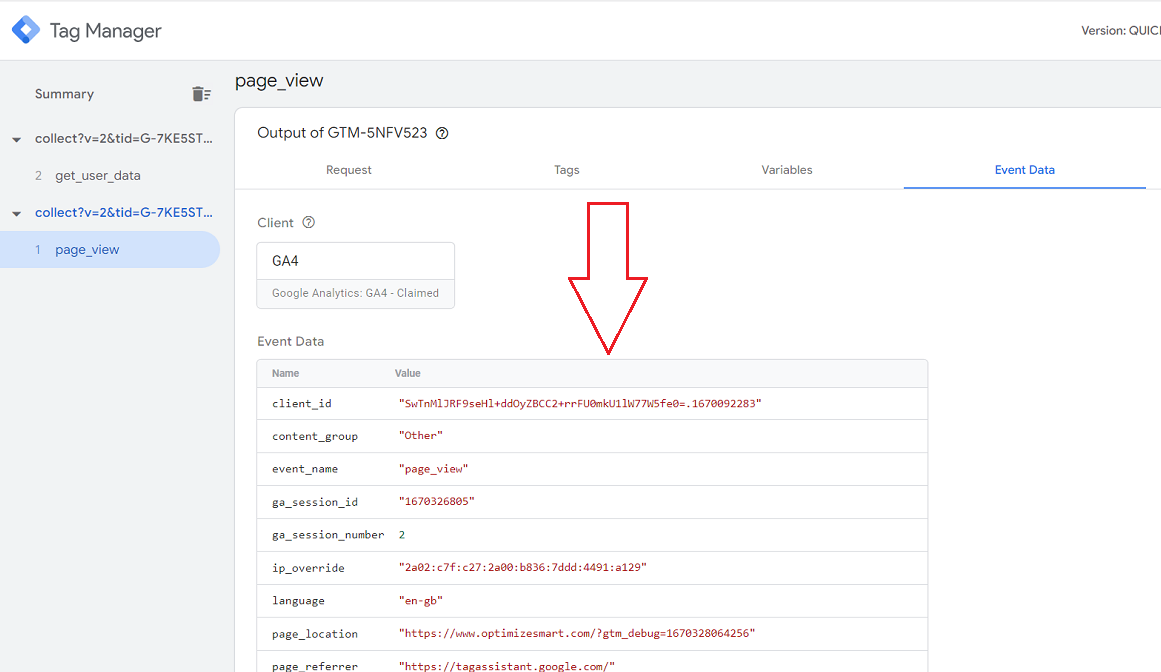
Step-10: Click on the ‘Event Data’ tab to see what event data is sent to your server:
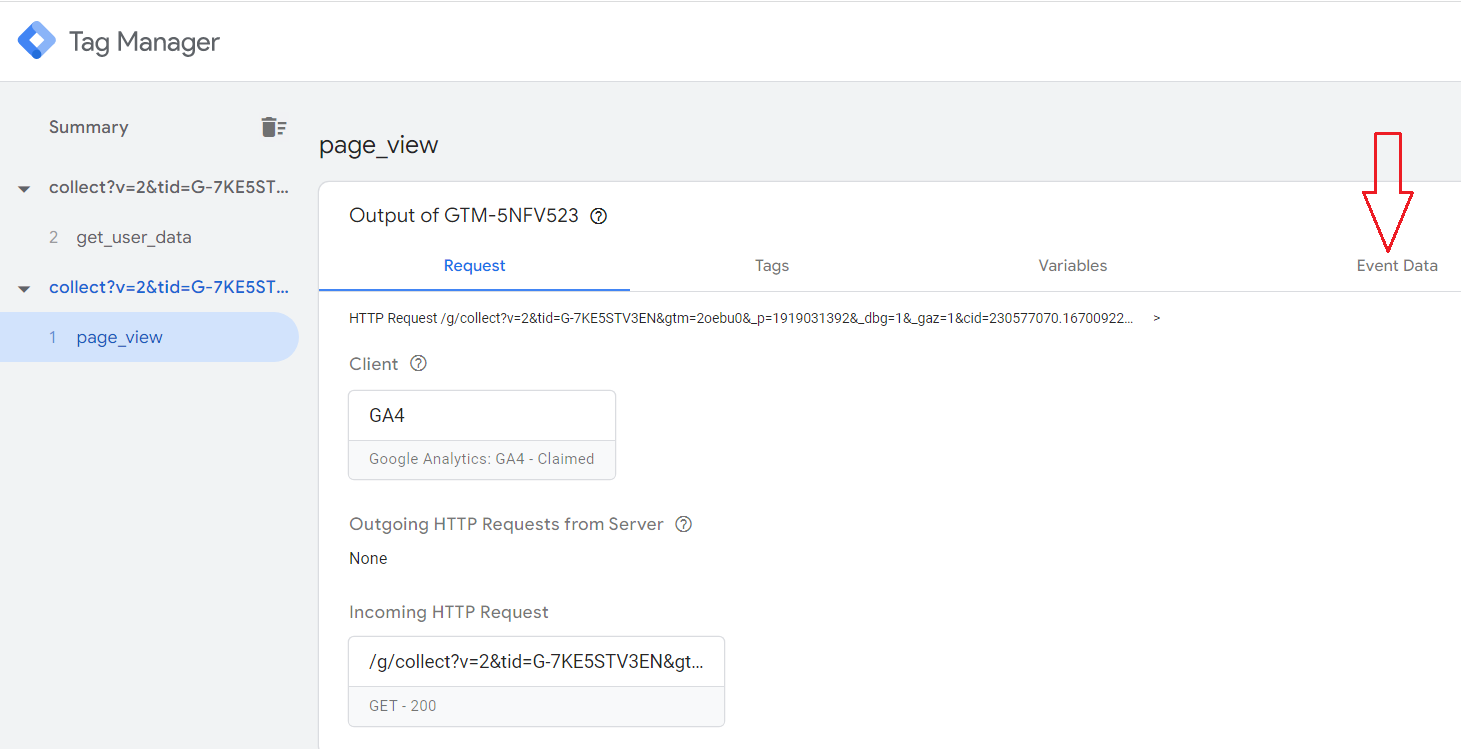
You should now be able to see all the event data sent to the server end point:
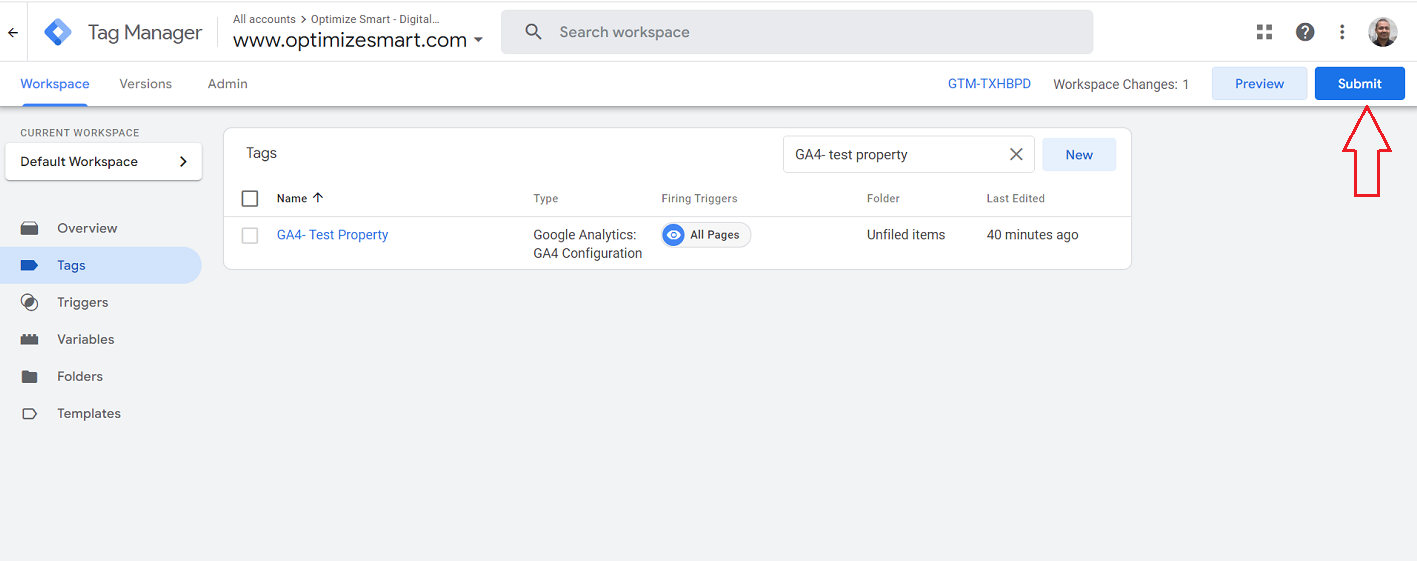
Step-11: Navigate back to your GTM web container and then click on the ‘Submit’ button to publish your container:
Phase-9: Upgrade from testing to production server.
Follow the steps below to upgrade from testing to the production server:
Step-1: Click on the container ID of your GTM Server Side Container:

You should now see a pop-up like the one below:

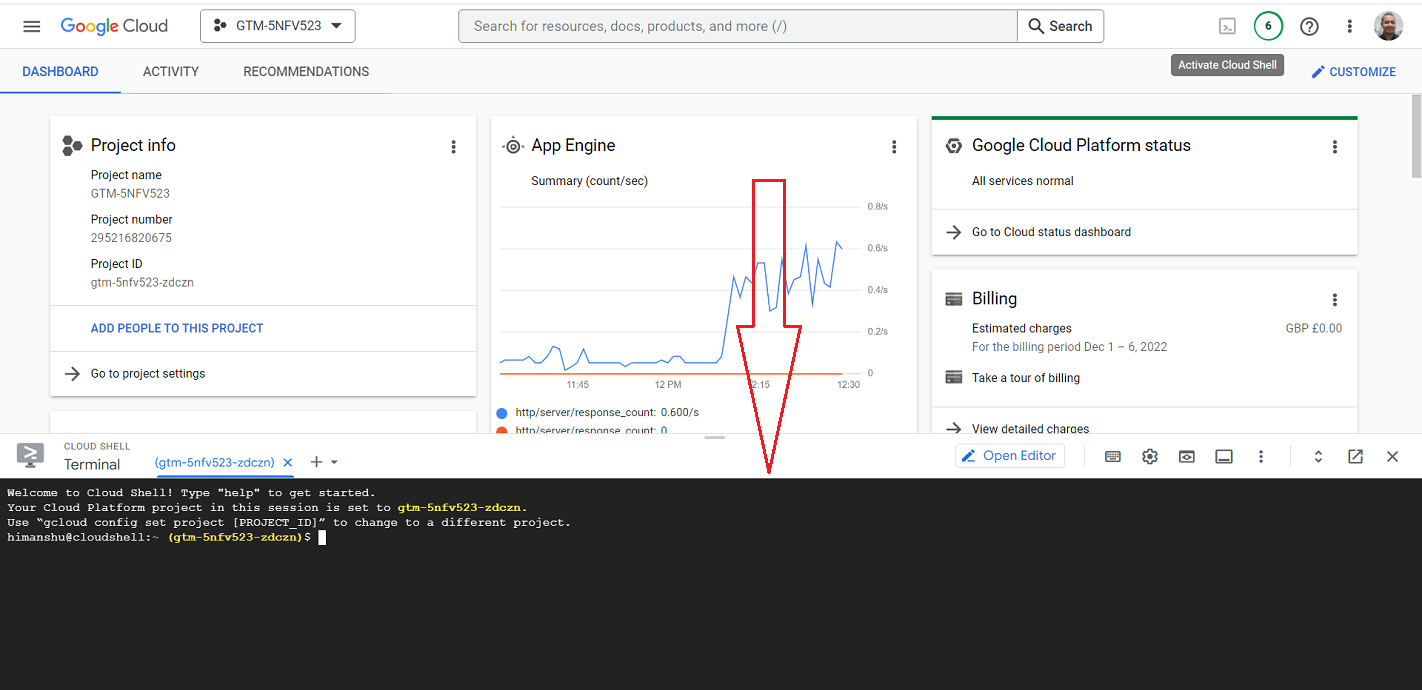
Step-2: Open your Google Cloud Platform project by clicking on the open button:
You should now see a screen like the one below:
Step-3: Find and click on the button ‘Activate Cloud Shell’ on the top right-hand side of your screen:
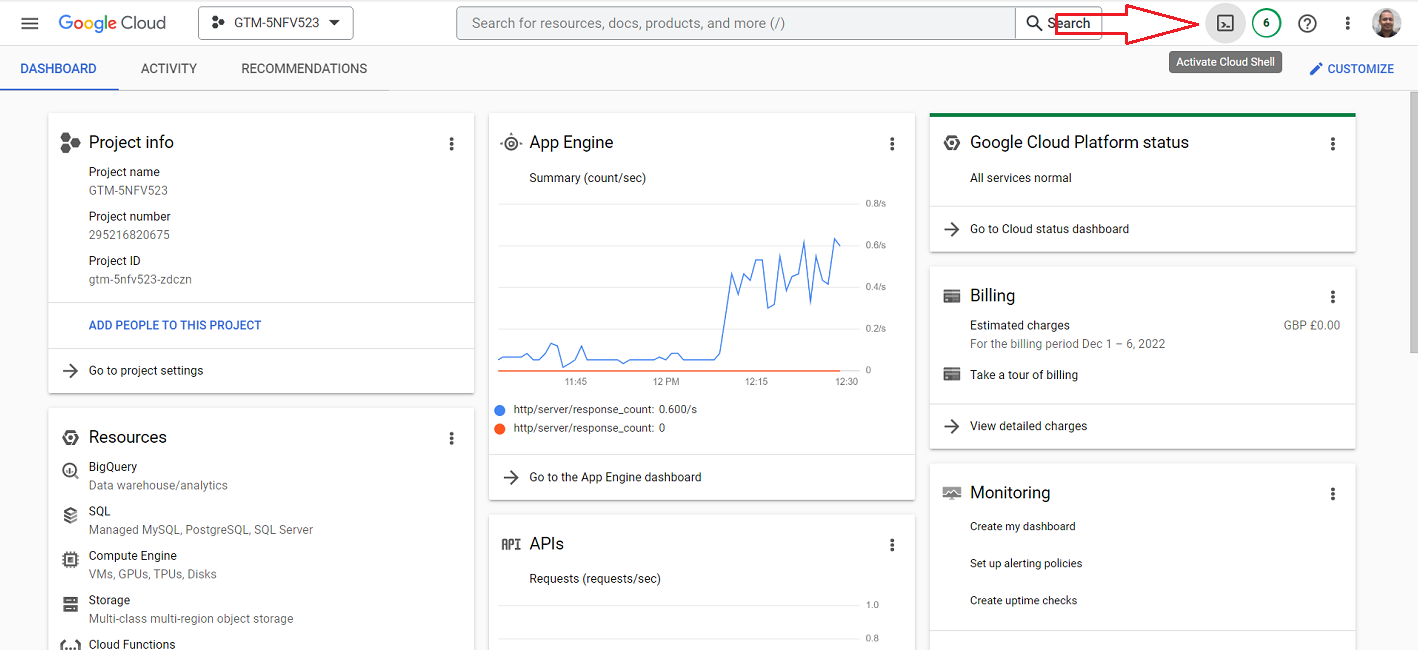
After a few seconds, you should see the cloud shell terminal window at the bottom of your screen:
Step-4: Copy-paste the following shell command at the command prompt:
bash -c "$(curl -fsSL https://googletagmanager.com/static/serverjs/setup.sh)"
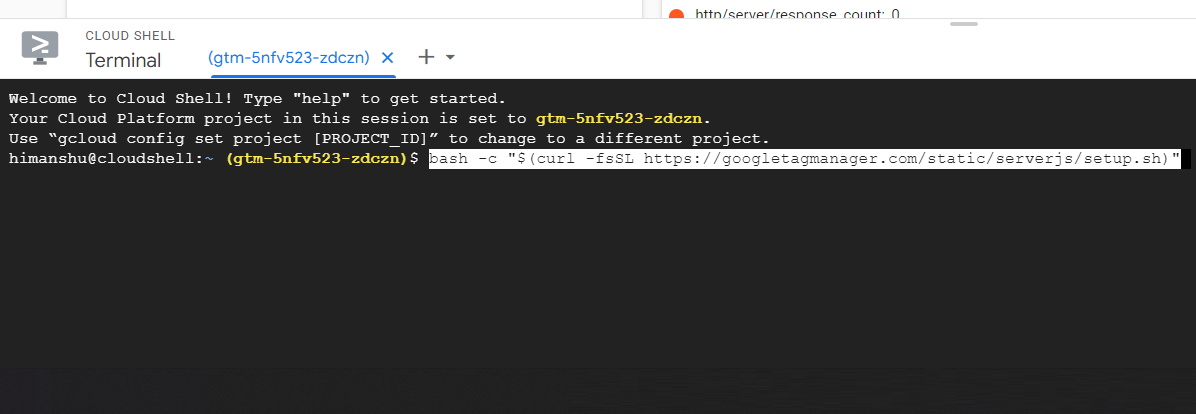
Step-5: Press the enter key to execute the shell command.
Step-6: Click on the ‘Authorize’ button:
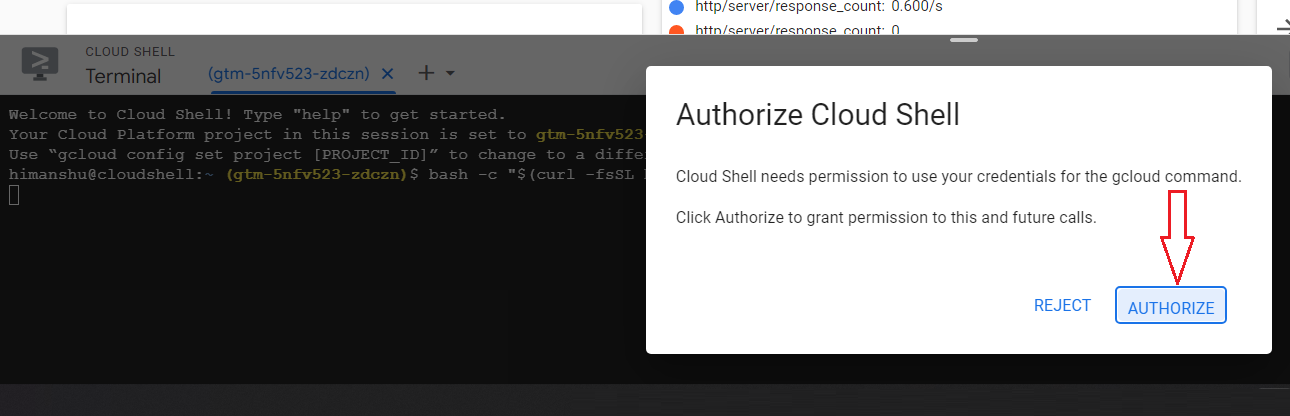
You should now see a screen like the one below:

Step-7: Press the Enter key to continue.
You should now see the following screen:
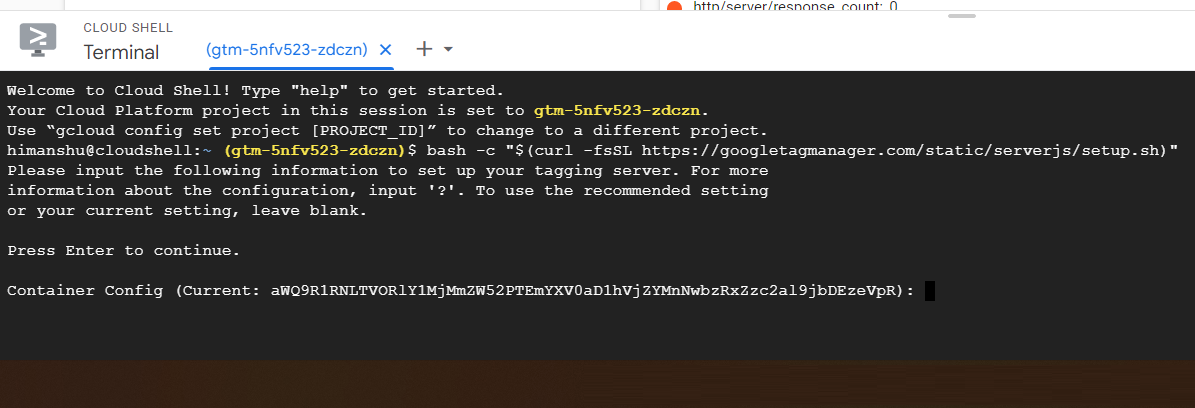
Note: If you don't see this screen, close the cloud shell terminal, refresh the web page and again start following from step-3.
The container configuration that you see in the cloud shell terminal is the same as that you see in your GTM server container:
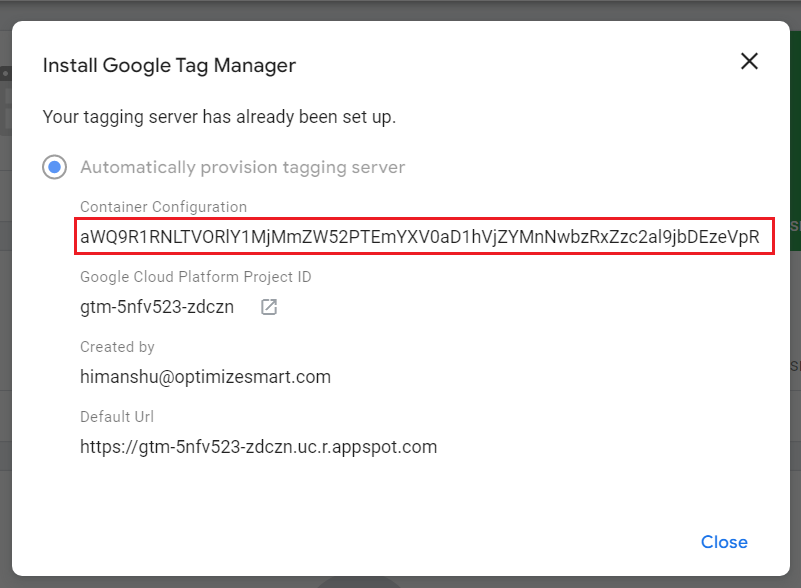
Step-8: Press the enter key, as we want to keep using the current container configuration.
You should now see the following screen:
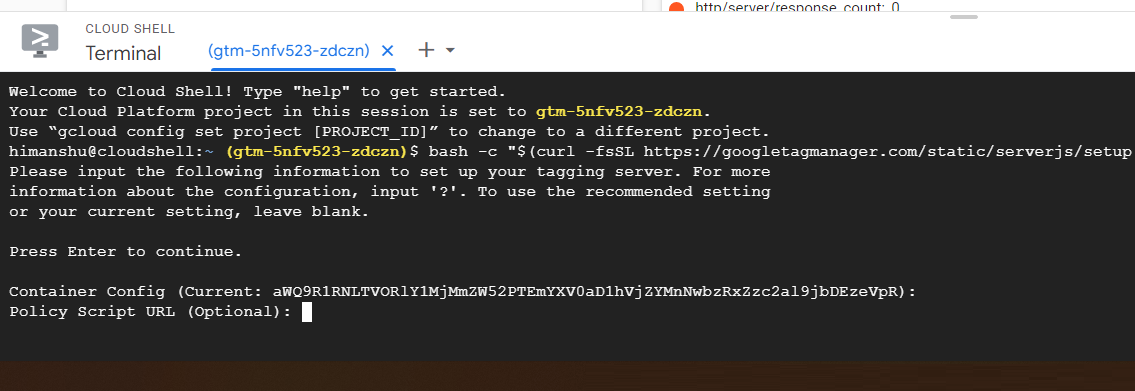
Step-9: Press Enter, as we don't want to provide the policy script URL.
You should now see the following screen:
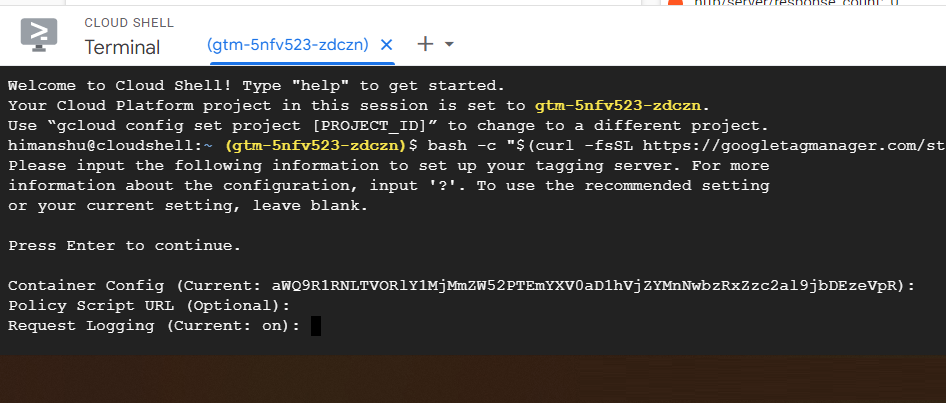
Step-10: Press Enter, as we want to keep logging on.
You should now see the following screen:
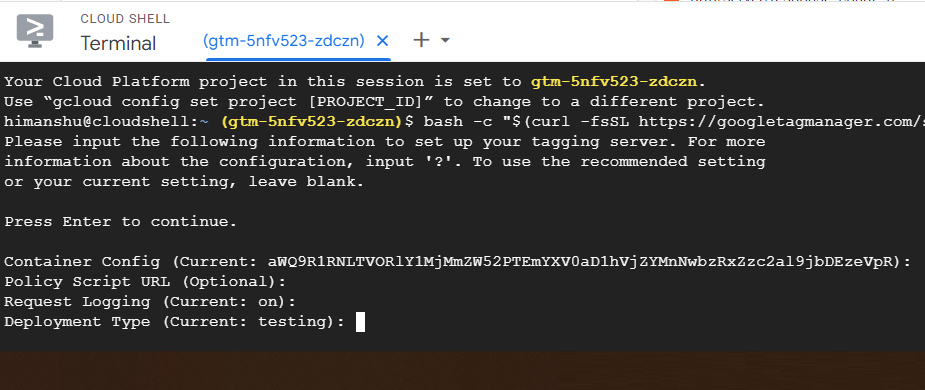
Step-11: Type ‘production’ at the command prompt, as we are upgrading to the production server:
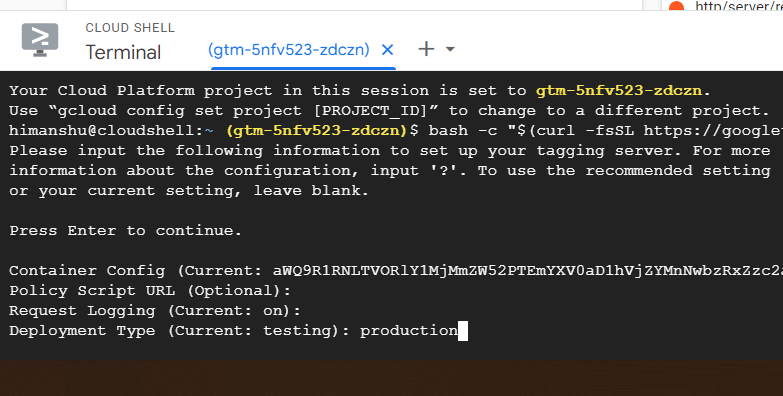
Note: If you want to downgrade to the testing server, activate cloud shell once again and enter' testing' when you are asked to provide information about the deployment type.
Step-12: Press the Enter key to change the server deployment type from 'testing' to 'production'.
You should now see the following screen:
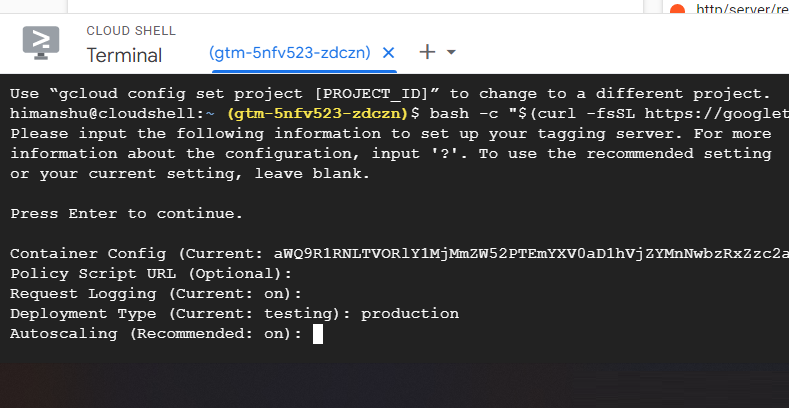
Step-13: Press Enter to keep autoscaling ON.
You should now see the following screen:
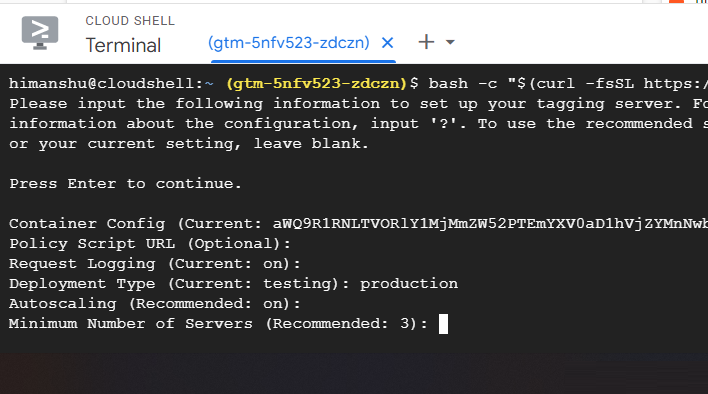
Step-14: Press the enter key to keep the minimum number of servers to 3
You should now see the following screen:
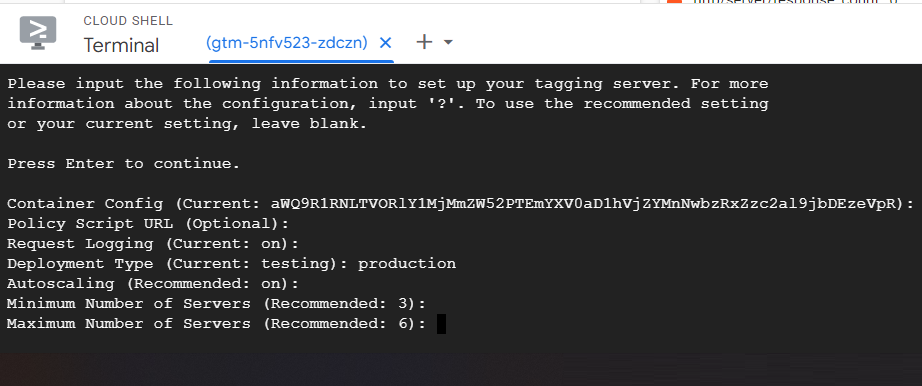
Step-15: Press the Enter key to keep the maximum number of servers to 6.
You should now see the following screen:
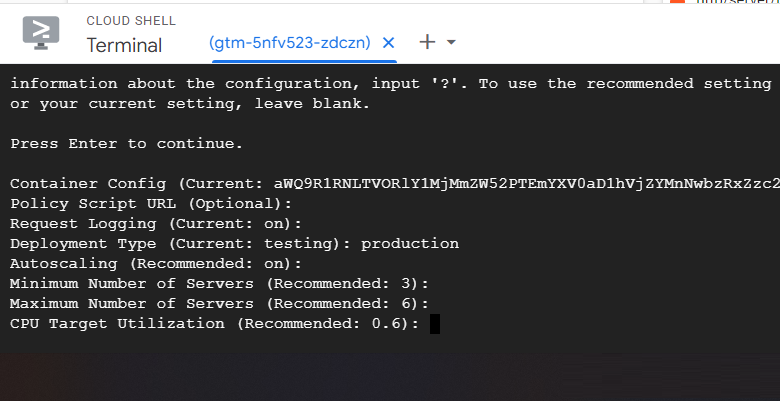
Step-16: Press the enter key to keep the 'CPU Target Utilisation' setting to 0.6
You should now see the following screen:
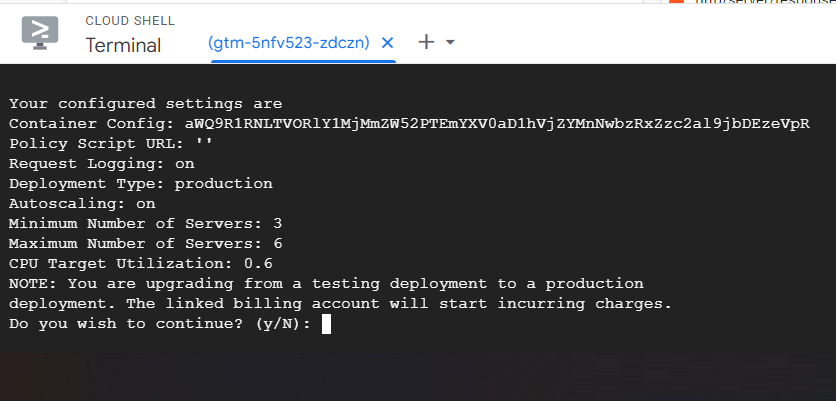
Step-17: Type ‘y’ and then press the enter key to confirm that you are ready to be billed.
You should now see the following screen:
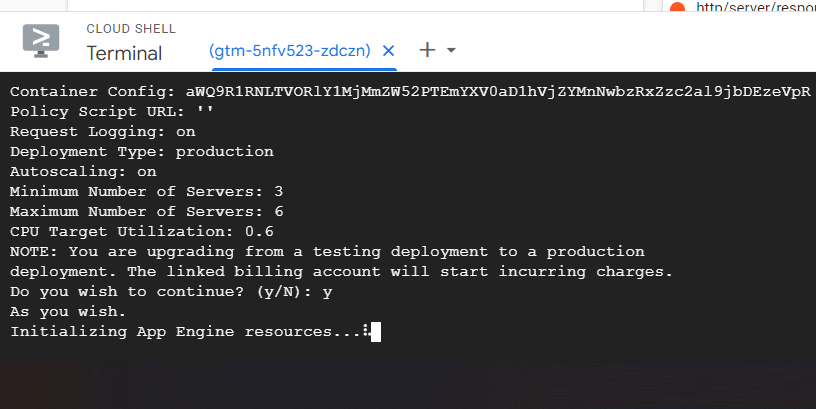
Wait for around 5 minutes or until you see the following message ‘Your Server Deployment is complete’:

Step-18: Close the cloud shell terminal by clicking on the cross button:
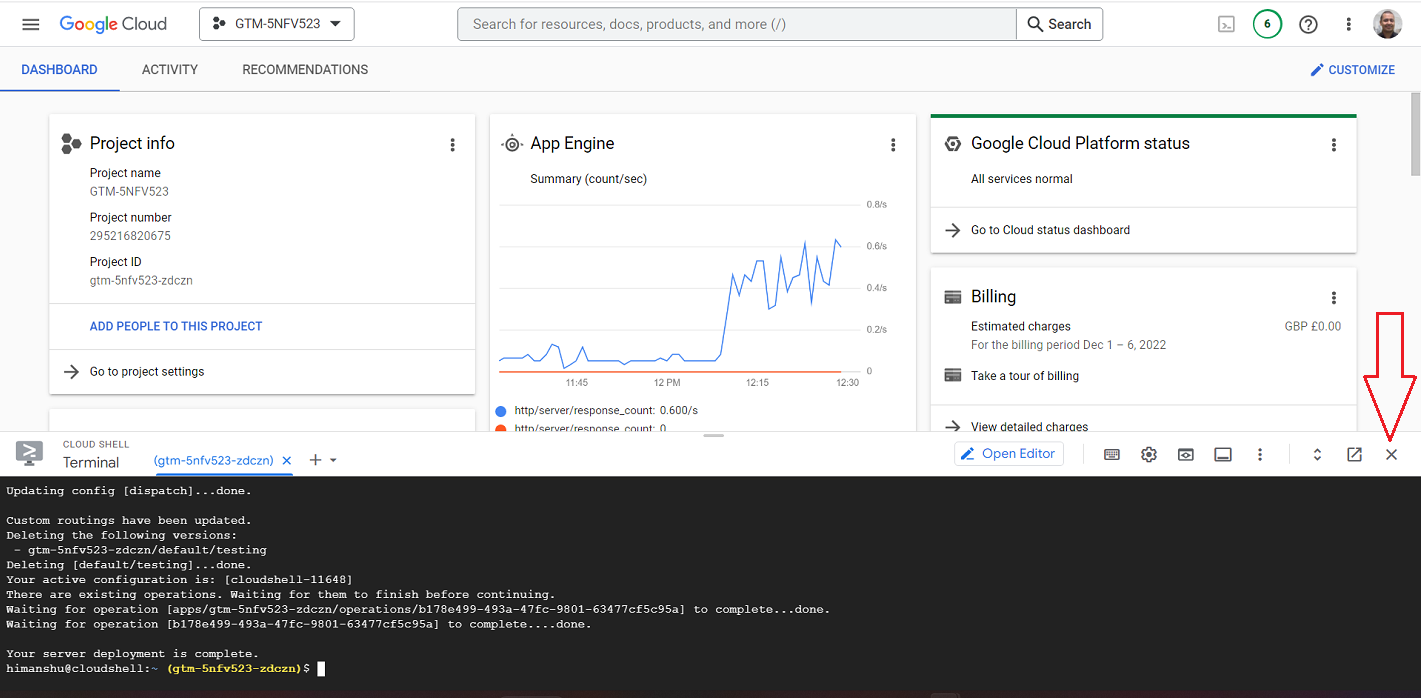
Step-19: Click on the browser refresh button to refresh your Google Cloud account.
Step-20: Click on the link ‘Go to App Engine Dashboard’:
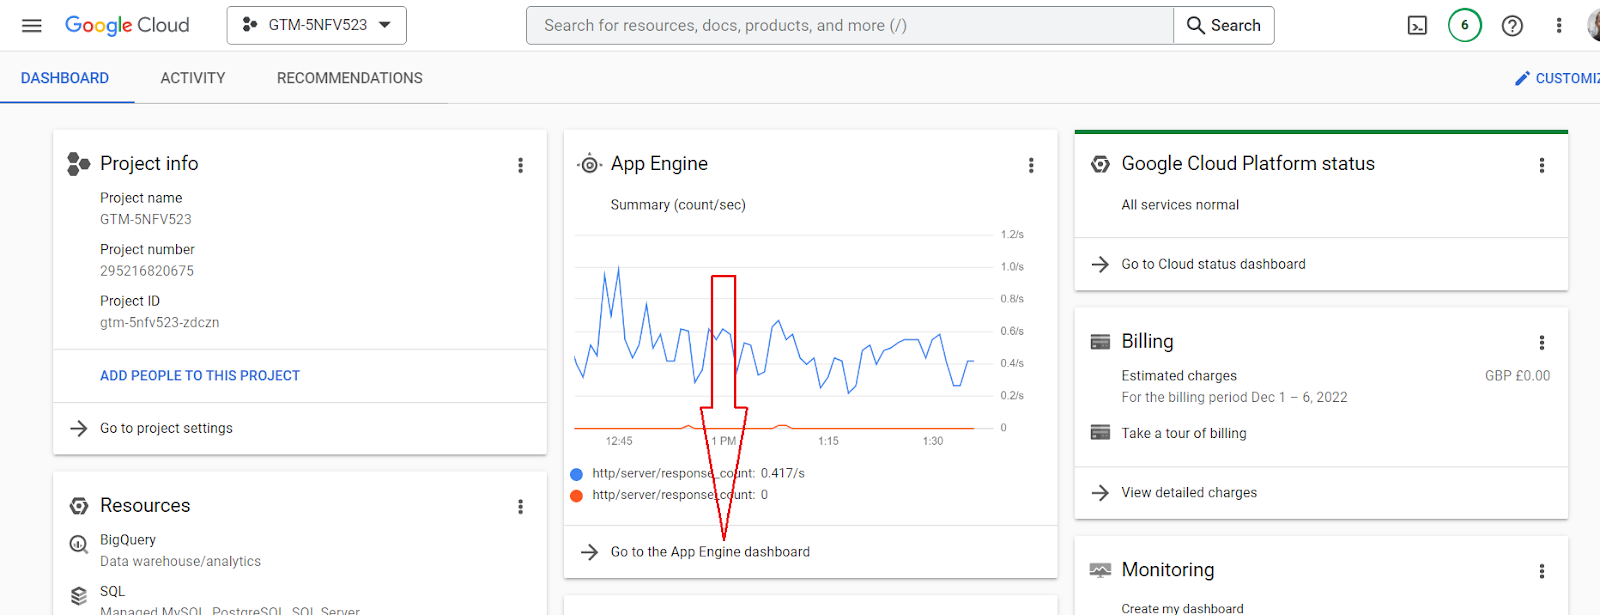
You should now see a screen like the one below:
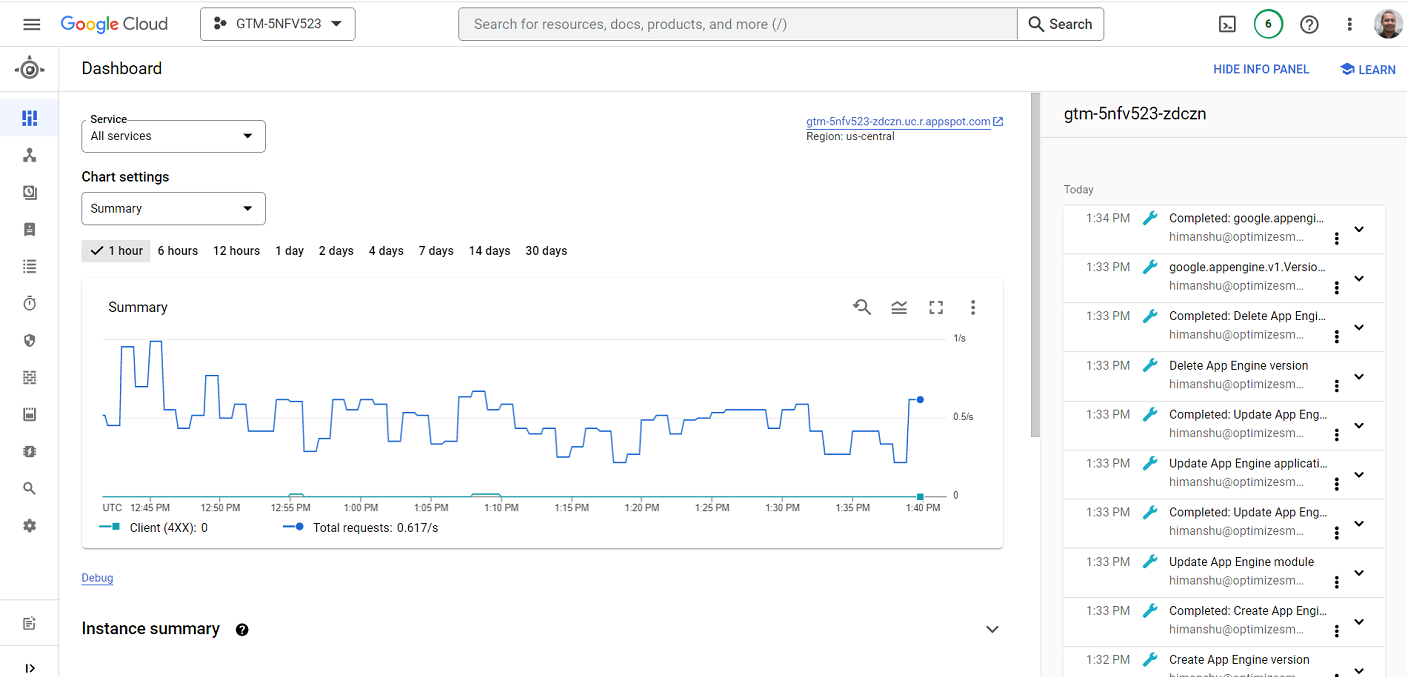
Step-21: Click on ‘Versions’ from the left-hand side menu:
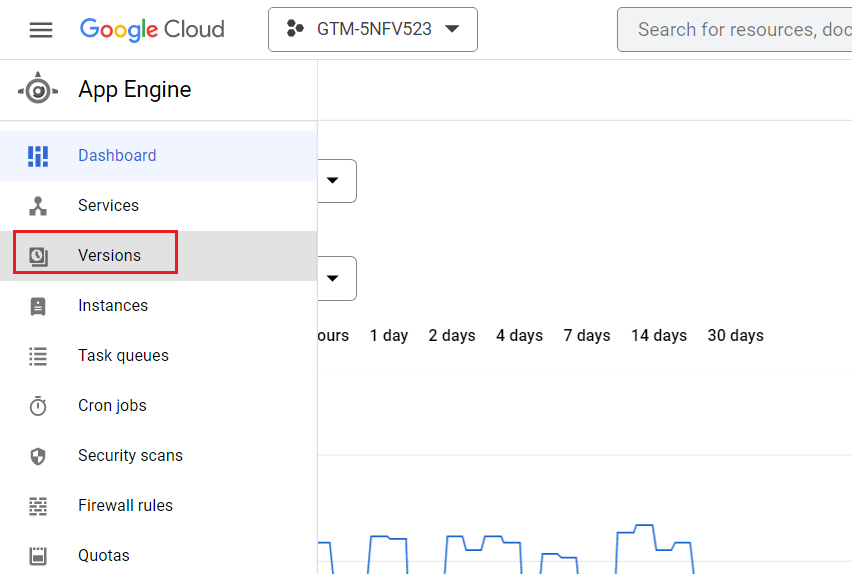
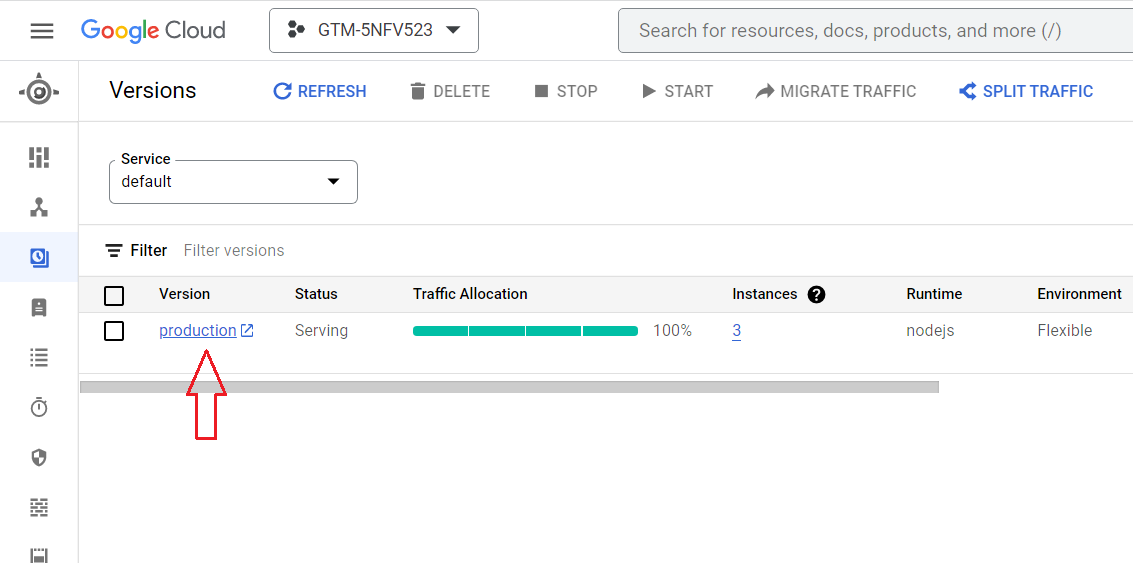
You should now see ‘production’ under the ‘Version’ column which indicates that you are now using the production server:
Phase-10: Optimize Cost.
Server-side Tagging is not a ‘set it and forget it’ type of Tagging.
Although server-side Tagging is more reliable and less error-prone than browser-based Tagging, it still requires daily/weekly monitoring and periodic adjustments.
It’s very likely that you will need to make adjustments to your Tagging set-up after it’s been set up for the first time.
You will need to regularly check for errors originating from your website and other originating data sources.
Otherwise, this could drive up your SS Tagging cost.
When using server-side Tagging, you must be careful not to collect unnecessary data. Because the more server-based events you track, the more you will pay.
When you outsource your server-side Tagging setup to someone who has done it before (like us), they can optimize your set-up for the “cost” by reducing computation, network egress and logging as much as possible.
So you pay as little as possible to Google each month.
When you try to do it yourself, even when you succeed, you will pay unnecessarily more to Google each month for the foreseeable future.
How to set up Data Layer for GTM Server Side Container.
When it comes to the server-side GTM container, it’s not loaded on the browser and resides in the Google Cloud environment.
Now you may be thinking about how to set up a data layer for a GTM container that is not even available on the browser.
Another question is whether the server-side GTM container requires a data layer.
The answer to this question is not simple, but I will try to explain it with a few scenarios.
Scenario 1: When you set a Google Analytics tag (either GA4 or Universal Analytics) in the client-side GTM container, you set it in such a way that all your data layer variables are mapped to a particular parameter, like a custom dimension, a custom metric, ecommerce data variables, etc.
When the website loads, the client-side container retrieves its value from the data layer and sends it to the server-side container via HTTP requests.
The server-side container then interprets the requests and forwards them to Google Analytics.
In this scenario, if you set custom dimension #1, let’s suppose ‘User State’ which can have values like ‘logged in’ or not ‘logged in’.
This variable will be initialised from the data layer during page load and sent in the HTTP request to the server-side GTM container.
Now the server-side container will interpret the incoming HTTP request and pass the information to Google Analytics in the same format, without modification.
You can see that in the below image, I am firing a pageview tag and passing custom dimension #1 as ‘User State’.

The same information is continued in the server-side GTM container and when the server-side tag is fired it also has dimension #1 set to ‘logged in’ which is nothing but that value of our data layer variable ‘User State’.

Now this answers our question; If we set up client-side tags correctly to a value from the data layer and pass it in a particular parameter like custom dimension, custom metric, ecommerce data variables, etc., it will be retained as it is in the server-side container as well, and you do not need to have a separate data layer for server-side GTM container.
Scenario 2: Now, let’s consider a situation where you want to send data to a third-party tool, like Facebook, and you want to have a value from your data layer variable, which is available in the browser (also in the client-side GTM container).
You would like to use the same variable value as the one available in the server-side container.
You cannot use or interpret the custom dimensions, metrics, or ecommerce variables from the Universal Analytics tag.
Here, the GA4 configuration tag comes to the rescue, and you can use that as a medium to send values from the client-side GTM container to the server-side GTM container.
Using GA4 tag parameters, you can send values from the client-side GTM container to the server-side GTM container.
Then you can use those values as event data variables in the server-side container.
Now let’s see how you can achieve this.
How to pass a data layer variable to a server-side GTM container?
To pass a data layer variable from a client-side GTM container to a server-side GTM container, let's create dummy GA4 events.
Note: I assume you have already configured your data layer variables in GTM.
Step-1: Navigate to your client-side GTM container and click on ‘Tags’ and then click on ‘New’.

Step-2: Give your tag a descriptive name and click on ‘Tag Configuration’.

Step-3: Select ‘Google Analytics: GA4 Configuration’.

Step-4: Now, add your GA4 measurement ID and click on ‘Fields to Set’.

Step-5: Click on ‘Add Row’ and then the first field name to add is ‘transport_url’ ,and its value should be your server-side container URL (you can find it in the admin section of the server-side container).

Step-6: Click on ‘Add row’ and in the field name type the variable name that you want to export to the server-side container, for example, ‘page_category’ or ‘user_state’. In the ‘Value’ section, select the data layer variable from which it will get the value.

Step-7: Now apply the default trigger ‘All Pages’ to the tag, and your configuration will look like below.

Step-8: Now save the tag and preview the client-side container. You should see that the GA4 configuration tag is fired with data layer values, as shown below.

Step-9: At the same time, put your server-side GTM container in preview mode, and you should see the incoming GA4 client request as shown below.

Step-10: For the corresponding request, click on ‘Events Data’ in the console.

Step-11: You should be able to see the variable name we set in the client-side container, along with its value populated.

Congratulations!
You have successfully passed the data layer variable from a client-side GTM container to a server-side GTM container.
But hold on, these data layer variable values are still available in events data requests only and now we have to create a new event data variable in the server-side container so that it can hold these values.
How to use client-side data layer variables in a server-side GTM container.
Follow the below steps to create a new ‘Events data’ variable in the server-side GTM container which will inherit its values from the events parameters of the GA4 configuration tag, and ultimately from the data layer.
Step-1: Navigate to your server-side GTM container and click on ‘Variable’ and then click on ‘New’ under ‘User-defined variables’.

Step-2: Give your variable a descriptive name and click on ‘Variable configuration’.

Step-3: Now select ‘Event data’ as the variable type.

Step-4: Now type the exact key path for the particular variable that we set in the client-side GTM container.
In other words, the ‘Field Name’ of the client-side GTM container should be the ‘Key Path’ of the server-side container for the corresponding variable.
For example, we set the field name as ‘page_category’ in the client-side container, and it’s the key path of the server-side variable.

You can also get the key path in the ‘Events data’ tab, which is in the server-side container preview mode.

Step-5: Now save the variable and repeat the same process from steps 1-4 for the other variables as well.
Step-6: Now, put your server-side GTM container in preview mode again and visit the webpage.
For corresponding GA4 client requests click on ‘Variables’ in the console and you should be able to see the variables that we created in the server-side container has the vales from the original data layer variable like below.

Congratulations!
You have successfully set up a data layer for a GTM server-side container.
Now you can use these variables in any third-party tag.
Troubleshooting GA4 GTM Server Side Tagging.
The following are the top 7 reasons your GA4 GTM server-side Tagging is a mess.
#1 One or more event tags fire before the Google Tag.
In server-side tagging, event tags are more likely to fire before the Google tag than in client-side tagging.
This is due to the different ways event data is processed and passed between the client and server.
So you are more likely to see unassigned traffic in server side Tagging.
Make sure that the GA4 configuration tag fires before any event tag.
#2 The ‘page_view’ event fires before the ‘session_start’ event.
Change the GA4 Configuration Tag in the Client-side GTM container to fire on All initialization events instead of All Pages.
This way, the ‘session_start’ event fires before the ‘page_view’ event.
#3 Cookies and Client Identification Settings in GA4 Client in Server GTM was set to “Server Managed”.
Change the Cookies and Client Identification Settings in GA4 Client in Server GTM to JavaScript-managed.

This should resolve the unassigned traffic issues related to server-side tagging.
The downside to ‘JavaScript-managed’ as opposed to ‘Server-managed’ is that some browsers might expire the cookies prematurely.
Now, you need to choose between the downside that some browsers might expire the cookies prematurely, vs. fixing unassigned traffic.
I would rather go for the latter option, as unassigned traffic is pretty much useless for data analysis.
#4 Not all tags in server-side GTM have the server_container_url configured.
When a tag doesn’t pass through the server-side container, GA4 may be unable to assign traffic source/medium data correctly, leading to unassigned traffic in GA4.
#5 Misalignment between client-side and server-side Tagging.
This is one of the most overlooked issues when setting up server side Tagging.
Misalignment between client-side and server-side Tagging can lead to unassigned traffic issues in GA4 because the data captured and processed by the client-side and server-side setups may differ or be incomplete.
For example, client-side Tagging can automatically capture data from UTM parameters in most URLs.
However, server-side Tagging does not automatically capture data from UTM parameters.
The server-side container might receive the event, but without the source/medium details, which could lead to unassigned traffic.
#6 Misalignment between client-side and server-side consent handling.
When using Consent Mode, both client-side and server-side implementations need to be aligned.
If consent is handled differently on the server compared to the client, it can lead to unassigned traffic issues.
#7 Not testing server side Tagging by blocking client side GTM.
By blocking or disabling client side GTM container, you can isolate and verify the functionality of server-side Tagging. You can determine hard to diagnose issues.
You can simulate scenarios in which ad blockers, browsers, VPNs, or privacy tools might block client-side Tagging.
One of the most effective ways to prevent GTM from being blocked by ad-blockers is to serve the GTM container script from a custom domain instead of the default googletagmanager.com domain.
Other Articles on GA4.
- Tracking New, Qualified and Converted Leads in GA4.
- Free GA4 training and tutorial with Certification.
- Understanding GA4 Ecommerce Reports (Monetization Reports).
- GA4 Ecommerce Tracking via GTM: Step-by-Step Setup Guide.
- How to see UTM parameters in GA4 (Google Analytics 4).
- GA4 UTM parameters not working? Here is how to fix it.
- How To Use UTM parameters in GA4 (Campaign Tracking).
- How to track AI traffic in GA4.
- Understanding Google Analytics 4 cookies – _ga cookie.
- GA4 (Google Analytics 4) Measurement Protocol Tutorial.
- GA4 Unassigned Traffic: Causes and How to Fix it Fast.
- GA4 Regex (Regular Expressions) Tutorial.
- GA4 Direct Traffic Spike: Common Causes and How to Fix Them.
- gtag.js – Google Tag in Google Analytics 4 and beyond.
- GA4 Scopes – User, Session, Event & Item scopes.
- GA4 Conversion Tracking (Key Events) Tutorial.
- GA4 (not set) - Guide to fixing (not set) issue.
- GA4 Certification Exam: Questions, Answers for Skillshop (GAIQ).
- GA4 User Properties (User Scoped Custom Dimensions) – Tutorial.
- Tracking Organic Traffic in GA4 - Complete Guide.
- Tracking Events in GA4 (Google Analytics 4).
- GTM Server Side Tagging - Setup Guide.
- Using Subfolder for GTM Server Side Tagging (Same Origin Tracking).
- Understanding Event Parameters in Google Analytics 4 (GA4).
- How to Uninstall GTM Server Side Tagging.
- How to remove (other) in GA4 reports and avoid Cardinality.
- Creating GA4 Assistant via Claude for your customers.
- How To Set Up User ID in GA4 - Cross Device Tracking.
- GA4 Mobile App Tracking - Firebase Integration.
- How to use DebugView report in Google Analytics 4 (GA4).