

Introduction to Google Analytics 4 Event Builder
Google Analytics 4 Event Builder is a tool that allows users to create offline measurement protocol events and send this data to a Google Analytics 4 property.
So, let us understand what exactly measurement protocol events are and when to use them.
Using the Event Builder tool, you can send data to a Google Analytics 4 property from your own servers that are not part of HTML or other offline POS machines.
In the case of general analytics set up, Google Analytics tracking code is placed on every single page. When a user visits the page, it tracks the user journey with basic GA4 metrics (page view, bounce rate, user type, etc), whereas measurement protocol lets developers create HTTP post data requests and send this information to Google Analytics 4 servers. This way you can also track the user journey outside your website.
Now that we have understood the basics of Google Analytics 4 Event Builder, let’s see when to use this tool.
When do we use Google Analytics 4 Event Builder?
The GA4 Event Builder tool should be used when you have data that is offline and you want to send this data to Google Analytics.
Let’s take an example; you are a business owner for a retail company that is available both online and offline. You would like to understand the overall performance of the business. To do so, both online and offline sales should be considered.
In this case, you can use the Event Builder to send offline data to a Google Analytics 4 property. Now, that you have both online and offline data in Google Analytics, performance can easily be measured.
Overview of the GA4 Event Builder tool
Click on the following link to access the GA4 Event Builder tool: GA4 Event Builder
This tool consists of 2 main sections:
- Hit summary
- Event details
#1 Hit summary
This box displays the full event and validation status. Once you login into the tool, you will notice the image as shown below:
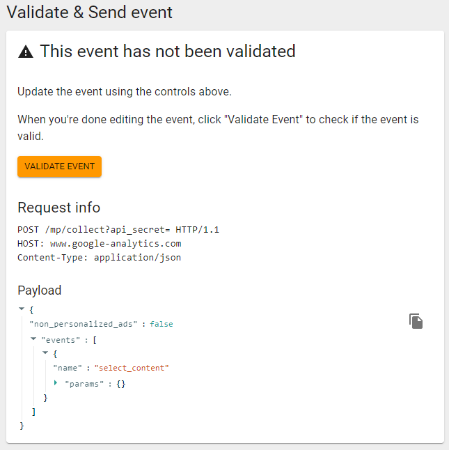
To send events to Google Analytics, an HTTP Post request should be made to the below endpoint.
POST /mp/collect HTTP/1.1HOST: www.google-analytics.com
<payload_data>
In hit summary, you have controls as shown below and these details need to be provided for creating the events.
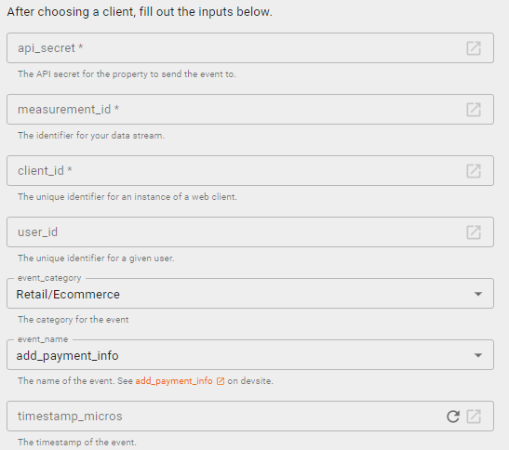
API secret: This is the required query parameter, which is generated using Google Analytics 4 UI. Follow the below steps to create an API secret key.
Note: you would need to create a Google Analytics 4 property in order to create an API secret key and measurement ID.
You can also upgrade an existing GA Property to a GA4 property.
Steps to generate api_secret and measurement ID in a Google Analytics 4 property.
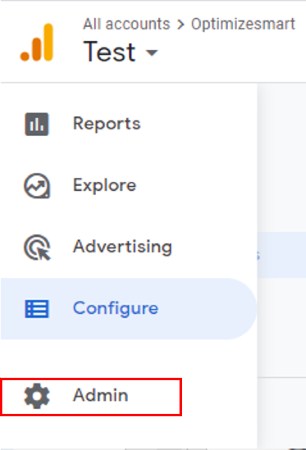
Step-1: Log in to your Google Analytics 4 property and then click on the ‘Admin’ link on the bottom left-hand side.
Step-2: Under the ‘Property’ column, click on ‘Data Streams’.
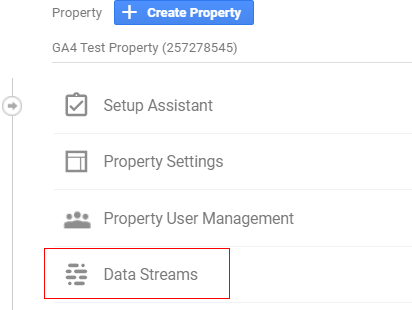
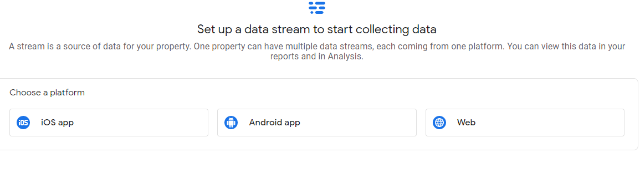
Step-3: Once you click on the data streams option from the property column, you will screen like below. You have an option to create a data stream for IOS, Android, and Web.
How to use Google Analytics 4 Event Builder 38
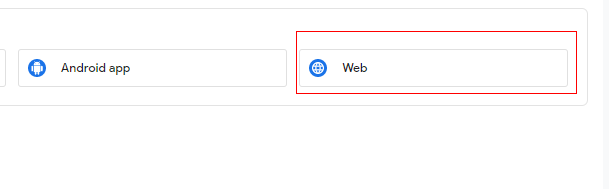
Step-4: Let’s create a web data stream for this example. Click on ‘Web’ to set up the data stream as shown below
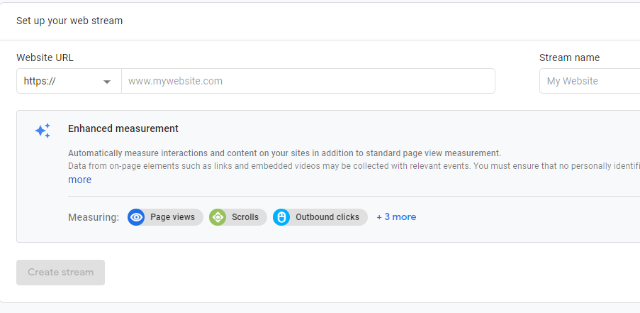
Step-5: Provide a website URL and stream name to set up your web stream.
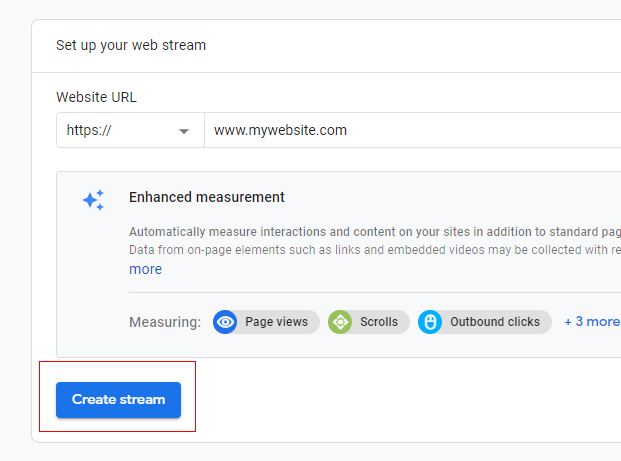
Step-6: Once the website URL and data stream name is provided, you will notice that the ‘Create stream’ button is highlighted. Click on ‘Create stream’.
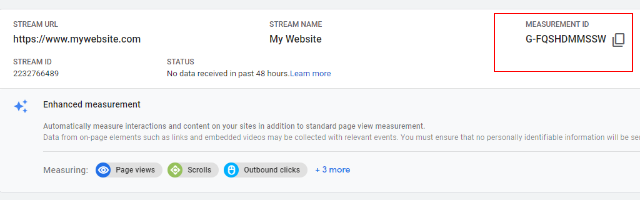
Step-7: You will see a screen like the one below once the stream is created. This is where the measurement ID is created.
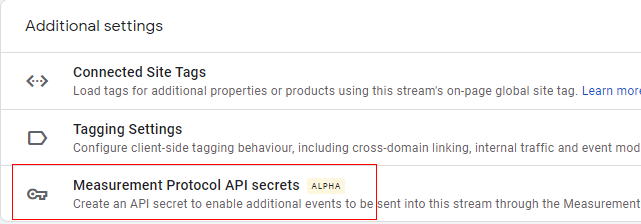
Step-8: To create an API secret key, scroll down and click on the ‘Measurement protocol API secrets’ in ‘Additional settings’.
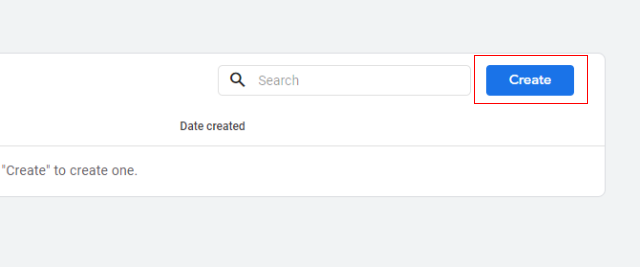
Step-9: A new pop up will open when you click on ‘Measurement protocol API secrets’, you will see a ‘Create’ button as shown below:
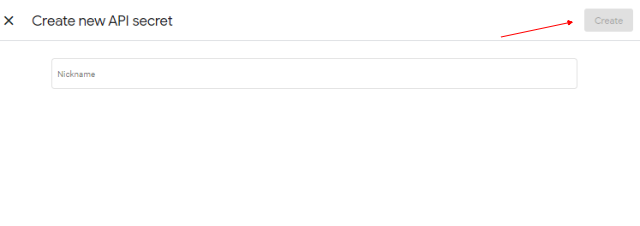
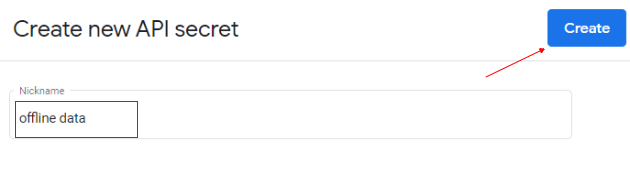
Step-10: When you click on ‘Create’, you are asked to provide a nickname for the API secret.
How to use Google Analytics 4 Event Builder 39
Step-11: For example, let us give ‘offline data’ as a nickname for the API secret key and click on ‘Create’.
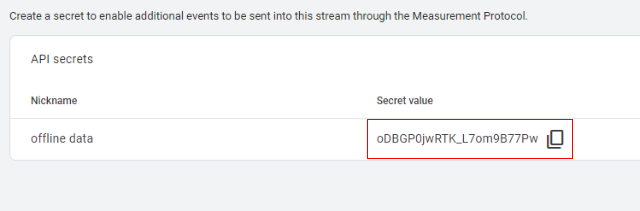
Step-12: A secret value is created which is used as a key to send the events using measurement protocol.
Steps to create Firebase APP ID in Firebase console
This is one of the required parameters which is an identifier for the Firebase app. This value is found in the Firebase console.
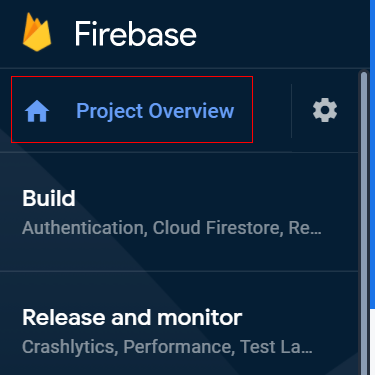
Step-1: Login to your Firebase console and click on ‘Project overview’ on the left-hand side.
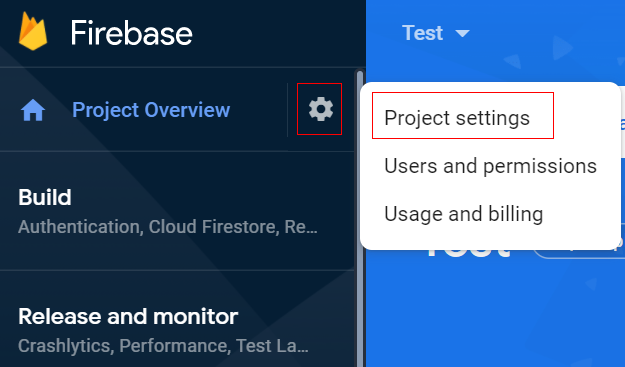
Step-2: Click on the gear icon and select ‘Project settings’ as shown in the image below.
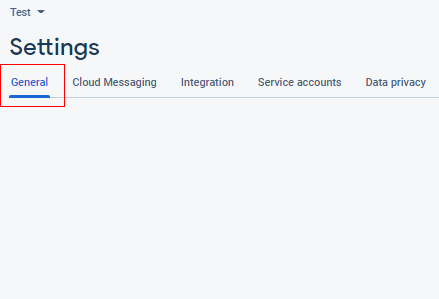
Step-3: You will now land on the ‘General’ tab in the selected project settings.
Step-4: Scroll down and you will notice the ‘Your apps’ section.
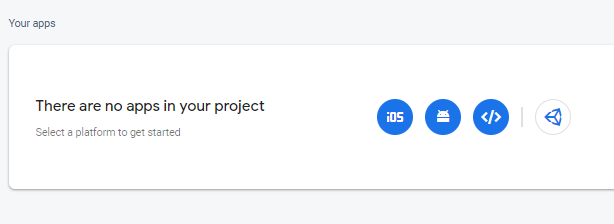
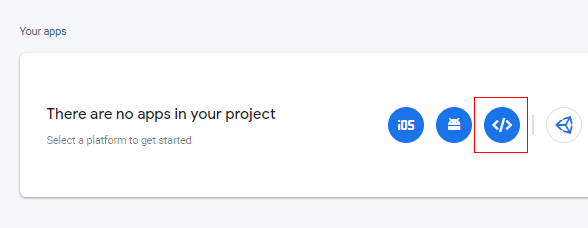
Step-5: As an example, let us select the web app to add to our project.
Step-6: You will see a form as shown below to add Firebase to your web app.
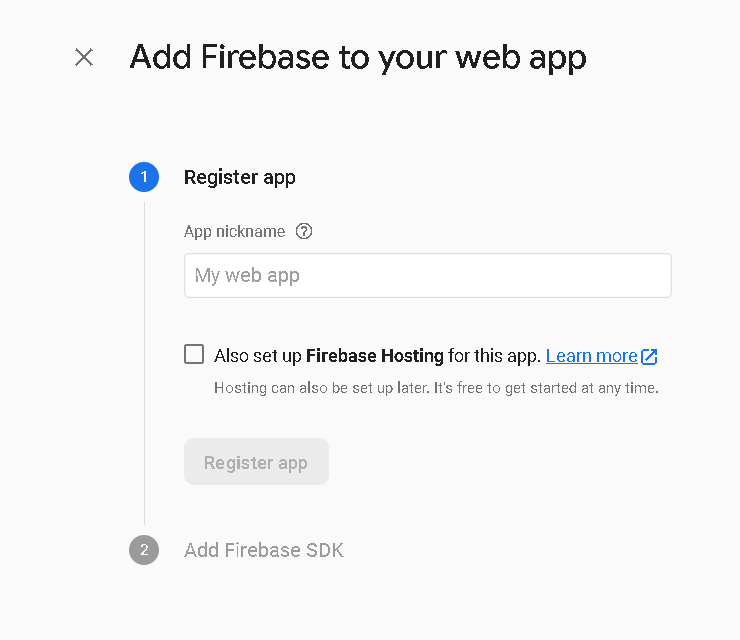
Step-7: Enter a nickname and click on ‘Register app’.
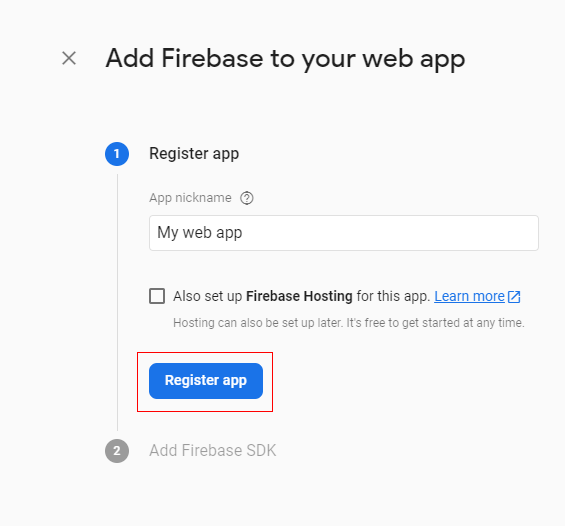
Note that you can also set up Firebase hosting which is free to get started.
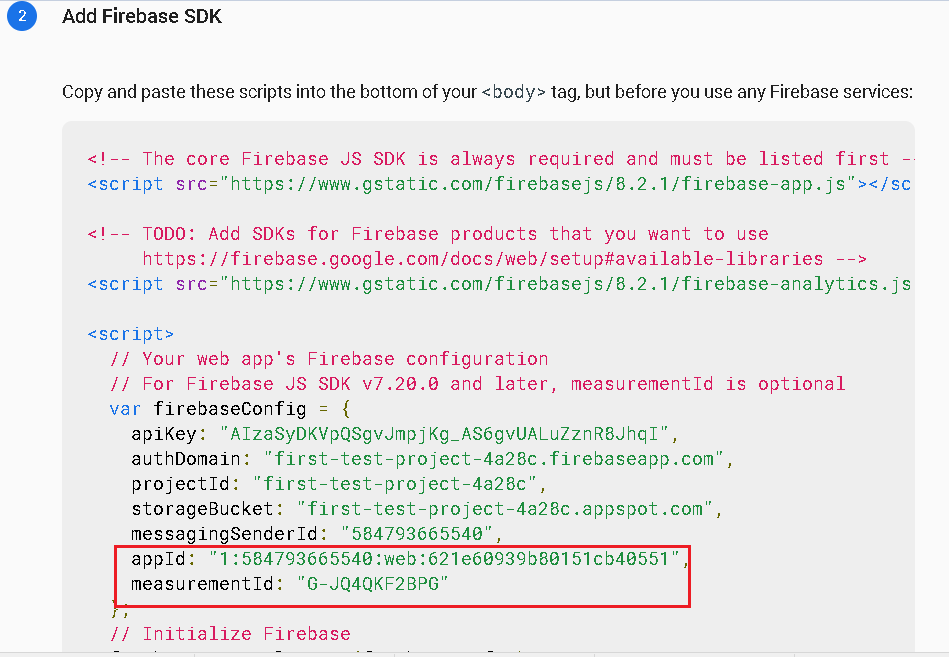
Step-8: After registration is complete, an SDK will be created which has Firebase configuration information along with the app ID and measurement ID.
How to use Google Analytics 4 Event Builder 40
We have successfully created a measurement ID and an API secret key.
Let’s have a look at the other controls that are needed for creating an event in Event builder.
#Client ID: It is a required string-type query parameter, which uniquely identifies a user instance on the web.
#User ID: It is an optional query parameter, which is used to identify a user. User ID may include only UTF-8 characters.
# app_instance_id: This is one of the required parameters which uniquely identifies a specific installation of a Firebase app.
#timestamp_micros: It is an optional parameter This value should be in microseconds, not microseconds. This is the timestamp associated with the event.
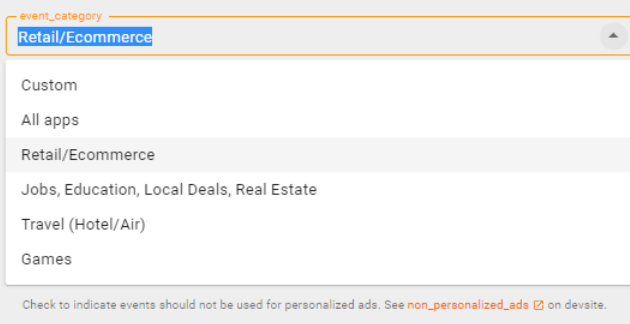
#Category: Based on the type of event you want to send to your GA4 property,you can select from the drop-down as shown below.
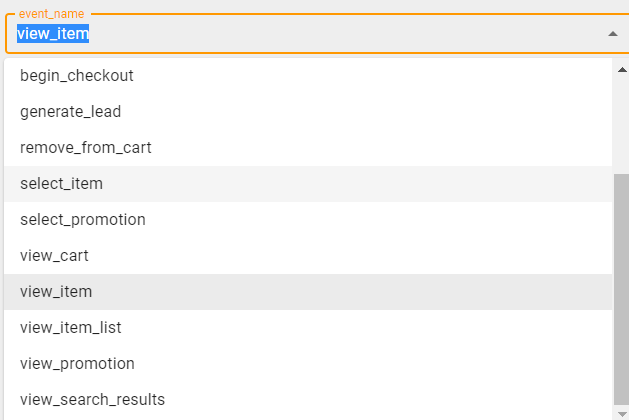
#Name: Based on the category you select, you will see options to select for the name. For example, if you have selected the category as ‘retail’ you would see below options for the name.
#2 Event Details:
Step-1: Based on the category and name you select in the HIT summary section, you will see event parameters get populated automatically where values need to be filled by the user.
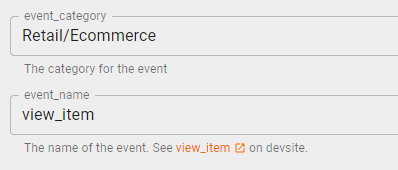
For example, if I select the category as Retail/Ecommerce and .ame as view_item, as shown below:
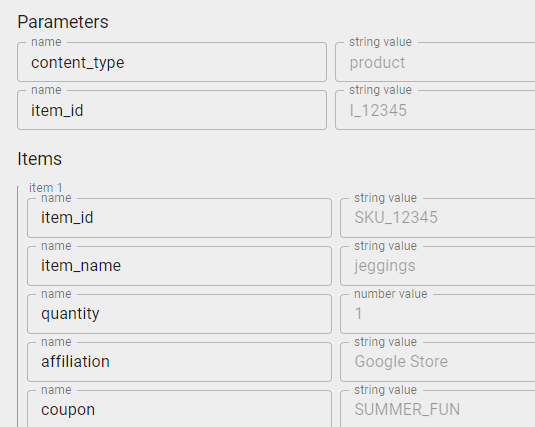
Step-2: You will see event parameters created, as shown below. Provide the values in the fields for item_id, item_name, etc.
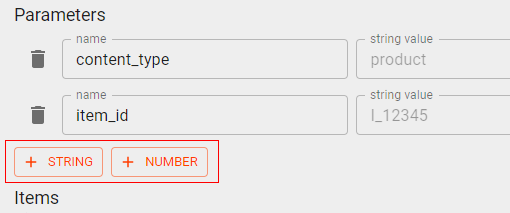
Step-3: You have an option to add additional parameters from the buttons available.
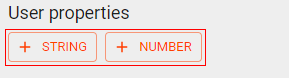
Step-4: You can add additional user properties as well by clicking on the button as shown below:
How to create an event and send it to a Google Analytics 4 property
Now that we have understood the tool and its various controls, let’s go ahead and create a test event and validate it.
Step-1: Copy the measurement ID and API secret which we created and update the fields mentioned, as below:
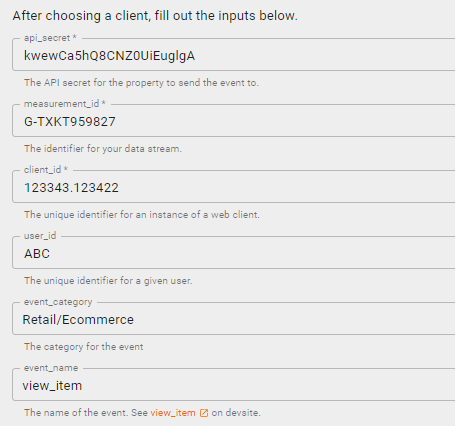
Note: I have selected ‘Retail/Ecommerce’ as the category and the name is ‘view_item’
Step-2: Provide additional details in the ‘Items’ section. In our example, I have used the following details.
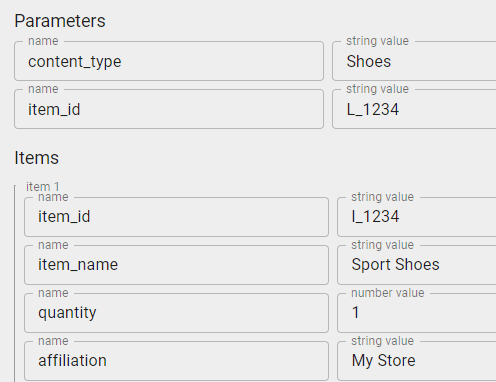
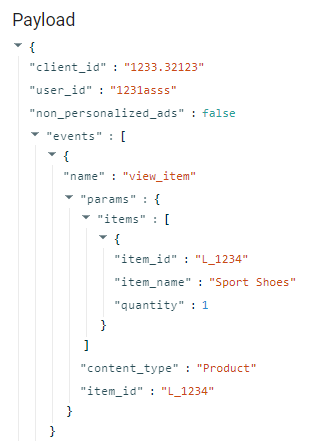
Step-3: Based on the values, the event payload is automatically created as shown below:
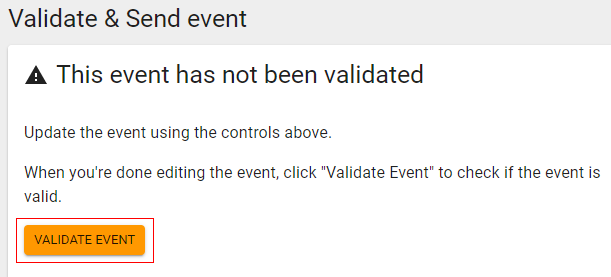
Step-4: Click on the ‘Validate event’ button which is highlighted after the event payload is created by the tool
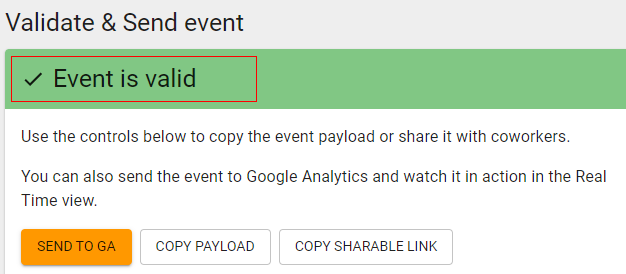
Step-5: If the event is valid, you will see the status highlighted in green above the event payload as shown below:
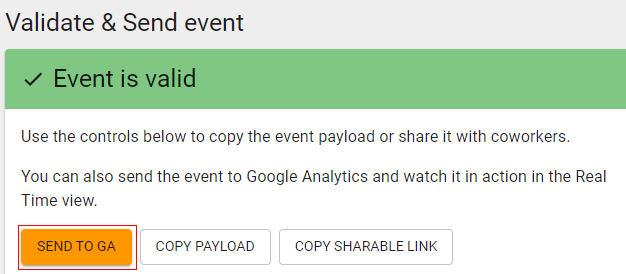
Step-6: After the validation is completed, you will find the option to send the event to Google Analytics, as shown below:
Below is the example event payload, which we have created:
{"client_id": "1233.32123","user_id": "1231asss","non_personalized_ads": false, "events": [{"name": "view_item", "params": {"items": [{"item_id": "L_1234","item_name": "Sport Shoes", "quantity": 1 }],"content_type": "Product","item_id": "L_1234"}}]}
Step-7: Click on ‘Send event to Google Analytics’ to validate the data in reports.
How to validate events in Google Analytics 4 property
To validate the data sent from the Event Builder Tool in the GA4 property, follow the below steps:
Step-1: Log in to your GA4 property and make sure you select the right property under which you have created the data stream for measurement ID.
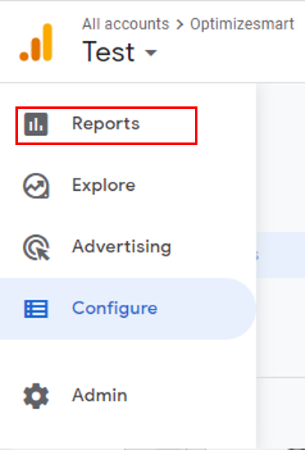
Step-2: Click on the ‘Reports’ tab on the left-hand side.
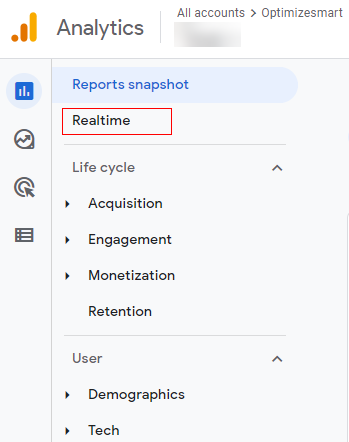
Step-3: Now Click on “Realtime”.
Step-4: Check for the data sent in the ‘Event count’ according to the name in the ‘Event name’ section.
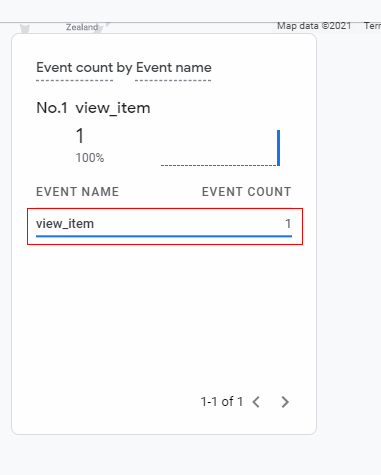
Congratulations!!!
You have now successfully created an event using the GA4 Event Builder and validated the data in real-time reports.

Other Articles on GA4.
- How to export GA4 data to Google Sheets for free.
- Top Google Analytics 4 Tools, add-ons and resources.
- Google Analytics 4 Audiences Tutorial.
- Understanding Automated Insights in Google Analytics 4 (GA4).
- How to build Comparisons in Google Analytics 4 (GA4).
- How to create a remarketing audience in Google Analytics 4 (GA4).
- Advanced Google Analytics Tracking – HTML DOM – Tutorial.
- Google Analytics 4 Migration Checklist - Upgrade to GA4.
- How to Install Google Analytics 4 on Shopify.
- How to link Google Analytics 4 with AdSense.
- Google Analytics 4 Subproperties Tutorial.
- How to connect Google Analytics 4 with Google Data Studio.
- Advertising Snapshot in Google Analytics 4 (GA4).
- Manage automatic event detection in Google Analytics 4.
- How to use Google Analytics 4 Event Builder.
- Is Safari Undermining Your GTM Server-Side Tagging?
- Guide to Google First Party Mode.
- You Can’t Really Trust Google Analytics 4 Engagement Metrics.
- Google Analytics 4 Metrics Tutorial.
- Google Analytics 4 Custom Metrics Tutorial.